Category Archives: Labs

[MacOS] Save your Data after EFI-X Crash

I. Abstract

Imagine the following situation. You are very keen on this EFI-X device that’s now on sale. So you order a testing device. Some days later the device arrives from Taiwan. Your EFI-X compliant system already kept waiting with a blank SATA 250GB on a Gigabyte EP35-DS3.

After having plugged the EFI-X module to your system, you install MacOS on your PC. It’s really worth the bunch of money since EFI-X lets MacOS boot like a charm. Easy and nice to handle for everyone who is not more willing to hack device drivers into their Hackintoshs. But as a tinkerer who wants to see how it works in real life and so you decide to apply the newest update for your EFI-X module. Since you’re a Mac user you decide to use the MacOS tool provided by the EFI-X team.

All works well during update, until you do the reboot. All of a sudden the intro boot screen of EFI-X looks quite garbled (like the screen below). You wonder what might have happened and do a reboot. As it doesn’t help you plug your EFI-X to another computer hoping you may be able to flash it again using Windows XP. But after all the installation argy-bargy with EFI-X’ virtual device driver under Windows XP – the update tool tells you, you are running the current version.


To make a long story short. EFI-X has customer service and they will exchange their defective units. You may also have a look at the EFi-X Bug Hunt forums for further assistence (please don’t link our article from EFI-X Bug Hunt forums, they will remove it and may ban you – don’t say we didn’t warn ya ;-) Anyway if you need to have access to your data until the RMA unit arrives, we prepped the following article. We’re going to show you how to make your system bootable after the EFI-X device broke for whatever reason.

A short remark before we start: this article is partly based on a HowTo by a guy going by the nick Menoob. We shamelessly stole the method of installing retail Leopards on PCs and adapted it a tiny bit for this EFI-X specific case. Anyway: all the shouts fly out to him.

II. What you need

  • 30 minutes of your precious life time – you may use this time to think about why you didn’t buy a real Mac
  • a Boot-132 disk – it contains your MacOS compatible bootloader (find a list of Boot-132.iso’s for different mainboards and chipsets here – in case you don’t know you should always give the generic.iso a try) – Kudos to Sonotone/Hackint0sh forums!
  • burn the Boot-132 onto a blank CD-R or CD-RW

III. Prepping your hardware

  1. remove the defective EFI-X device and if you feel you don’t need it, send it to the CCC for further examination
  2. let only the MacOS drive and the CD/DVD drive plugged, unplug all other drives from your motherboard
  3. start your computer and hit DEL key to go into your BIOS
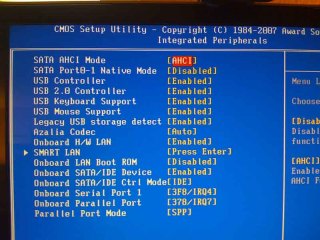
  4. inside of your BIOS: set the MacOS harddrive as first boot device and enable AHCI mode for SATA drives – your drives will appear orange/yellow in MacOS, don’t worry about that
  5. save the BIOS changes and reboot

IV. Booting your system

  1. turn on your computer
  2. insert the just burnt Boot-132 CD-R into CD/DVD drive
  3. during BIOS startup hit the F12 key to manually choose your boot device (applies to Gigabyte boards only!!!)
  4. Choose to boot your CD/DVD drive
  5. Your screen will show that ISOLINUX 3.6x is prepping to boot the Multiboot loader
  6. since this ISOLINUX bootloader is not too user-friendly ;-) you will find yourself with a screen similar to this.

  7. Hit the F8 Key. You’re gonna see this:
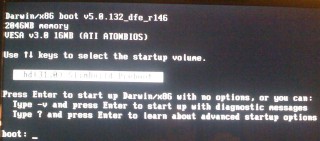
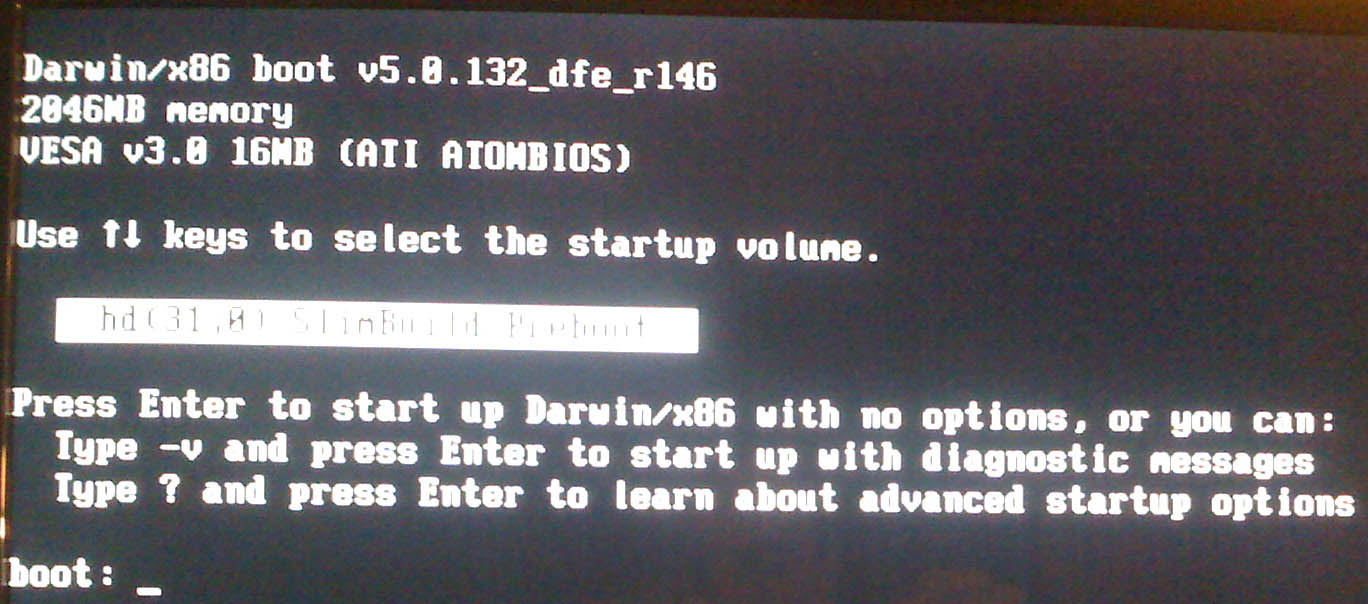
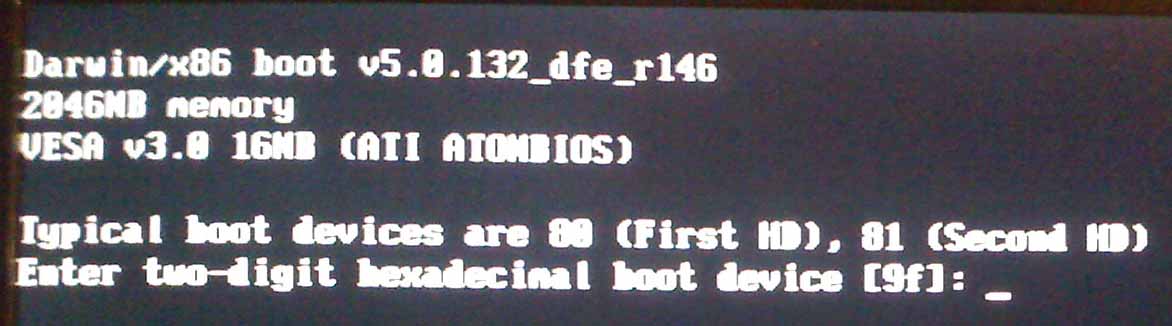
  8. Hit the ESC Key. and You’re gonna be welcomed with this screen.
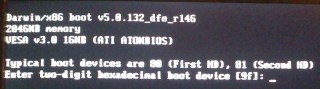
  9. Now enter 80 and hit return, if the name of your MacOS harddrive shows up, 80 was the right number, if it does not show up, give 81 a try and so on.
  10. Once you’ve found your MacOS harddrive, the bootloader will require again some parameters. Simply enter -v -x as parameters and hit return (you may find more infos about these Darwin boot parameters here)
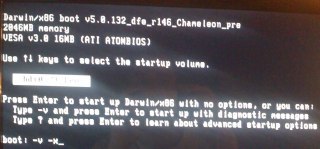
  11. if you experience the “still waiting for root device” issue, just reset your system and play with the AHCI mode for SATA inside of your BIOS
  12. Anyway: booting will take a long while – in our case about 5 minutes until the login screen appears
  13. login into your system

V. Saving your data

  1. Examine which data you require from your formerly known as almost native system
  2. plug your external harddrive (if you plan to migrate data to Windows, better have the external drive FAT32 formatted)
  3. Copy the files

VI. Final Words

Ooop duh. You got some more options here that we cannot cover at this time:

  1. You may revive this system with the hackint0sh ingredients (dsmos.kext and kexts for audio and video cards) – this will be a longer journey
  2. You may also get a real Mac. In this case Apple will suddenly love you…
  3. We recommend to give also Microsoft’s Vista a try. We feel like Vista Aero Glass effects are currently superior to Leopard’s effects. In this case Microsoft will love you (and us for suggesting this)…
  4. You could also go up the hill to the end and find Debian and ask yourself why it took so long to understand that unix is beautiful – in this case nobody will really love you but during installation you’ll find plenty of new friends in the Ubuntu community explaining you Debian…
  5. :-)

Anyway we hope that article helped you a tiny bit. If so you may also consider our sponsors, they also help you (and us of course)…
[iPhone] HowTo Activate and Unlock using QuickPwn 2.1

I. Abstract

This is a short HowTo since all of you by now know how to use QuickPwn, don’t you? in short: QuickPwn is an Après-Tool. Means: you let iTunes 8 do the update process and use QuickPwn afterwards to “open” your device. Note:

  • 2G iPhones can be jailbroken and unlocked
  • 3G iPhones can be jailbroken, but not unlocked
  • iPod Touch 1st generation can be jailbroken
  • iPod Touch 2nd generation can not be jailbroken

Our article will not cover the iPod Touch, but the iPhone.

II. Requirements

III. Warning

Jailbreaking and unlocking is illegal to be performed with iPhone devices that are part of a current agreement (mostly 12 or 24 months). You would violate your contract by jailbreaking and unlocking! Don’t do it.

  • If you’re updating: all your Cydia and Installer.app based applications will be lost and need to be installed again!
  • Make sure you make a backup of your data!

IV. Update iPhone firmware

  • connect your iPhone with your PC
  • start iTunes 8
  • choose your iPhone (under devices)
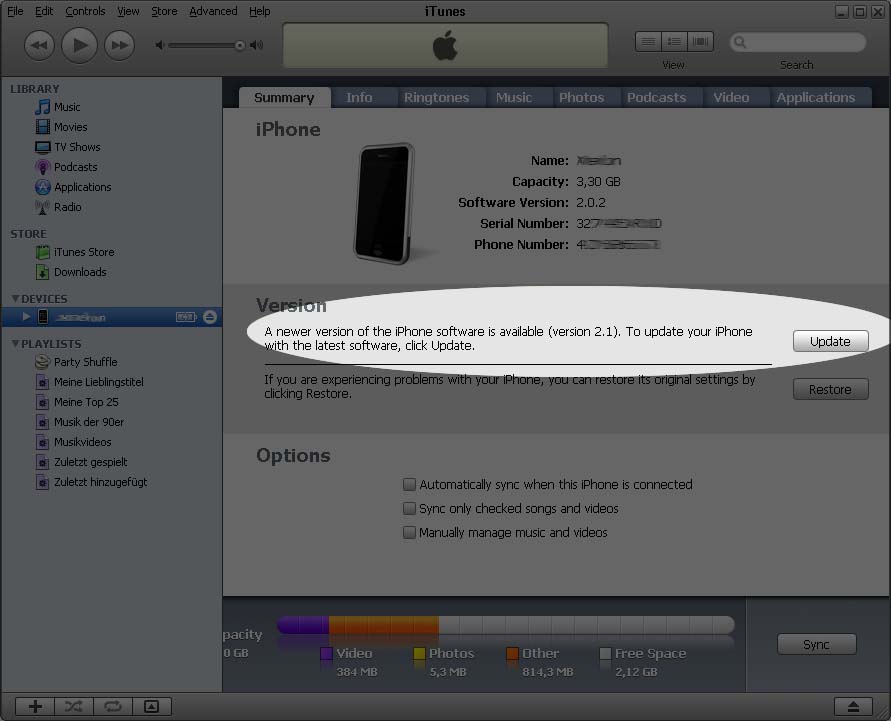
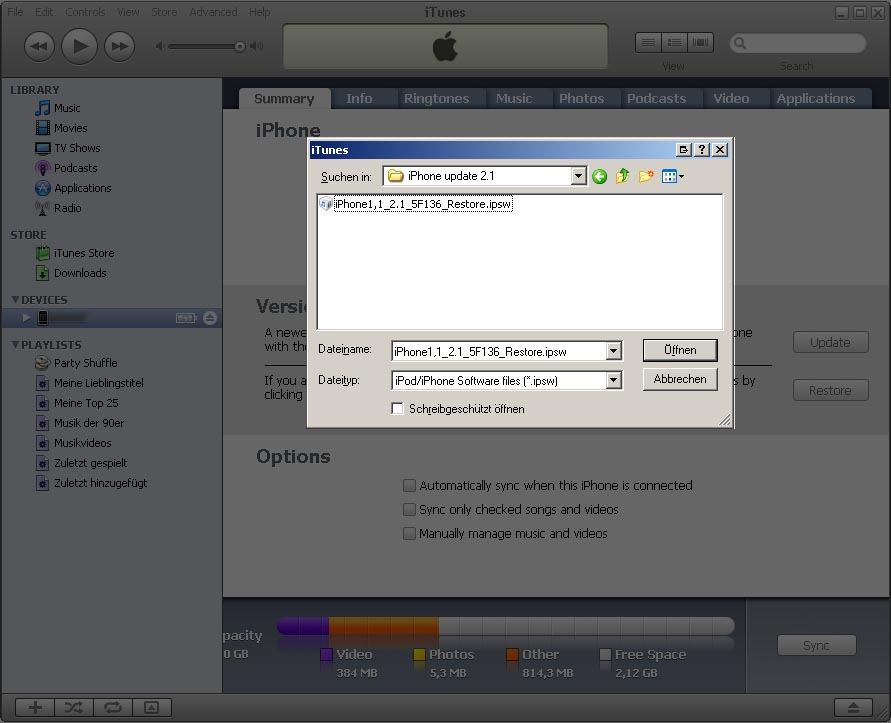
  • hold the shift-key (on your keyboard) and do a mouse-click on the Update Button – a file-open window will pop up like this:
  • locate the downloaded firmware 2.1 (named: iPhone1,1_2.1_5F136_Restore.ipsw) and open it
  • iTunes will begin to update your iPhone automatically


  • After having updated the iPhone will reboot. If you are using an already Pwned iPhone it will remain activated and unlocked, you only need to jailbreak.

IV. QuickPwning it :-)

  • Let your iPhone plugged to your computer
  • Close iTunes
  • Start QuickPwn 2.1-1
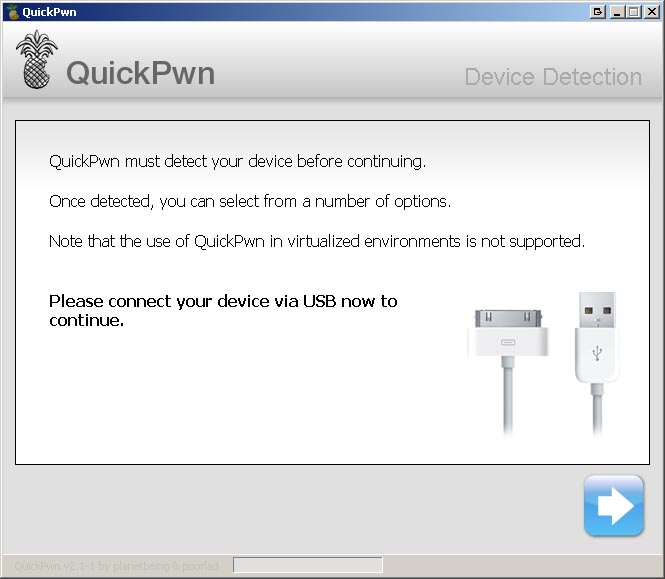
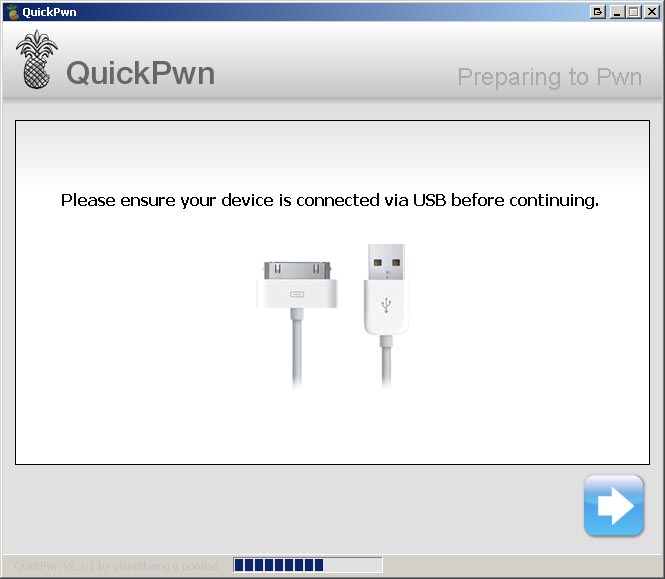
  • You will be greeted with the Device Detection screen, click the right-arrow to proceed:
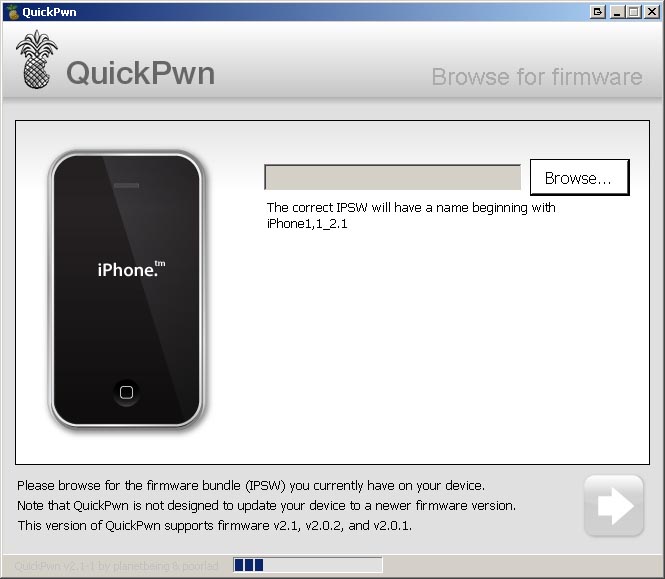
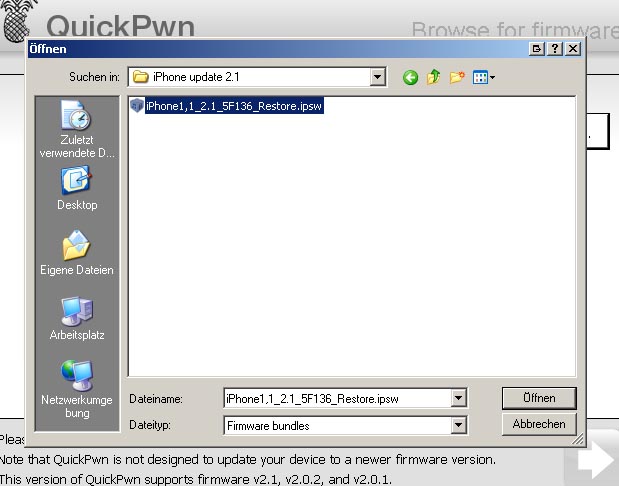
  • on the next window, click the Browse button to locate your iPhone1,1_2.1_5F136_Restore.ipsw firmware:

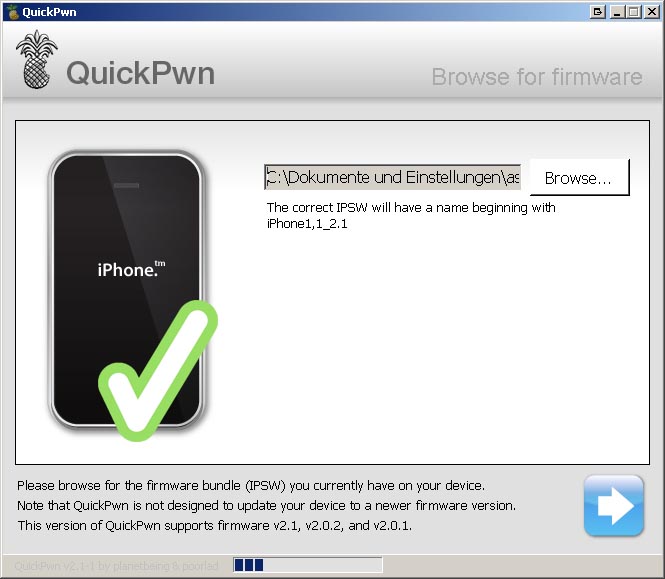
  • QuickPwn will check if the firmware matches the version currently running on your iPhone and will allow you to proceed (click the right-arrow):
  • the next windows allows you to select, what you want to install. We recommend to install both Cydia and Installer.app. If your iPhone has not been unlocked until now, here you can also choose to simunlock it. As we are quite conservative: we never change the boot logos, but this seems to be a matter of taste. After having selected, click the right-arrow button to proceed.
  • For safety reasons, QuickPwn will remind you to leave your iPhone plugged to your computer, click the right-arrow button to proceed
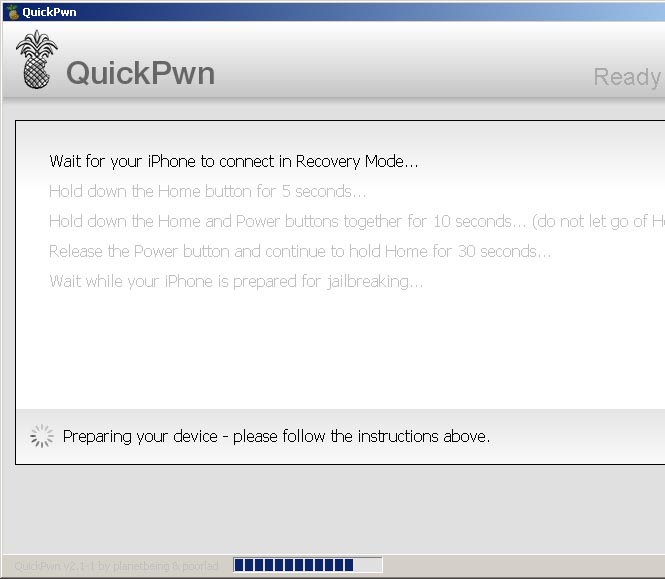
  • Read and follow the instruction on this window very carefully! QuickPwn will help you counting!
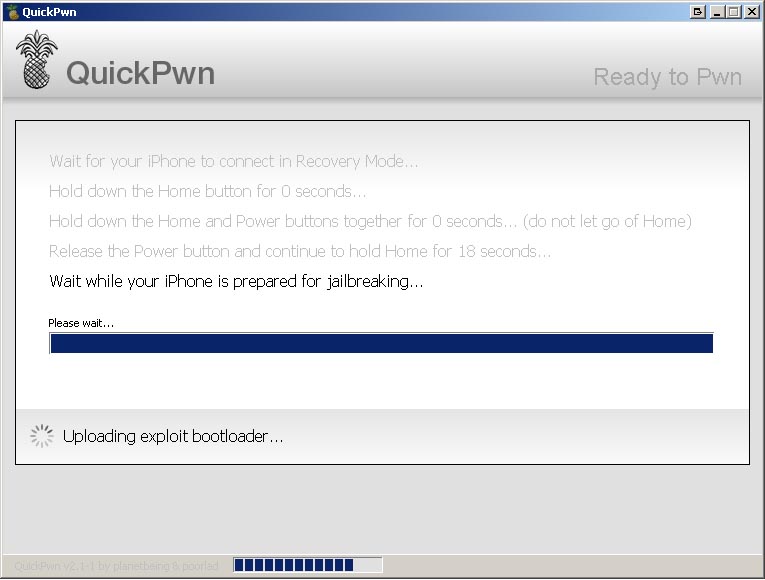
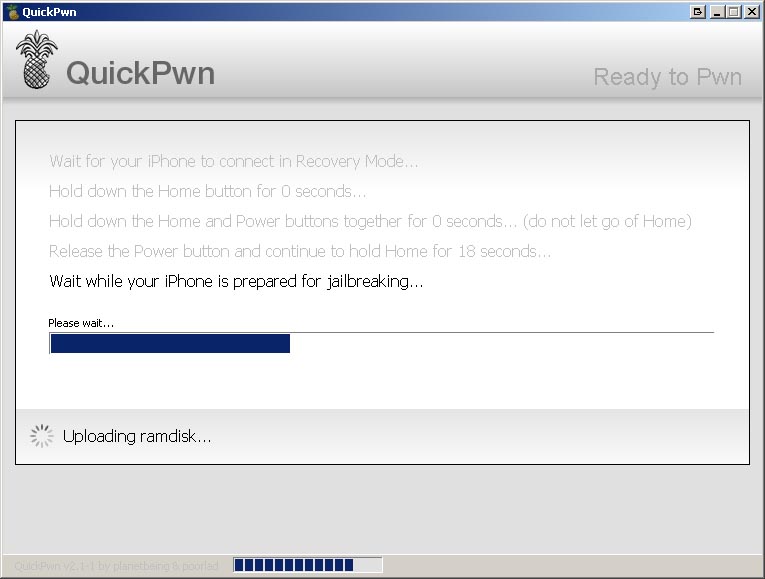
  • After that, QuickPwn will take control and perform the following actions automatically:


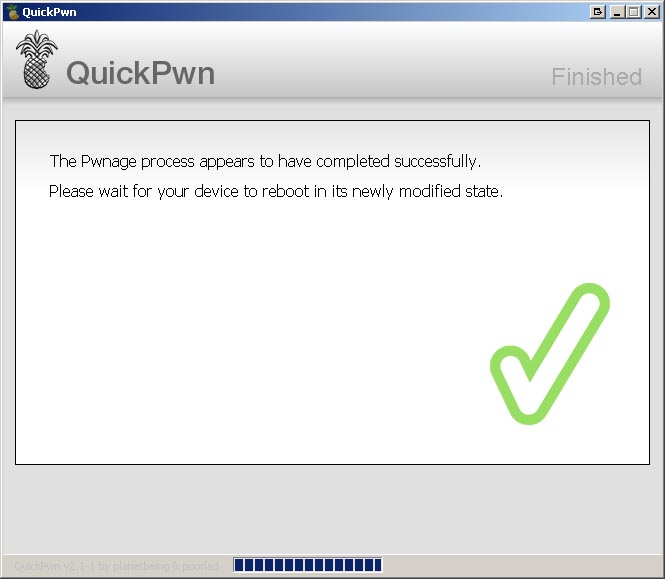
  • When all the tasks have been completed, QuickPwn has finished.
  • Your iPhone will perform some more actions for the next few minutes. It will show it is changing the NOR and so on and will reboot then.

After having rebooted your iPhone will be perfectly jailbroken and unlocked

V. Final words

Guys, we hope we could clarify some more things here than others did. We appreciate your comments on this. Kudos to all of you and remember to consider our sponsors, they really got the coolest offers ;-) Kudos fly out to the iPhone Dev Team! Live long and prosper, guys.

[Windows] Unleash Vista with Language Packs

I. Abstract

One of the obstacles with Windows in earlier times was: you could not simply change the language from say german to english or german to french. For me as a german loving the languages this always was a big prob. I saw the easiness of changing languages under Linux and wondered. Now with Windows Vista you can also install and use up to 16 different languages.

As always with Windows operating systems there are also limitations: changing of languages is (officially) only supported by Windows Vista Ultimate. Although you might choose any language during installation of Windows Vista Basic or Home Premium or what ever, you sadly will not be able to officially change it once you installed it. But by digging the dark places of the net, we found there are ways to change the language even in non Ultimate versions. With the help of a tool called “Vista MUI Tool”, which is being developed by some chinese guys, you can enable multi language on all Vista versions. Anyway this topic will not be covered here, because we ain’t got no Vista Basic version here. But we confess to come back to the “Vista MUI Tool” in a short while, simply because activating functions that have been disabled is an interesting topic for all of us, isn’t it?

The following short article will deal with changing the language in an Vista Ultimate version by using onboard tools – no modifications required. As an ultimate user using it in english you’ll enjoy the following advantages: you will have access to the  Windows Ultimate features (english only!) and to tons of different Widgets, that are also available in english, only.

II. Premises

For following this little tutorial and for playing with me the following 15 minutes, you need the following:

  • Windows Vista Ultimate (go and buy it, it really got cute effects, once you got used to it, you wonder how crappy XP looks like in contrast)
  • Have Administrator privileges
  • a little concentration, although there won’t be too much Zen in this article

III. Installing new languages

Have Vista booted and be logged in as user with admin privileges. In the following example we’re gonna install a french language pack while we are running an english language version. Do the following:

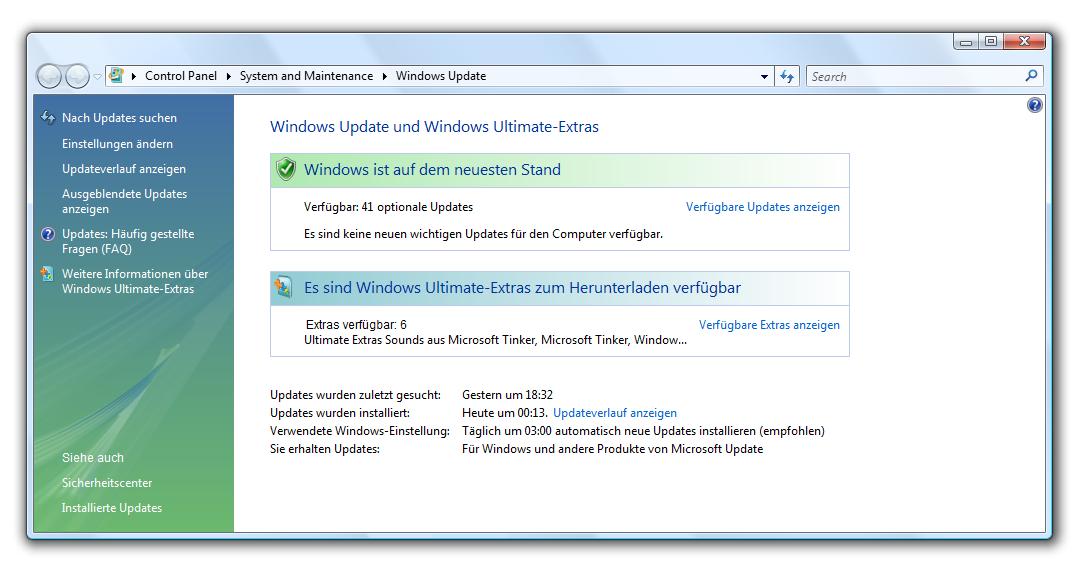
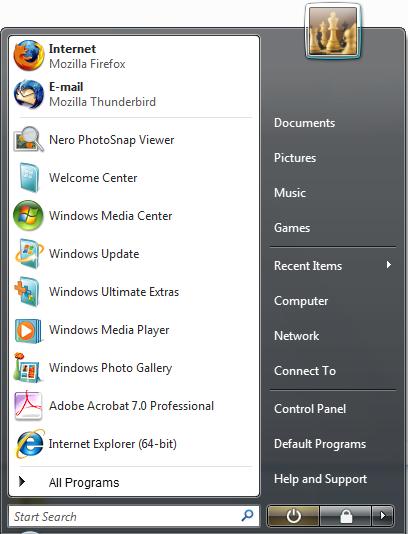
  1. Click the Start button and choose the Windows Update:
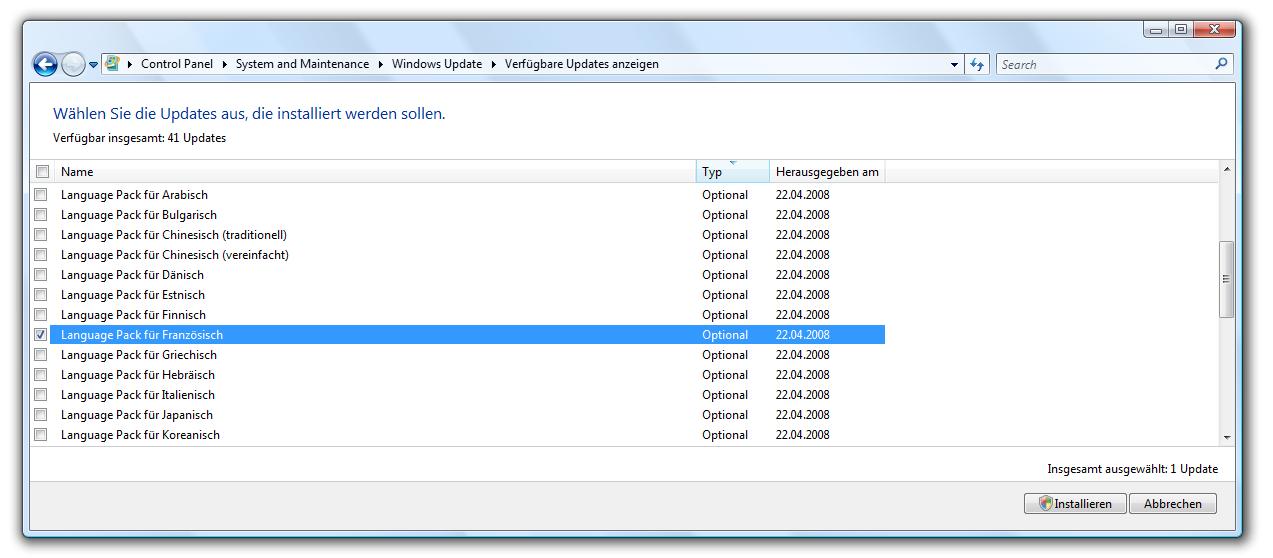
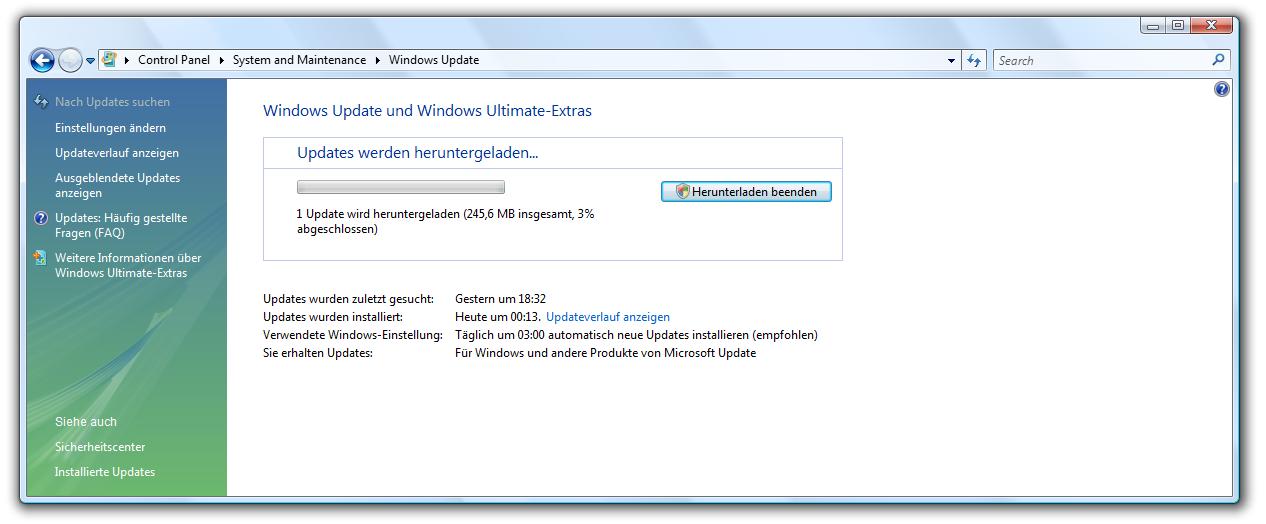
  2. The Windows Vista Update window will open and you click show available updates (on the screenshot partly german: verfügbare Updates anzeigen)
  3. A window gets opened then where you can choose your updates, besides the language updates there may be others, but hic et nunc we’re not gonna deal with those. Choose the languages you wanna install and click the install button.

    Note: (automatic background download and) installation of languages takes time. We experienced it may take up to 10 minutes per language pack. So better install them manually, not all of them at once. Each language pack is 300-500MB download size and requires between 1GB to 2GB space on your harddisk!
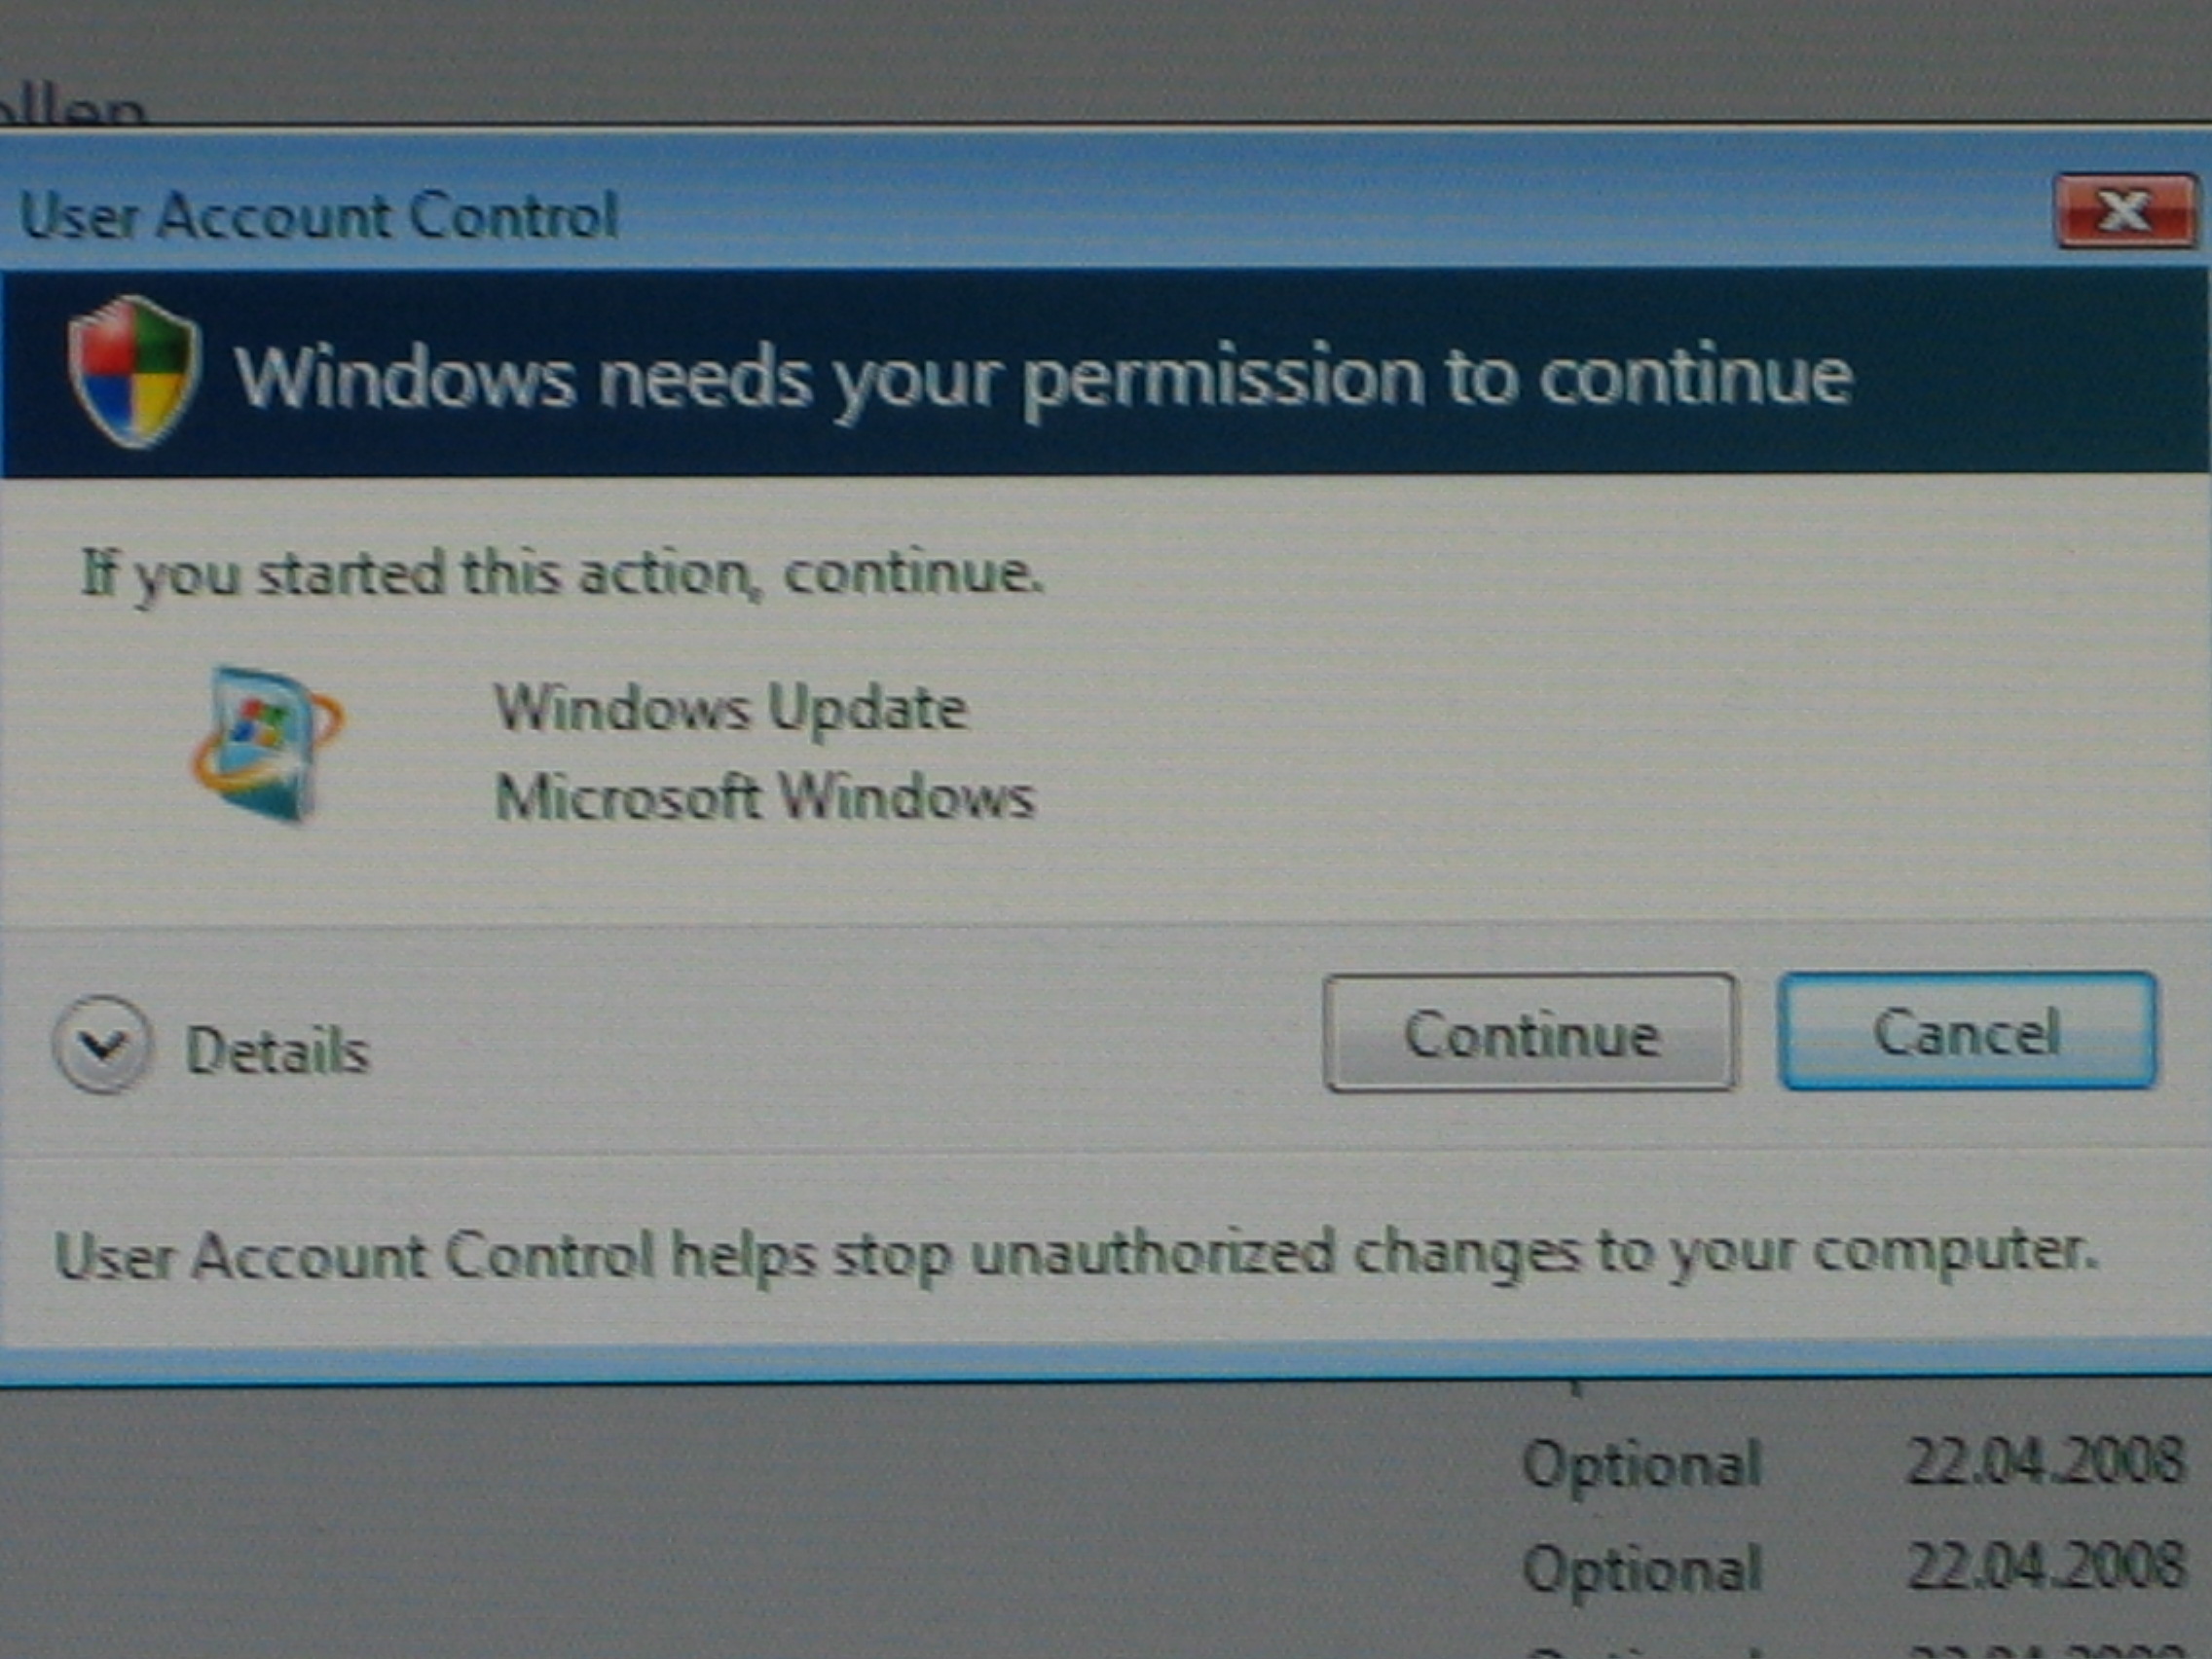
  4. There will be a security question if you really want to install the language pack. Click the Continue button.
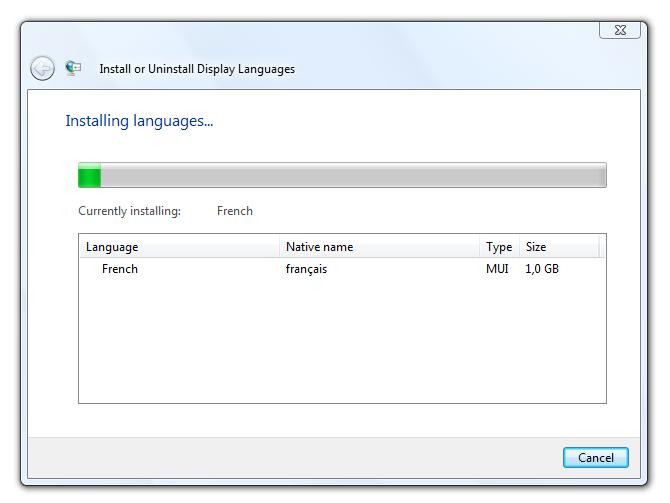
  5. The download begins and then it gets automatically installed. This will take time now. Instead of wasting your precious time, you may consider some advertisements on our site, would you?

  6. When the installation is finished and your screen looks like that (at least the symbols ;-) You’re good to go then.

You may repeat this step with as much language packs you need.

IV. Activating the new language

So after having prepared all the required languages, we really like to use them. Do the following:

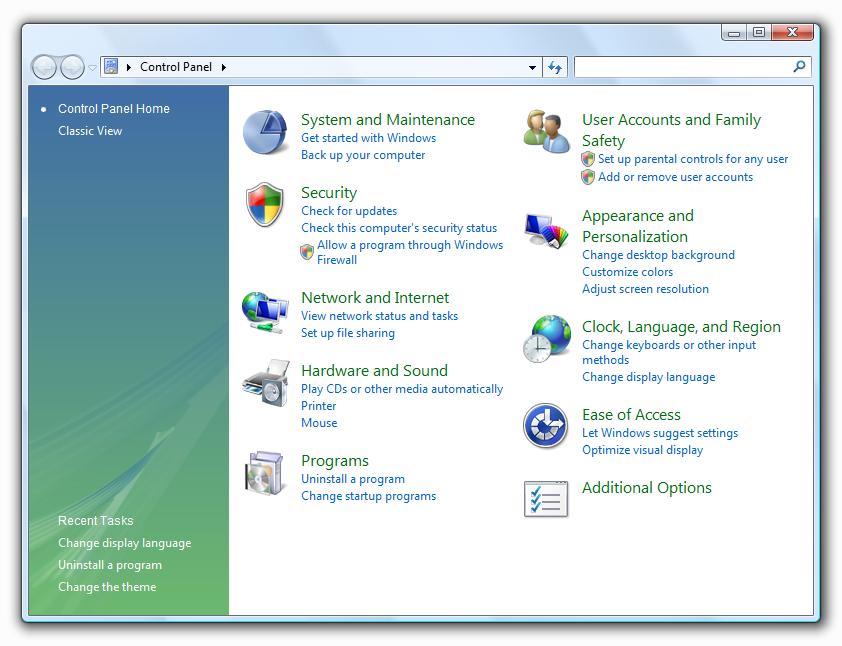
  1. in Vista click the Start button and open the Control Center
  2. In the area Clock, Language, Region choose Change display language
    note: click the Control Panel Home button, in case you’re in Classic View
  3. In the field Choose a display language select your language and click the Apply button
    note: after having clicked Apply it may take some seconds to some minutes
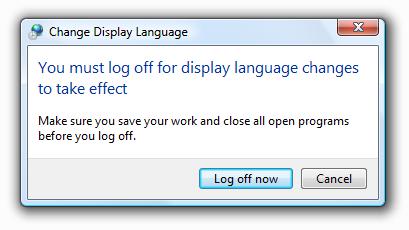
  4. Windows will want you to log out to apply the language changes:

After logging in again you’ll have the selected language set

V. Final words
That should do for the moment. Next time we’re gonna take a Windows Vista Basic and unleash the language pack thing there. Ob Duh…
[MacOS] Using CrossOver to run UltraEdit

I. Abstract

Many of us are nowadays using different operating systems almost at the same time. At work most of us use Windows machines, at home we use a Mac, coexisting with a Windows Laptop. Although we really like the Mac eco system, from time to time we find out we’re missing something from the Windows world very desperately. Many of us coders who recently switched to a Mac soon find out, we miss one thing for sure: UltraEdit. UltraEdit is one (if not even the) editor for the Windows environment. And once you get used to a workflow you will not want to miss it, no matter if you switched completely or not. This is were the emulators or the virtual machines come into play. As long term users of UltraEdit we’re gonna show you in the following article how to get UltraEdit (almost natively) installed on MacOS using the WINE based CrossOver by CodeWeavers. Enjoy…

II. What you need

  • Intel Mac (or a Hackintosh with EFI-X) running MacOS X 10.5 Leopard
  • CrossOver Mac 7.0.1 installed. Get a CrossOver trial version here (we recommend to get the “Professional Version” as it also includes CrossOver Games, but for running UltraEdit only, CrossOver Standard Version will be sufficient.)
  • UltraEdit 14.10 installer. Get an UltraEdit trial version here. In case the downloaded file is .zipped, please unpack before proceeding.

III. Prepping CrossOver

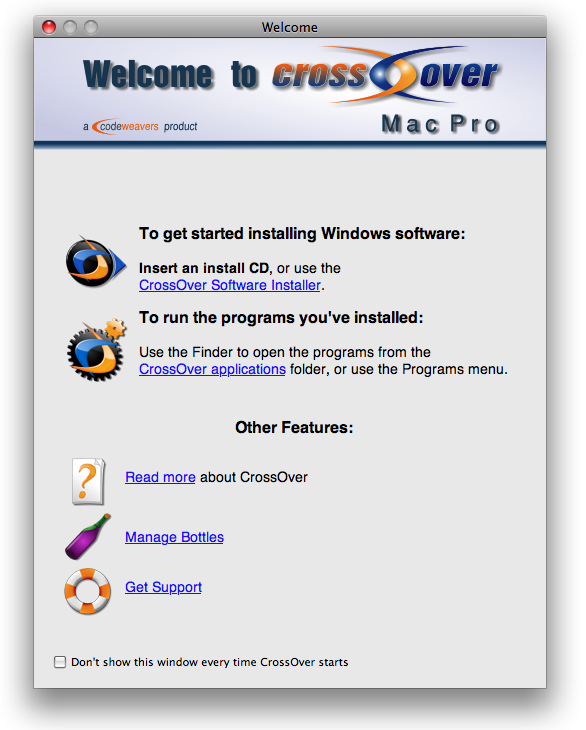
  1. Start CrossOver. The welcome screen will ask you what to do. Click the “CrossOver Software Installer” link:
  2. An Installer window will pop up. Choose “Install Unsupported Software“:
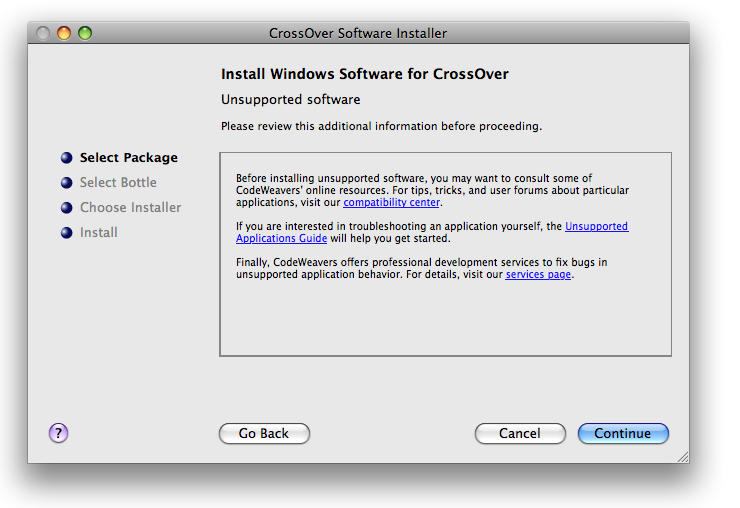
  3. Click “Continue” after having read this reminder:
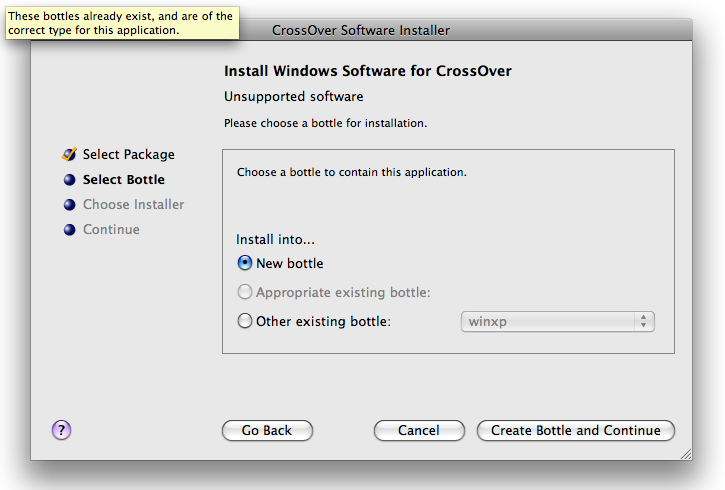
  4. Choose to “Install into... New bottle” and click “Create Bottle and Continue“:
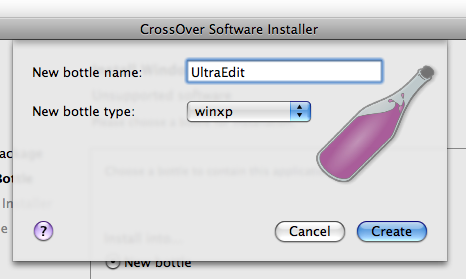
  5. Enter the “New bottle name:” (like UltraEdit, for example) and choose “New bottle type” as “winxp” (yes, means Windows XP compatibility mode). And hit the “Create” button:

    The bottle is being created then. This process may take some minutes on older machines.

IV. Installing UltraEdit

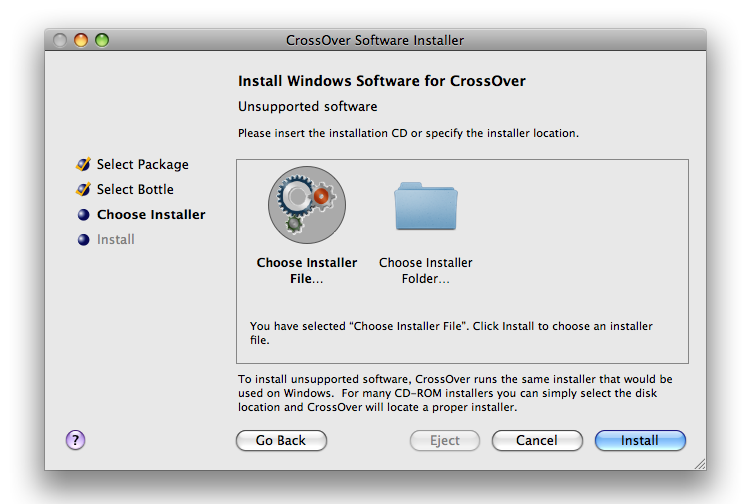
  1. After bottle creation, CrossOver like to install. So “Choose Installer File...” and click “Install“…
  2. Locate the installer file. It will be called something like “ue_english.msi“. Click “Use this installer“:
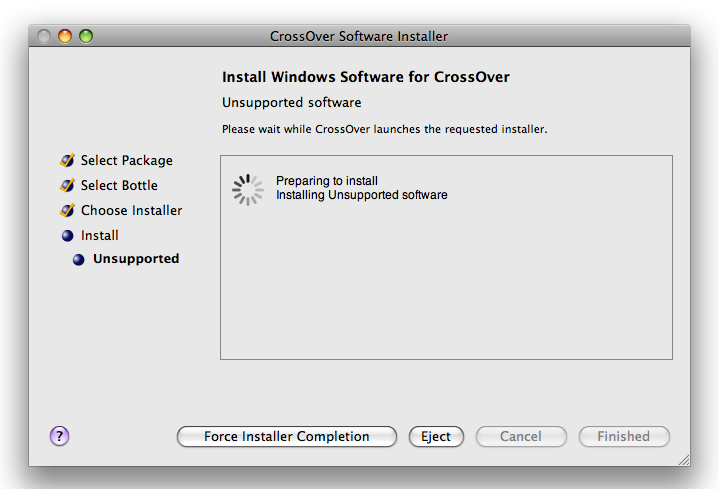
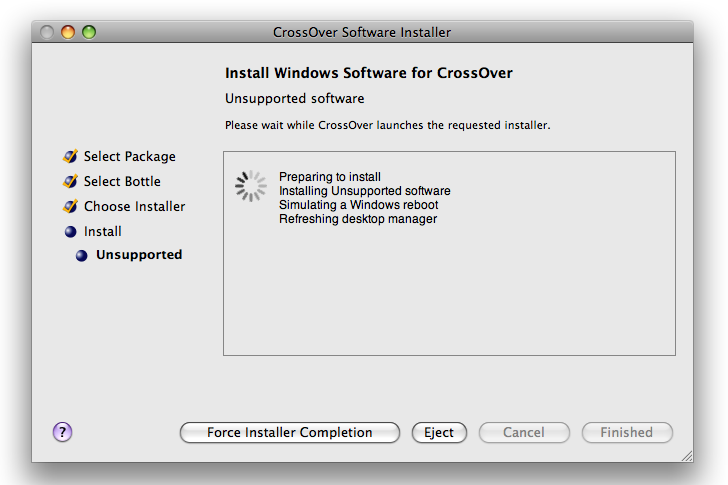
  3. CrossOver will prepare to install (no interaction of yours required here!)
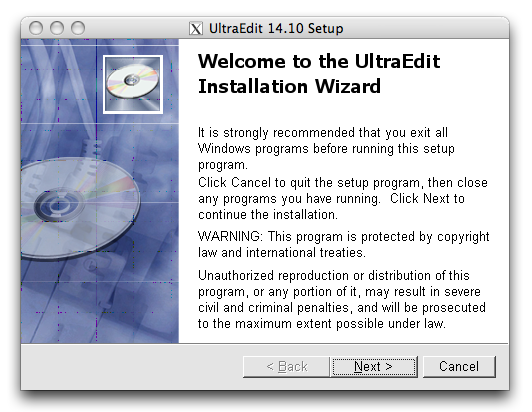
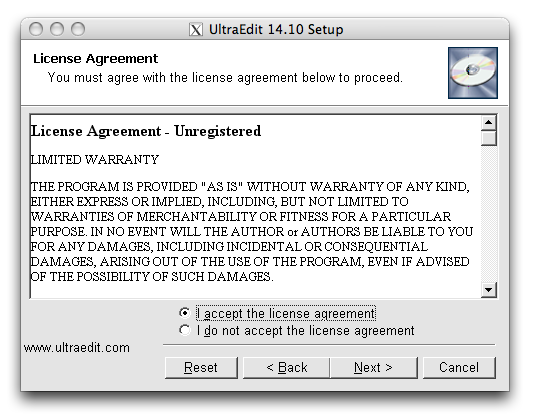
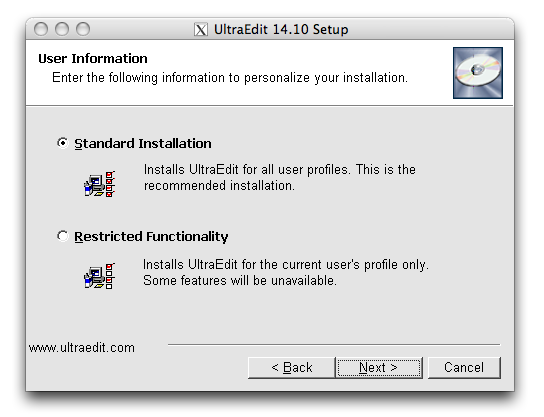
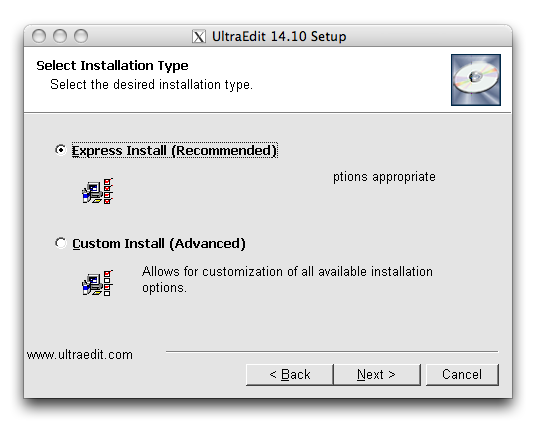
  4. Et voilà, the well known Windows installer will be loaded. Click “Next
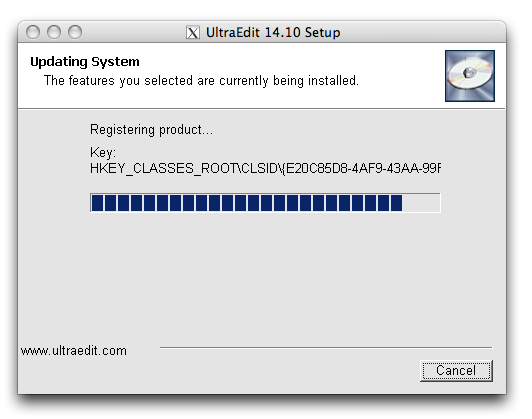
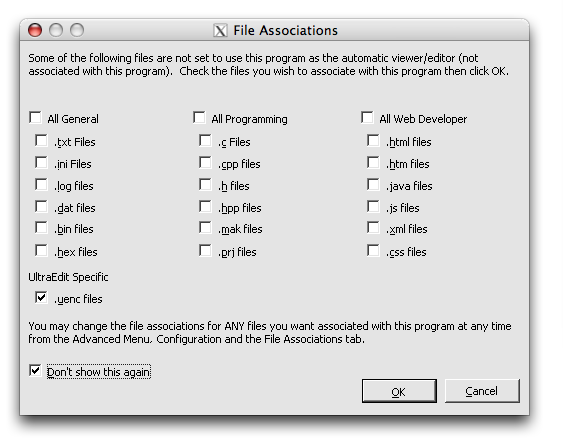
  5. We expect, you know how to install Windows software, so we’re not gonna comment the following screenies:


  6. We did not install UltraCompare, but you may give it a try…
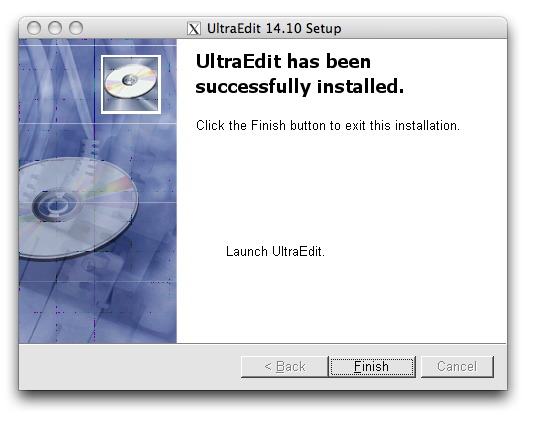
  7. Uncheck the “Lauch UltraEdit” box and click “Finish“.

V. Final preparations

  1. After installation, Crossover will do a virtual reboot of its Windows XP bottle, where you installed UltraEdit into (no interaction of yours required here!)
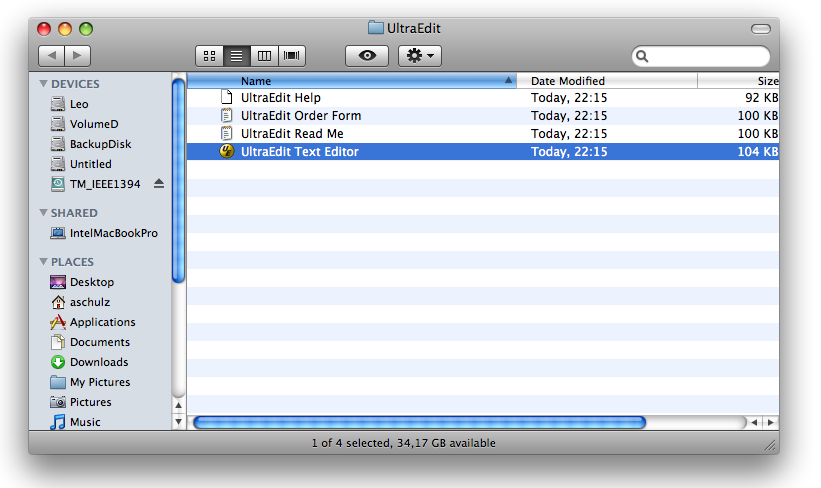
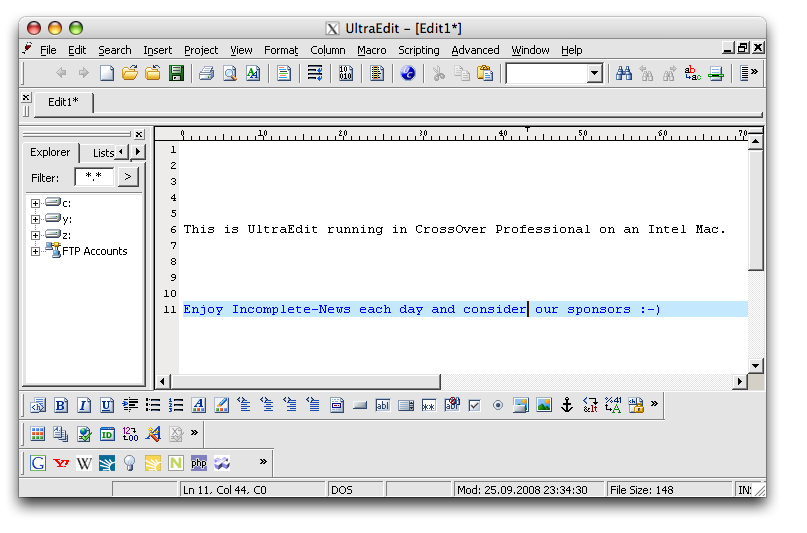
  2. After virtual reboot, it will create the program links. You may now double click the “UltraEdit” program link to start it.
  3. Feeling home already?
  4. Don’t hesitate to type some lines

  5. Yes, you’re done…

VI. Final words

We hope you had some fun, following this tiny HowTo to get UltraEdit back to our new environment. Although the FTP feature did not work for us, as it crashs UltraEdit, by being able to run UltraEdit we can use our trained workflow for coding and editing. Anyway there are native editing solutions on a Mac, which we will have a closer view on within next time.

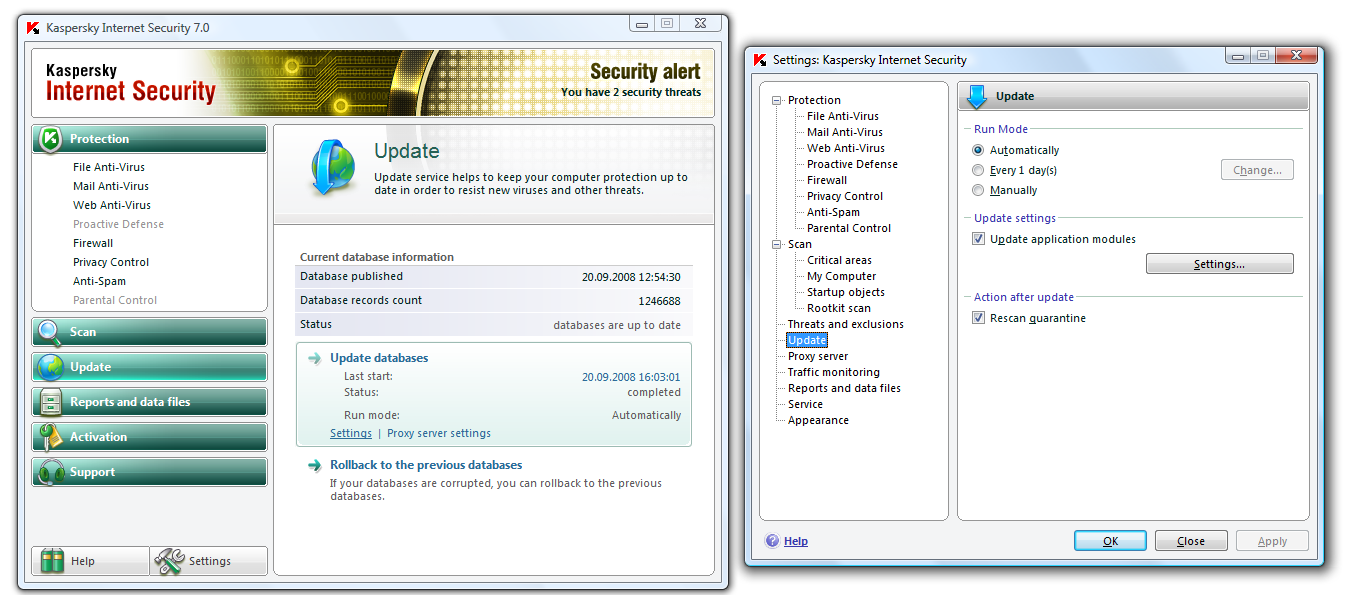
[Windows] Kaspersky Internet Security Kills Vista 64

An update that has been distributed yesterday is likely to be the cause for sudden blue screens on Windows Vista 64bit. The yesterday update forces the user to restart, but after restarting, Windows Vista64 customers report that their system would not boot anymore. Instead a blue screen of death was shown.

Although the problem should be fixed now, many users still cannot boot. What you can do, if your system still hangs:

  • boot into Safe Mode (hit F8 when Window begins to boot after the BIOS messages)
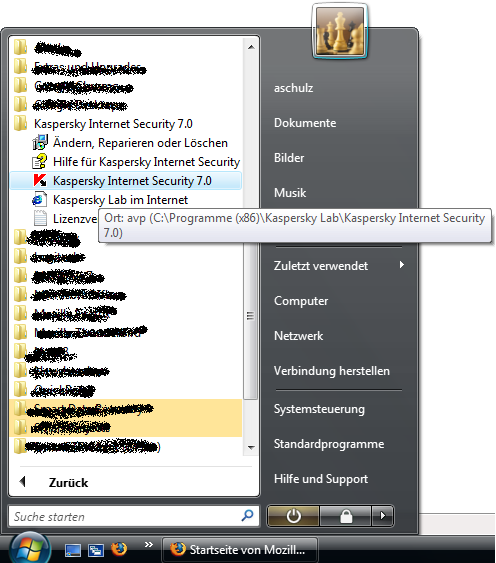
  • click Start -> all Programs -> Kaspersky Internet Security

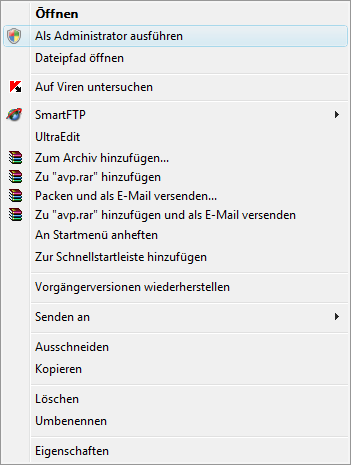
  • right click on Kaspersky Internet Security 2009 to Run As Administrator
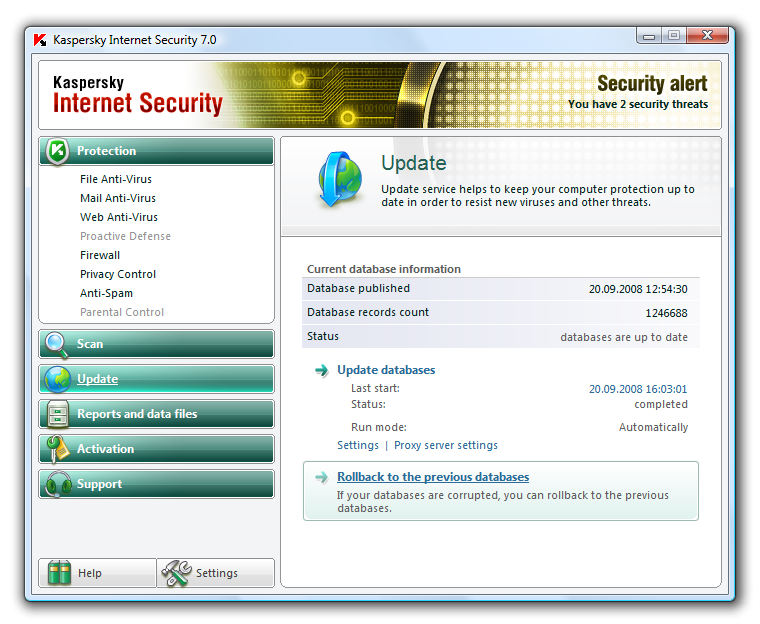
  • Click Update and choose to Rollback to previous Databases
  • Wait some secs to some minutes for the rollback to perform
  • you may change the Update mode (from automatically to manually). But we’ve heard everything is under control again. So this step is not necessary.
  • Reboot your system

Enjoy…

[iPhone] Workarounds for Issues with PwnageTool/QuickPwn for Firmware 2.1

We read all over the net and found some solutions to the most common issues that occurred. If you are kinda conservative user, we’d recommend not to update to firmware 2.1 and wait until a PwnageTool and QuickPwn update has been released. Since the iPhone Dev Team is reacting very fast, this should take only some days.

Known Workarounds:

Error 1600 and Error 6: restore with stock firmware 2.1, then QuickPwn (you may then put into restore mode and install custom IPSW, but it’s not necessary- credits to “HomeGrown”).

Error 1600: when Pwnage asks, if already pwned your device, answer NO, no matter if you pwned if before or not (credits to “Maurofoto”)

Error 1600: let iTunes download firmware 2.1 again (you may delete it from the local folder if you already downloaded it via iTunes. Folder on a Mac: ~/Library/iTunes/iPhone Software Update/), then exit iTunes, prep a custom IPSW using Pwnage, delete the iTunes downloaded firmware from the above mentioned folder again and copy your custom IPSW to that folder, but name it exactly as the original firmware was named (credits to “Markat”)

[ID1082] Was the information provided above helpful?

View Results

Loading ... Loading ...

[iPhone] iTunes 8 crashs Windows Vista

Windows Vista users complain about complete operating system crashs resulting in blue screens. iTunes 8 for Windows seems to have the following issues, when using under Vista:

  • after connection an iPod Touch or an iPhone to the USB port: complete system hang up
  • CD/DVD drives disappear from Windows Explorer

But Apple already reacted and distributes now a fixed version. This implies you need to uninstall your current iTunes 8, then download the fixed iTunes 8 and install ii.

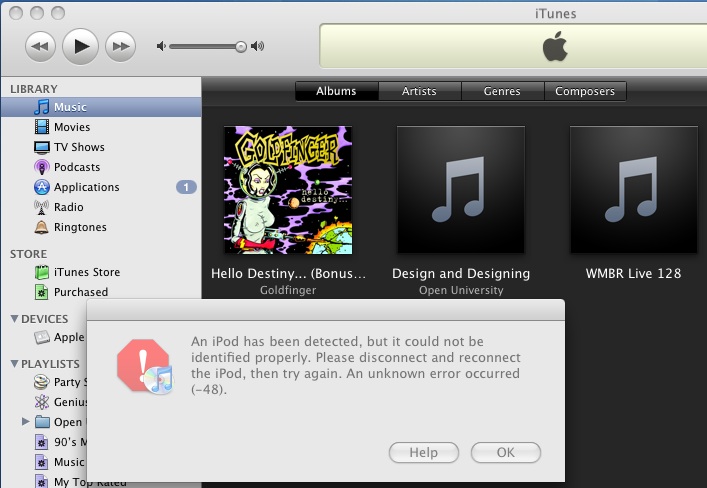
[iPhone] iTunes 8 detects Pwned iPhone Firmware

Warning

Firmware 2.1 will be released today. As of now, it cannot be pwned – no matter if you are running QuickPwn or PwnageTool. We recommend not to update until further notice.

Current Status

The iPhone Dev Team reports iTunes tries to countermeasure the exploits the well known Pwnage Tool is using. After having compiled a custom firmware with Pwnage Tool or WinPwn, you need to install it using iTunes. Now, iTunes in version 8.0 refuses to install custom firmware, thus combatting Pwnage’s way into the iPhone or the iPod Touch. The iPhone Dev Team released the photo below indicating the error message from iTunes 8, when trying to install a custom firmware to a (not yet) pwned iPod Touch. As of now, it is unknown if iTunes can also detect an already installed custom firmware. Thus allowing original unmodded updates to install. This would also allow the use QuickPwn. iTunes seems not to be able to detect already pwned iPhones. Forum reports say, iTunes 8 still can install custom firmware to an already pwned iPhone. For those guys of you who are running a device fresh from the factory (means not pwned), use QuickPwn as a workaround for now.

Interim solution to pwn a new device:

  1. Use QuickPwn to jailbreak and then Pwn/unlock your device
  2. if you like you can then use Pwnage Tool to create a recovery custom firmware (imho: you don’t need it, after having QuickPwned your devices

Next Steps

Anyway the Dev Team reports, they are working on a way to trick iTunes, thus forcing iTunes to install custom firmwares even on not pwned devices. The iPhone Dev Team is currently prepping a whole lot of patches for iTunes 8, no matter if you are on Windows or on Mac. Patches will be released during the next week.

» Read the iPhone Dev Team’s article here

[Windows] HowTo configure Kaspersky for News Client Access

Abstract

Running news clients with the built-in Windows Firewall, you will usually get fullspeed when accessing the usenet. Problems occur when you use All-in-One Internet-Firewall-and-Virus-Scan solutions. Since Virus-Scanners and Firewalls tend to scan all the network traffic with heuristic algorithms, scanning may slow down internet (and usenet) access. The following article demonstrates how to configure the widely spread Kaspersky Internet Security to allow fullspeed access to the usenet.

Preparations

We assume you know how to setup your news client and you already installed Kaspersky Internet Security (KIS).

Setting up KIS

Open up your KIS and do the following:

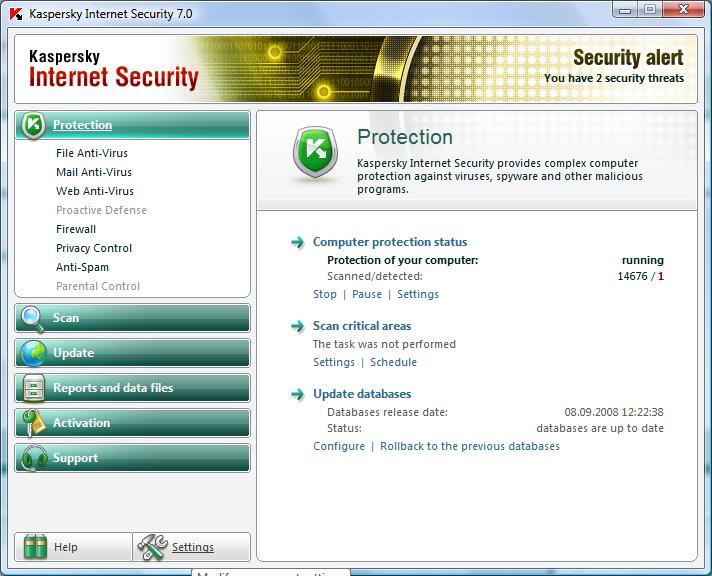
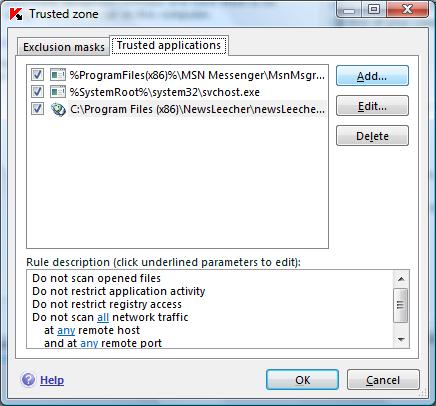
  • click the Settings Button (see picture)
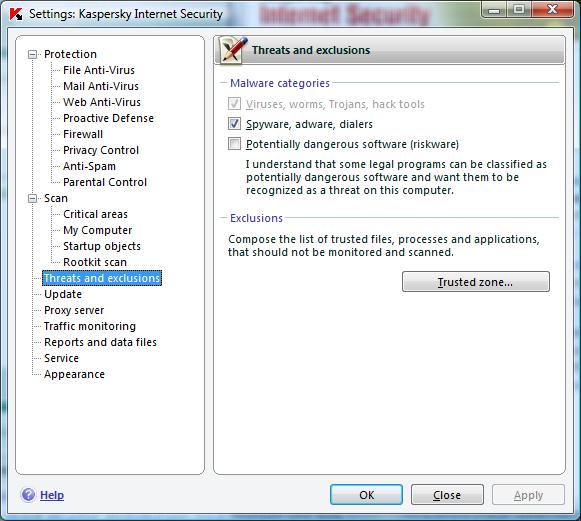
  • on the next window click the Threats and Exclusions Button (see picture)
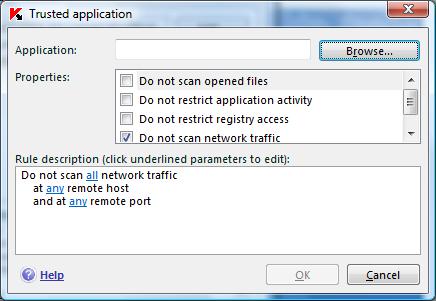
  • on the next window click the Add Button (see picture)
  • on the next window click the Do not scan network traffic Checkbox (see picture) and then click the Browse Button to choose your News Client (see picture).

Then save your settings and restart your News Client application and you’re done.

More questions? Don’t hesitate to ask below. Thanks for your attention :-)

[iPhone] Experienced Issues with Firmware 2.0

After some days of using a pwned iPhone 2G with firmware 2.0, we found some issues. As of now, we don’t know where they come from. But we definitly know: we don’t like them.

  • WiFi doesn’t stay connected, it falls “asleep” and takes time to reconnect
  • the more apps have been used, the longer it takes to see reactions
    means: if you click on contacts and have used Safari, SMS and Youtube before, opening of contacts takes a lot longer than after an fresh reboot!
  • loading the contacts take 5-10 seconds
  • scrolling through contacts is jerky and freezes the view from time to time
  • scrolling through photos is jerky and freezes the view from time to time
  • launching the camera takes up to 10 seconds
  • the unlock slider may not react in time and you may miss a call
  • keyboard reacts slower than on 1.1.4
  • reaction time is heavily delayed (or seems not to react at all for more than 17 seconds – see video below)

We won’t blame anyone for this, because on the one hand this could be an effect of Pwning the iPhone and on the other hand these issues might be “features” of the original unmodified firmware 2.0 aswell. See update below, this is a firmware 2.0 issue.

Anyway we feel there are heavy problems with the memory management in firmware 2.0, that need to be addressed soon. Workflow was a lot faster with firmware 1.1.4.

As of now we just reboot the iPhone once a day, but this really is no working solution for such a device. We feel this reminiscent to Windows 95 times is not necessary.

Update: it has been reported this may come from Cydia. As we’re investigating this issue, we get back to you once we found a solution.

Update: Pumpkin of the iPhone Dev Team reports this most likely is an issue of the original firmware 2.0. Native iPhone users have also experienced this behaviour (see reports here in Apple’s forums). The internet is full of reports. Do a Google search you will find plenty of people reporting these issues.