Category Archives: MacOS

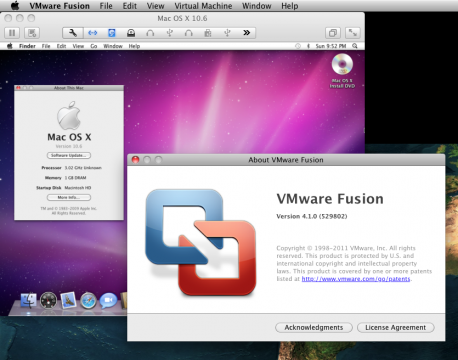
[MacOS] VMWare Fusion 4.1 Allows Installation of Snow Leopard Client and Leopard Client Versions

Fusion 4.1 Allows Mac OS X Client Installations

With the release of Mac OS 10.7 Lion VMWare seem to have decided that all of Apple’s latest operating systems can be virtualized. VMWare Fusion 4.1. (released Nov 17th, 2011) thus allows the installation of all Mac OS X 10.5 Leopard, and 10.6. Snow Leopard versions; vulgo: the server and client editions.

Voicemail From Infinite Loop

The tiny downside is, VMWare seem to have gotten an urgent call from a fruity garage company in Infinite Loop soon after their release of VMWare Fusion 4.1. That’s why they issued VMWare Fusion 4.1.1 (released Nov 23rd, 2011) almost immediately, thus effectively reverting the capability of virtualizing the Mac OS X client versions.

Fusion 4.1.1 Update Bars Client Installations Again

That means: if you are running VMWare Fusion 4.1, you should consider not to upgrade to 4.1.1. If you have a Mac OS X client version virtualized it would not boot anymore after the update to Fusion 4.1.1. For all the others, VMWare does not distribute version 4.1 anymore, only 4.1.1. So you would have to search the net for download possibilities of VMWare Fusion 4.1. Luckily there are still legal sources for the 4.1 download. Update: the download link distributes version 3.1.1 (sic!) at the moment. You’re on your own finding the 4.1 download on the net (filename: “VMware-Fusion-4.1.0-529802-light.dmg”). Good luck.

Continue reading

[MacOS] Backup Chameleon Boot USB-Stick

1. Abstract

You have the situation that you installed Chameleon for security and compatibility purposes on an external USB-stick. For safety reasons you should consider making a backup. But all diskimaging (either Apple’s Diskutility, Carbon Copy Cloner or Super Duper) tools fail to create a proper backup since the bootblock is just not copied. So you end up with having to create a second usb-stick, but this takes time. So why not copying it? In the following article we’ll show you some basic steps to create a proper backup of your precious Chameleon bootable USB-Stick.

This session is not considered for newbies. You need to understand the steps and understand that you can completely destroy your system when you apply certain steps in a wrong way. The following steps comprise a forum threat on OSX86.net.

2. Walkthru: Backing up your Chameleon USB-Stick

Continue reading

[Win] Oracle VirtualBox: Workaround For Initialization Issue Pt. II

Find our previously released workaround for initialization issues here.

CPU VT-X/AMD-V Issue

After configuring a dual core virtual machine and trying to start you may encounter a message box indicating:

  • Hyper-V launch failed; Either VMX not present or not enabled in BIOS.
  • Hyper-V launch failed; at least one of the processors in the system does not appear to provide a virtualization platform supported by Hyper-V.

This issue may occur no matter which host operating system you’re using. The reason for this might be:

  • you’re not using a CPU that supports hardware virtualization
  • your BIOS does not support hardware virtualization properly
  • hardware virtualization is disabled in your BIOS settings (check it!)
  • there is a bug in your current BIOS version
  • the trusted execution flag prevents booting properly

Known Workarounds

Try these settings in your BIOS:

  • Enable Execute Disable bit (depending on the motherboard manufacturer this can be called: XD-Bit, EDB, NX-Bit, AMD EVP)
  • Enable Virtualization bit (depending on the mobo manuf. this can be called: VT, IVT, AMD-V)
  • Enable VT for Direct I/O Access (depending on the mobo manuf. this can be called: VT-d based I/O)
  • Disable Trusted Execution Technology (depending on the mobo manuf. this can be called: Intel TXT, TET)

Of course, upgrading your BIOS to the latest version can also be of help, but flashing the BIOS is always a little risky.

Final Words

As we’re currently using VirtualBox only on the Windows XP platform we categorized this article under Win, anyway it is very likely that the same issue also occurs under Linux or Mac OS, as VirtualBox on all platforms derives from the same source code.

The above settings apply for example for installing MacOS SnowLeopard in a VM under Windows 7 on Gigabyte EP35-DS3 or Dell Optiplex 745/755.

[MacOS] Save Energy by Using Deep Sleep aka Hibernation

Looking at the situation in Japan at these days, it seems overdue to begin worrying about all our energy consuming devices.

As a MacOS user we are used to some quite convenient features. Like just clicking sleep and the system goes to sleep.

What most of us don’t realize at this point is, that sleep mode logically requires energy as it will immediately wake up when I hit the keyboard.

So for me this began causing me a bad conscious – until I found the way to hibernate MacOS also on desktops

How to Hibernate aka Deep Sleep

  1. Download Axonic Labs’ Deep Sleep Widget for Snow Leopard 10.6 here.
  2. Unpack by double clicking
  3. Install to
    /Library/Widgets
  4. open terminal and
  5. enter in terminal:
    sudo pmset -a hibernatemode 3

Step 5. because Hibernation Safe Sleep is disabled by default on desktop systems like iMac, Mac Mini, or Mac Pro’s.

By the way: first tests show that this Deep Sleep Widget is at least compatible to Chameleon EFI RC4 :-))

[MacOS] Handle DMG Images under Microsoft Windows

Are you one of those lonesome people who tried to access the contents of a DMG image under Windows? Yes, there are several ways like converting to ISO with programs like Magic-Iso or mounting with Mac-Drive. All these solutions are nice, handy and well… expensive…

Simply using 7-zip is in my opinion the easiest way, as all of us should have 7-Zip installed anyway ;-)

  • right click the .dmg file
  • choose:
    7-Zip
  • a submenu opens, in that submenu choose:
    unpack to <nameofmydmg\>
  • wait a couple of secs while unpacking and
    open the subfolder <nameofmydmg\>
  • you should find a bunch of files:
    0.MBR
    1.Primary GPT Header
    2.Primary GPT Table
    3.free
    4.hfs
    5.free
    6.Backup GPT Table
    7.Backup GPT Header
  • The file for further examination is “4.hfs”. It mostly is a lot bigger than all the rest of the files.
  • now do a right click on "4.hfs" again and
  • choose 7-Zip
  • a submenu opens again, now in that submenu choose:
    unpack to <4\>
  • et voilà…

you’re done with unpacking… now fire IDA and find the jump ;-)

[Win] Oracle VirtualBox: Workaround For Initialization Issue

“and first for something complete different”: Muzaq… coding or administrating system can’t do without gooood muzaq. Check our latest tunes here :-)

History

VirtualBox is an open source virtualization software. Originally it has been developed by a german company named Innotek, which has been acquired by SUN Microsystems in 2008. SUN Microsystems in turn has been acquired by ORACLE in 2010.

Innotek originally collaborated with Connectix on Virtual PC – a virtualization software targeting the Mac OS platform. Connectix has been bought by Microsoft in 2003. Innotek then decided to develop VirtualBox.

Status Quo

VirtualBox is used by many companies for virtualization and thus developing. Palm for example uses VirtualBox for WebOS development in an emulated environment. Thus allowing either Linux, Mac OS or Windows host systems for development.

CPU VT-X/AMD-V Issue

After configuring a dual core virtual machine and trying to start you may encounter a message box indicating:

VERR_VMX_MSR_LOCKED_OR_DISABLED

This issue may occur no matter which host operating system you’re using. The reason for this might be:

  • you’re not using a CPU that supports hardware virtualization
  • your BIOS does not support hardware virtualization properly
  • hardware virtualization is disabled in your BIOS settings (check it!)
  • there is a bug in your current BIOS version regarding

Known Workarounds

  • Disable USB for the virtual machine
  • Reduce the amount of CPU cores to 1
  • upgrade your BIOS to the latest version (this might be dangerous)
  • Disable VT-X/AMD-V
  • Disable 3D acceleration
  • Shutdown your host machine, unplug (!) from electricity for say 30 secs, reboot then

As we’re currently using VirtualBox only on the Windows XP platform we categorized this article under Win, anyway it is very likely that the same issue also occurs under Linux or Mac OS, as VirtualBox on all platforms derives from the same source code.

Any suggestions, hints or things need to be added? Don’t hesitate to tell us below…

[MacOS] Add Avi Files to iTunes Library

I. Abstract

As some of us have already realized: iTunes by default does not allow adding AVI files to its library. This is very sad, but there are several solutions for this problem.

II. Converting or going Commercial?

One might be converting all files to something that QuickTime allows to play. As this is not a convenient solution for people having a lot of AVI files, we might give Aroona’s VideoDrive app a try. VideoDrive allows adding AVI files to the iTunes library with a simple click. This is nice. But it costs 15€.

III. Using a freeware Apple script

But you might also try a custom script for free. Since as long as QuickTime can play your file, iTunes is also able to do so. And you know it: QuickTime on the Mac plays AVI, XviD, DivX, x264 movie files and a whole bunch of interesting codecs just beautifully using Perian.

Anyway the solution provided here has originally been publicly released by a guy going under the nick Nevyn on the MacRumors Forums. Aroona’s VideoDrive appeared much later on the markets. By the way: Arroona’s VideoDrive also uses Apple scripts for their things… so yes, the universe is full of funny coincidences.

Nevyn’s script does a simple thing. It adds the movie-type meta-data to the AVI file. And this basically could also be done via terminal:

  • testuser$ SetFile -t "MooV" /path/to/movie.avi

But the nice thing is Nevyn put this idea in tiny Apple Script, that allows creating a nice Apple Script Droplet. Thus allowing us to just drop the files or folders on the Droplet and have the AVI files instantly available in iTunes’ movie library – ready for sharing on the local net via Bonjour…

As said this script has originally been released on the MacRumors Forums:

(*add movie to iTunes

The script will add OSList file-type information to a list of files. This identifies them as movie files, the files are then imported into iTunes.

TO DO:
Verification of file list passed as video files
Growl integration (if installed)
Move repeat loop into separate object script to clean-up code.
*)

--Folder Action [Attach to a folder in Finder]
on adding folder items to this_folder after receiving file_list
repeat with each_file in file_list
try
tell application "Finder" to set file type of file each_file to "MooV"
end try
end repeat
tell application "iTunes" to add file_list
end adding folder items to

--Droplet [Compile and drop items onto application]
on open file_list
repeat with each_file in file_list
try
tell application "Finder" to set file type of file each_file to "MooV"
end try
end repeat
tell application "iTunes" to add file_list
end open

Yes this is basically it. In case you are too lazy to copy and paste. You’ll find the script already put into a Droplet ready for download here. Shouts to Navyn. Nice script…

Enjoy and yes: happy new year to all of you :-)

Links

»MacRumors Forums: Add AVI to iTunes
»Aroona.net: VideoDrive Download
»MegaUpload: Download AVI to iTunes Droplet for free ;-)…
»Perian.org: Download Perian for QuickTime

[MacOS] Chameleon On USB: Mounting USB Stick Correctly

Inserting USB sticks to your Mac OS X based system makes Mac OS X mount the stick without assigning certain permissions like owners, or groups.

I. How things get mounted on Mac OS

The mount command on the terminal returns most likely some lines, like that:

  • testuser$ mount
  • /dev/disk0s2 on / (hfs, local, journaled)
    devfs on /dev (devfs, local, nobrowse)
    map -hosts on /net (autofs, nosuid, automounted, nobrowse)
    map auto_home on /home (autofs, automounted, nobrowse)
    /dev/disk3s1 on /Volumes/CHAMBOOT (hfs, local, nodev, nosuid, journaled, noowners)
    /dev/disk1s4 on /Volumes/Mac OS X Install DVD (hfs, local, nodev, nosuid, noowners)

You can see quite a lot of slices (i.e. ~partitions) are mounted to that system I am running here. For instance disk1s4 is the forth slice of disk1 and it countains an image of a Mac OS X Install DVD. And you can see a CHAMBOOT named drive mounted with several options.

II. Mount Options/Permissions

Our beloved USB stick named CHAMBOOT (contains Chameleon and) is disk3s1 and is mounted to /Volumes/CHAMBOOT. Mac OS handles USB mounting for most of our every day life operations fairly reliable. But this comes at a cost, as this simplicity is achieved here by applying options like nosuid and noowners during the mount process.

For people willing to run Chameleon from a USB stick permissions are inevitable, as for instance an Extensions.mkext kextcache can only be generated with proper file permissions being set.

II. Mounting USB with permissions

This just requires some simple mount operations being performed manually on the terminal. Do the following:

  • testuser$ sudo -s
    Become ultimate root now.
  • testuser$ cd
    Get back to the home folder whereever you’ve been before.
  • testuser$ sync
    Force completion of pending disk writes.
  • testuser$ umount -f /Volumes/CHAMBOOT
    This unmounts the USB stick called CHAMBOOT
  • testuser$ mkdir chamboottemp
    Create a temporary folder for our mounting session
  • testuser$ mount_hfs /dev/disk3s1 chamboottemp/
    Mount the USB stick to the temporary folder
  • testuser$ mount
    See how the drives are mounted now
  • /dev/disk0s2 on / (hfs, local, journaled)
    devfs on /dev (devfs, local, nobrowse)
    map -hosts on /net (autofs, nosuid, automounted, nobrowse)
    map auto_home on /home (autofs, automounted, nobrowse)
    /dev/disk3s1 on /Users/admin/chamboottemp (hfs, local, journaled)
    /dev/disk1s4 on /Volumes/Mac OS X Install DVD (hfs, local, nodev, nosuid, noowners)
    You can see the USB stick is now mounted without “extra” options.

Now you can apply changes to the USB stick’s files in the proper manner (like copying files, repairing permissions and creating a kextcache). After having performed all the changes, you can correctly unmount. Read here:

III. Manually Unmounting

  • testuser$ cd
    Get back to the home folder whereever you’ve been before.
  • testuser$ umount -f chamboottemp
    Force to unmount the device mounted to the chamboottemp folder now.
  • testuser$ rmdir chamboottemp
    It is safe to delete the chamboottemp folder now.

IV. Links

» Mac OS X Reference Library: Man Page for “sync”
» Mac OS X Reference Library: Man Page for “mount”
» AsereBln.BlogSpot.com: Some terminal work

[MacOS] Intel Atom CPUs still Unsupported in 10.6.2 beta

In contrast to what is being written on the major internet newspapers, the latest beta build 10C535 of Mac OSX Snow Leopard 10.6.2 does indeed still not support Intel Atom CPUs anymore.

Stellarola investigated into this issue some of his spare time to find out why different sources tell different things. And the reason is simple: if you run an early built 10.6.2 with an old kernel from july then 10.6.2 will indeed work, but the latest stock kernel in 10.6.2 build 10C535 as of now is not going to allow Atom CPUs to run.

According to Stellarola even in the 10.6.2. build 10C540 the Atom support is not gonna come back.

» Stellarola: Atom CPU – Sir, your pants are on fire

[MacOS] Recommended Apps: MacTubes

Abstract

Do you ever wanted to download some of the YouTube videos, simply to have them available when being on the road? Or say: you wanna archive them, because as we’ve seen in the past with several major media services: there will be a time when they don’t exist anymore.

But YouTube does not support downloading their videos anymore.

MacTubes’ Features

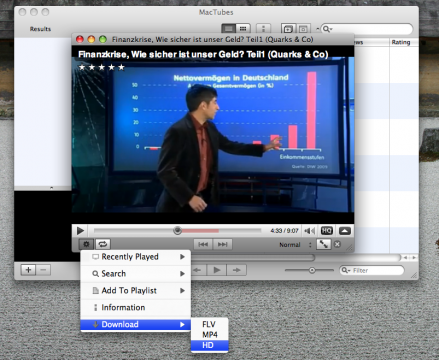
This is where MacTubes by mametunes comes into place. MacTubes is an open source project that is freely downloadable. Besides downloading MacTubes also supports just playing YouTube videos. You also can make custom playlists without having a YouTube account.

Tips and Tricks

MacTubes is straightforward, as most of those nice freeware Mac applications are.

The only hint we can give: don’t wonder if errors occur when trying to download HD videos. This is normal. Although YouTube may show that you are playing the video in HD quality, this is not true in all cases. You can see this quite obviously when comparing the video resolutions between the normal video and the HD video just with your eyes.

Links

» MacTubes Download

Screenshot