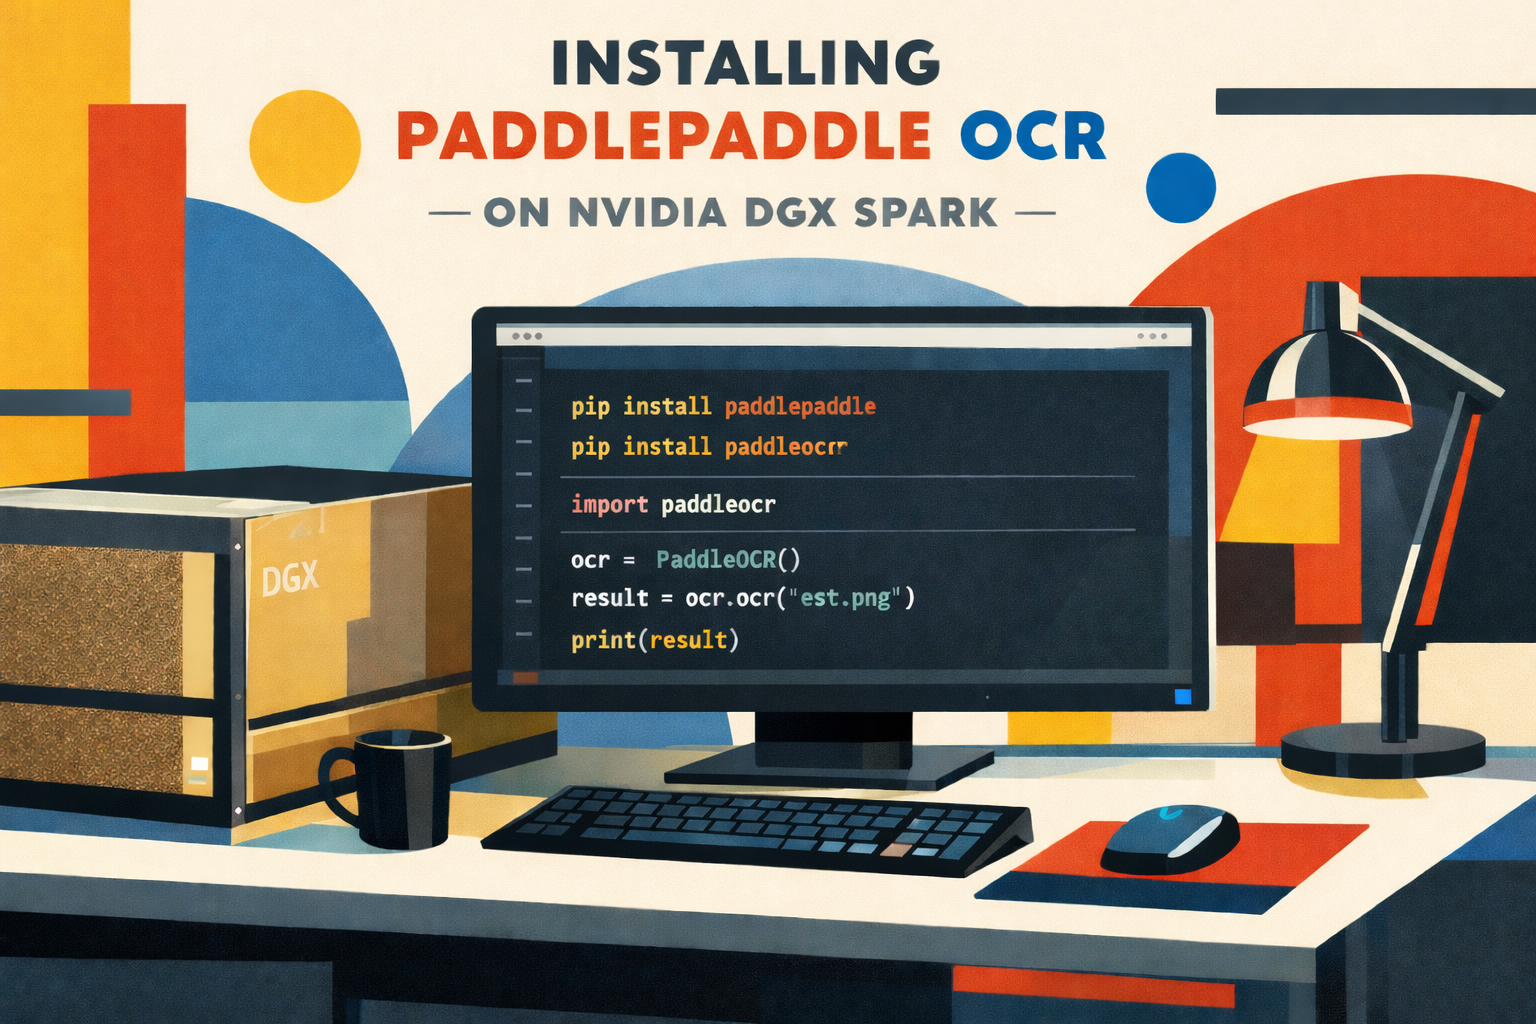
Category Archives: Linux

[Win] Oracle VirtualBox: Workaround For Initialization Issue

“and first for something complete different”: Muzaq… coding or administrating system can’t do without gooood muzaq. Check our latest tunes here :-)

History

VirtualBox is an open source virtualization software. Originally it has been developed by a german company named Innotek, which has been acquired by SUN Microsystems in 2008. SUN Microsystems in turn has been acquired by ORACLE in 2010.

Innotek originally collaborated with Connectix on Virtual PC – a virtualization software targeting the Mac OS platform. Connectix has been bought by Microsoft in 2003. Innotek then decided to develop VirtualBox.

Status Quo

VirtualBox is used by many companies for virtualization and thus developing. Palm for example uses VirtualBox for WebOS development in an emulated environment. Thus allowing either Linux, Mac OS or Windows host systems for development.

CPU VT-X/AMD-V Issue

After configuring a dual core virtual machine and trying to start you may encounter a message box indicating:

VERR_VMX_MSR_LOCKED_OR_DISABLED

This issue may occur no matter which host operating system you’re using. The reason for this might be:

  • you’re not using a CPU that supports hardware virtualization
  • your BIOS does not support hardware virtualization properly
  • hardware virtualization is disabled in your BIOS settings (check it!)
  • there is a bug in your current BIOS version regarding

Known Workarounds

  • Disable USB for the virtual machine
  • Reduce the amount of CPU cores to 1
  • upgrade your BIOS to the latest version (this might be dangerous)
  • Disable VT-X/AMD-V
  • Disable 3D acceleration
  • Shutdown your host machine, unplug (!) from electricity for say 30 secs, reboot then

As we’re currently using VirtualBox only on the Windows XP platform we categorized this article under Win, anyway it is very likely that the same issue also occurs under Linux or Mac OS, as VirtualBox on all platforms derives from the same source code.

Any suggestions, hints or things need to be added? Don’t hesitate to tell us below…

[Linux] Setting up a LAMP Webserver with Apache, PHP, MySQL on Debian Etch

In our Linux Debian section the following articles have been published during the last weeks:

  • How to secure your Debian server by changing the SSH port number (read tutorial here)
  • How to secure your Debian server by setting up SSH for passwordless login via public- and private-key cryptography (read tutorial here)
  • How to secure your Debian server by updating the buggy openSSH Debian package (read tutorial here)
  • How to secure your Debian server by configuring a GUI based Firewall named Firestarter (read tutorial here)
  • How to simplify Debian administration by setting up a graphical interface (GNOME) to be used via VNC connection thru an SSH tunnel (read tutorial here)

I. Abstract

This time we’re gonna set up a LAMP (Linux – Apache – MySQL – PHP) webserver. Furthermore we will consider the basic security implications for such a server. Follow us into the amazing world of Debian server configurations. This article will take you about 60 minutes to follow straightforward (and well it took us a lot more than those 60 minutesto prepare, but nevermind, just click our sponsor to help us, when you found the tutorial helpful).

II. Requirements

Hic at nunc, we need to have an SSH connection (better is a running VNC connection (read tutorial here) to our Debian server, because dumbed down: to eventually access the webserver from all over the web, we will configure our firewall using the Firestarter GUI – read tutorial here)

III. Install and test Apache 2 and PHP 5

III. Part I. Installing Apache 2 and PHP 5

We assume you logged into your server as root. Enter that command:

  • server$ apt-get install apache2 php5 libapache2-mod-php5
    (yes we can use the apt-get install command to install more than just one package, in this case we use it to install three packages consecutively)

III. Part II. Creating a PHP test file

Standard path of your www web folder will be /var/www . For checking if everything went well, we simply create a phpinfo script. Take your favourite editor like vi, vim, joe or nano. We use nano…

  • server$ nano /var/www/test.php

Fill that command into your editor:

  • <?php phpinfo(); ?>

And save and exit (in nano: ctrl+x).

III. Part III: Checking via VNC

When you followed all our other articles about configuring a server, you will have the Firestarter running as a frontend to the iptables firewall. At this point we highly recommend to still block and disallow any incoming connections on port 80, since we will install phpmyadmin and it would be available from all over the net. For Firestarter this means: the only port that has been opened by you explicitly still is the SSH port.

For testing our php environment it is much safer to perform an SSH tunneled VNC connection and start a browser on that server. Which points to http://127.0.0.1/test.php

When everything went well, you will see your server specific PHP configuration.

As this file simply tells to much server internals and since we really don’t need it anymore, we strongly recommend removing it now.

  • server$ rm /var/www/test.php

A file like that is easily forgotten and could become a serious security danger…

IV. Install MySQL, PHP5 connector and phpMyAdmin

IV. Part I. Installing MySQL

We still assume, you’re logged into your server as root. Enter the following command:

  • server$ apt-get install mysql-server mysql-client php5-mysql
    (this time we again install three packages, we could have installed php and mysql even in one step, means we would have supplied an apt-get install with six commands)

IV. Part II. Configuring MySQL

All of us know about the bad guys being outside. We can make their lives a little more difficult by applying a default root password for MySQL. Do the following as root:

  • server$ mysql -u root
    (login as user root)
  • mysql> USE mysql;
  • mysql> UPDATE user SET Password=PASSWORD('yournewpasswordgoeshere') WHERE user='root';
  • mysql> FLUSH PRIVILEGES;
  • mysql> quit;

V. Installing phpMyAdmin

You are logged into your server as root, aren’t you? Enter those commands:

  • server$ apt-get install phpmyadmin

V. Part I. Security precautions for phpMyAdmin I

During the installation of phpMyAdmin a symbolic link will be created to make phpMyAdmin available under that address: http://yourserver.net/phpmyadmin.

We feel this is not a good idea and not a very secure way here. Even if you already set the MySQL root password, it is no good idea to leave standard settings at that, since all the bad guys know this, aswell. So we have two options. First we just put an .htaccess file into that folder. That would work, but has the little disadvantage, that it would show the bad guys that the address http://yourserver.net/phpmyadmin really exists. Therefore we prefer option 2: we make phpMyAdmin available from localhost (means from within the server) only and move it to a new place and make it accessible on a specific port only (we use a non privileged port for that). We still can access our beloved phpMyAdmin simply via SHH tunneled http or SSH tunneled VNC directly on the server.

  • server$ unlink /var/www/phpmyadmin
    (we remove the symbolic link, means pointing to http://yourserver.net/phpmyadmin won’t return any results anymore)

V. Part II. Security precautions for phpMyAdmin II

Since even we still cannot access phpMyAdmin, we need to change the Apache configuration a little bit. Take your favourite editor (we again use nano here) and do that:

  • server$ nano /etc/apache2/sites-available/default

Right in the beginning of that file change (old):

  • NameVirtualHost *

to (new):

  • NameVirtualHost *:80
    NameVirtualHost *:8780

Then change (old):

  • <VirtualHost *>

to (new):

  • <VirtualHost *:80>

and after the closing </VirtualHost> tag, we insert this:

  • <VirtualHost *:8780> Alias /my-pma-is-not-accessible/ "/usr/share/phpmyadmin/"

    <Directory "/usr/share/phpmyadmin/">

    Options Indexes Multiviews FollowSymLinks

    AllowOverride None

    Order deny,allow

    Deny from all

    Allow from 127.0.0.0/255.0.0.0 ::1/128

    </Directory>

    </VirtualHost>

As we can see, we specify 127.0.0.1 (localhost) as the only Allow from address and bind access to port 8780. So our phpMyAdmin will now be accessible from http://localhost:8780/my-pma-is-not-accessible (== port 8780) only. Since port 8780 is behind our firewall and is not accessible from outside, we are quite safe for the beginning.

V. Part III. Security precautions for phpMyAdmin III

As mentioned before we got two ways for accessing our beloved phpMyAdmin now. The first is simply using our VNC connection and start a browser on our server machine and let it point to http://localhost:8780/my-pma-is-not-accessible . The second way is simply forwarding the port 8780 to our local client browser via SSH tunnel.

Having bound the phpmyadmin access to the new port 8780 solves here another issue: forwarding of privileged ports would require root privileges on a client machine. Our somewhat unpurified trick to make Apache listening on a second non privileged port allows us forwarding to a client machine without a hitch.

Let’s edit /ect/apache2/ports.conf

  • server$ nano /ect/apache2/ports.conf

Let’s make it listen to that second port mentioned. Inside the ports.conf add this parameter

  • Listen 127.0.0.1:8780

By now you might guess what this configuration targets at. It creates a listen port for apache on our beloved port 8780 but only for network cards that have the IP address 127.0.0.1. Means in case our firewall would go down and port scanning would give results, there wouldn’t be any results from port 8780…

After that we simply restart our Apache via:

  • server$ /ect/init.d/apache2 restart

VI. Setting up SSH tunnel for http connection

Ok now we almost made it. For security precautions and for server performance reasons it makes sense to not use VNC connections all the time, although it works. But as it is more comfy to edit phpMyAdmin on your local client machine, we simply set up an SSH tunnel thru our server’s firewall and let it forward http from within the server to our local machine.

This can simply be done by entering this on your client’s terminal:

  • client$ ssh -f -N -L 8780:localhost:8780 root@yourdomain.net -p 8722

Congratulations, you’re almost done. You can now start a webbrowser of your choice and let it point to:

  • http://localhost:8780/my-pma-is-not-accessible

et voilà, you’re smack in your phpMyAdmin interface.

Killing your tunnel (and all other running SSH connections) can be done by simply entering on your client machine:

  • client$ killall ssh

VII. Conclusions

We hope you had some fun by conquering this learning curve. There are several points that we only touched on. We might consider applying other security features like faked error reports. We will deal with those faked error reports (means returning a 404 instead of 403) and comprehensive security techniques in forthcoming articles, because this would have lead us here astray.

If you found this article helpful: why not considering our sponsor’s offers? Thanks for re-enacting and now for something completely different: our sponsor …

[Linux] Installing a Firewall (Firestarter) via VNC on Debian

“and first for something complete different”: Muzaq… coding or administrating system can’t do without gooood muzaq. Check our latest tunes here :-)

In our Linux Debian section the following articles have been published during the last weeks:

  • How to secure your Debian server by changing the SSH port number (read tutorial here)
  • How to secure your Debian server by setting up SSH for passwordless login via public- and private-key cryptography (read tutorial here)
  • How to secure your Debian server by updating the buggy openSSH Debian package (read tutorial here)
  • How to simplify Debian administration by setting up a graphical interface (GNOME) to be used via VNC connection thru an SSH tunnel (read tutorial here)

I. Abstract

In this (very short) howto, we’re gonna setup a firewall with a graphical user interface (GUI) for GNOME. This firewall is called Firestarter. Our goal is to further improve safety of our server. We’re gonna do that on a Debian Etch system.

II. Requirements

Hic at nunc, we need to have a running VNC connection (read tutorial here) to our Debian server, because dumbed down: Firestarter is a nice (GNOME) GUI for Nefilter/IPTables (further details here).

III. Installation

Hic et nunc, we follow Kant’s question “What shall I do?”. We assume you logged into your server as root using VNC and opened a terminal. Do the following:

  • server$ apt-get install firestarter
    (installs the firewall)
  • server$ firestarter
    (starts firestarter for first configuration)

IV. Configuration

Firestarter auto recognizes your network card and device id (for example eth0 or venet0). Follow the wizard and click Save and Exit then (here because of german screen shots: Speichern und Beenden).


Then the main Firestarter window will open. Since we want to come back later on after having logged out of our server, we have to open at least one port for our VNC through SSH tunnel. Go to register Rules (here because of german screen shots: Richtlinie)

And add a rule (here because of german screenshots: Regel hinzufügen) for your specific ports.

V. Which ports

The following list is only an example you know best which services your server runs.

  • the normal VNC port will be 5901 or 5900 – since VNC communication is not encrypted on that port, we strongly recommend to only use a SSH tunnel for VNC sessions.
  • in case you followed our recommendation to use an SSH tunneled VNC connection you only need to open port 22, port 5901 or 5900 is not necessary
  • in case you followed even our recommendations to change your SSH port number to somewhat different, open that port instead (you may have a look at your /etc/ssh/sshd_config if you forgot the port number)
  • if you’re running an apache with a website, you probably need port 80, aswell

VI. Activate new rules

  • click on Apply Rule rule (here because of german screenshots: Richtlinie anwenden)

VII. Testing

Stay logged and open a second terminal and try to log in, if everything works you’re done. Thanks for your attention.

If this article helped you, please click our sponsor (Google-Adsense) and help us maintaining this project free. Thanks…

[Linux] Setting Up a Debian VNC Server (via SSH tunnel)

“and first for something complete different”: Muzaq… coding or administrating system can’t do without gooood muzaq. Check our latest tunes here ;-)

I. Abstract

No doubt, configuring a web server won’t work without being in the know of basics about the terminal, vim or nano. Anyway many tasks can also be performed by administrating a server using a GUI. The problem is: only Windows 2003 or Windows 2008 come with a preinstalled remote desktop connection – and they are really much more expensive than Linux solutions. When using our beloved and most stable Linux distribution Debian, it mostly comes preinstalled with almost nothing.

The following article assumes, you have a server, which can be managed via ssh rather than by physically access. We will show you how to setup a GNOME desktop on that server and virtually connect to that desktop using an SSH tunnel.

In case you are running a client machine with:

  • Linux or Mac OS X, just keep on reading, all tools come onboard
  • MS Windows, please install Cygwin with the openSSH package first
    (Note: you may also use the Putty/Pageant combo instead, but this will require some different steps. The following article is straightened to using Cygwin, because we feel it’s got several client sided advantages in contrast to Putty)

II. Preparations

First of all: log into your server via SSH as root. Make sure openSSH has been updated, a serious security flaw has been discovered some days ago concerning Debian based Linux distros. Make also sure you have secured your SSH access. We really recommend public-, private-key crypto for ssh login.

III. Update and Upgrade your server with current packages

Being logged into your server as root, do the following:

  • server$ apt-get update
  • server$ apt-get upgrade
  • server$ apt-get dist-upgrade

to upgade your whole installation.

IV. Installing GNOME

After having done a dist-upgrade we are used to reboot the servers. This might not be necessary in all cases and might be a strange obsession from ancient MS Windows times, but we would recommend it to allow all scripts to become initialized anew.

After reboot login as root again and do the following:

  • server$ apt-get install gnome-desktop-environment

V. Install fonts for GNOME and VNC

Install some (required) fonts for the VNC server GNOME session:

  • server$ apt-get install xfonts-100dpi
  • server$ apt-get install xfonts-100dpi-transcoded
  • server$ apt-get install xfonts-75dpi
  • server$ apt-get install xfonts-75dpi-transcoded
  • server$ apt-get install xfonts-base

VI. Install VNC server

We prefer TightVNCServer, simply because it worked from the very beginning…

  • server$ apt-get install tightvncserver
    (installs TightVNCServer)
  • server$ tightvncserver :1
    (initialize the VNC server for the first time, it will copy some files to ~/.vnc folder and it will ask twice for a VNC password – we recommend to provide it for your own safety)
  • server$ tightvncserver -kill :1
    (stop VNC server – for further configuration purposes)

VII. Configure VNC server

In this example we’re gonna use nano, you can also use vim, vi or whatever you think what editor fits your needs best:

  • server$ nano ~/.vnc/xstartup

We need to change the standard X-Windows interface, since we like to use GNOME.

Original xstartup file:

  • #!/bin/shxrdb $HOME/.Xresources
    xsetroot -solid grey
    x-terminal-emulator -geometry 80x24+10+10 -ls -title "$VNCDESKTOP Desktop" &
    x-window-manager &

Change this to

  • #!/bin/shxrdb $HOME/.Xresources
    xsetroot -solid grey
    x-terminal-emulator -geometry 80x24+10+10 -ls -title "$VNCDESKTOP Desktop" &
    # x-window-manager &

    gnome-session &

Save and exit nano (ctrl + x).

VIII. Setup an SSH tunnel for VNC connections

VNC connections are usually to be found on port 5901. Usually they are not encrypted on that port. That means you send the VNC password unencrypted thru the net to that port. Since this allows too many attacks, it is just too weak for a web server solution.

We don’t want to provide possible Zombies. So the solution is: we just setup an SSH tunnel as a wrapper for our VNC connection. Further information about SSH tunneling can be found here and here.

On your client machine do the following:

  • client$ ssh -f -N -L 5901:localhost:5901 root@yourserver.net

In case you changed the ssh port on your server (like we recommended in our article here), you need to specify your ssh port for the SSH tunneling aswell, like:

  • client$ ssh -f -N -L 5901:localhost:5901 root@yourserver.net -p 8722
    (in this case we use port 8722 instead of the standard port 22)

IX. Connect to your server via VNC

Start tightvnc on your server:

  • server$ tightvncserver :1

In case you like to have a different screen resolution than 1024×768 you may start tightvnc with:

  • server$ tightvncserver -geometry 1280x1024 :1

On a Mac the VNC client is called Chicken of the VNC (Download here). On Windows you can use RealVNC (Download here). Both work quite similar and contain almost the same features.

Use the VNC client (like Chicken of the VNC) to connect to your SSH tunnel,

  • connect to localhost (or 127.0.0.1)
  • display 1, because of port 5901 (display 0 would be port 5900)
  • enter your VNC password
    (the password, that has been setup in step VI. Install VNC server)


  • hit connect and
  • you should see something like that (on vservers the performance may be kinda slow and GNOME’s GUI may take some time to initialize).

Congratulations, you’re done.

X. Stopping VNC session and SSH tunneling

You can simply quit the VNC session by just closing your VNC client. But the SSH tunnel from your client to your server will still be up until you stop it (means until you kill it). We may provide a simple script to do that when we finished cleaning it up. Right now it is kinda spaghetti code. Although this is not too comfy, you may live with a simple command until then:

  • client$ killall ssh

It simply kills every SSH process :-)

XI. Final words

We hope you enjoyed our trip into the amazing VNC worlds on Debian and also hope you learned something. You could now setup a firewall like firestarter, which is GUI driven. We will publish some words about this in the early future.

And of course, you are still invited to consider our sponsor (Google-Adsense) and help us maintaining this project here free. Thanks…

[Linux] Severe SSH security issues in Debian

I. Abstract

It has been found by Luciano Bello that the Debian OpenSSL package has a severe security bug since 2006. By removing some lines of code from the md_rand.c source code that originally caused the memory check tool Valgrind to alert (see original Debian discussion here) the box of pandorra has been opened and the flaw been introduced.

By removing that specific part of the OpenSSL code, effectively the random seed function has been crippled, and eventually the only random value remaining was the current process ID. Since on linux only a maximum no of 32,768 process IDs exist, the worth of this pseudo random number generator (PRNG) is heavily limited.

Update: a set of instructions has been added under IV. How to fix/repair your server (click here).This shows the steps to a secure server with new SSH server side keys.

Update II: a new fix has been released as of May, 16th (4.3p2-9etch2). You should therefore apply step IV. again to upgrade your SSH package to the recent version.

II. Impact

As a summary based on infos from metasploit.com.

  • Debian based distributions are affected aswell (i.e. Ubuntu, Kubuntu, Xubuntu, Edubuntu, Gobuntu etc. pp)
  • SSL and SSH keys generated between 09/2006 and 05/2008 are vulerable to brute force attacks
  • SSL certificates need recreation and signed again by Certificate Authority
  • Certificate Authority keys need to be regenerated and revoked.
  • SSH public key authentication on other distributions than Debian may be affected aswell when keys have been generated on Debian systems
  • SSH servers using host keys generated on Debian are vulnerably to man-in-the-middle attacks

III. Testing for weakness and vulerability

Debian released a program for testing the vulnerability of keys. Download it here (see OpenPGP signature). You may do the following. Log into your server as root and do:

  • server$ wget -c http://security.debian.org/project/extra/dowkd/dowkd.pl.gz
  • server$ gunzip dowk.pl.gz
  • server$ chmod 700 dowk.pl
  • server$ ./dowkd.pl host 127.0.0.1
    (checks your local SSH host keys)
  • server$ ./dowkd.pl user
    (checks all users available on your system)

Vulnerabilities will be reported. Nonetheless we recommend to apply step IV. How to fix/repair your server (click here).

Before reading on: if this article helps you, please click our non-offensive sponsor (Google-Adsense) and help us maintaining this project free. Thanks…


IV. How to fix/repair your server

Log into your server as root and perform the following steps:

  • server$ apt-get update
  • server$ apt-get upgrade
  • server$ apt-get dist-upgrade

The OpenSSH and OpenSSL packages will be updated then. You will be asked a couple of questions concerning your server configuration. It should be fairly self explaining.

The server side SSH keys (known_host keys on your local machine) will be regenerated. If you still don’t trust your server, you can check your new host keys for vulnerability by entering this:

  • server$ ssh-vulnkey
    (the response should be Not blacklisted)
  • server$ ./dowkd.pl user
    (if this reports weak keys read on)

Login as user whose keys have been recognized as weak and do the following:

  • server$ ssh-keygen -t dsa -b 1024
    (provide passphrase!)

You should be done now.

V. Tools

H.D. Moore of metasploit.com already prepared Debian toys and rainbow tables (pre-generated keys) for all possible 32,768 PIDs with up to 4096 bits in keysize that may be used for testing the brute force vulnerability of your systems.

VI. Links:

» debian.org: Security Advisory DSA-1571-1 openssl
» debian.org: Security Advisory DSA-1576-1 openssh
» debian.org: Vulnerability test tool… (OpenPGP signature)…
» metasploit.com: OpenSSL Rainbow Tables

[Linux] Upload and Download via SSH terminal

I. Abstract

Sometimes we experience the situation we need to upload or download something and there is no ftp installed yet. The following article provides information about uploading (push’ing) or downloading (pull’ing) via SSH using the terminal only.

II. Push commands (Upload to server)

  • client$ ssh remote_address cat <localfile ">" remote_file
  • client$ ssh remote_address cat <localfile - ">" remote_file
  • client$ ssh remote_address cat <local_file "|" dd of=remote_file
  • client$ ssh remote_address cat - <local_file "|" dd of=remote_file
  • client$ cat local_file | ssh remote_address cat ">" remote_file
  • client$ cat local_file | ssh remote_address cat - ">" remote_file
  • client$ dd if=local_file | ssh remote_address dd of=remote_file

III. Pull commands (Download from server)

  • client$ ssh remote_address cat remote_file > local_file
  • client$ ssh remote_address cat "<" remote_file >local_file
  • client$ ssh remote_address dd if=remote_file | dd of=local_file

If that helped you well, consider clicking our sponsor (non offensive Google Adsense) to help maintaining this project free for all of you…

IV. Final words
We hope we could be of service and those commands helped you a bit. In case you found what you were looking for, you may consider our sponsors. They really got the coolest offers and allow us to run this site. Thanks.

[Linux] Securing a Debian server by Enabling passwordless Login

I. Abstract

All of us know, there are lots of bad guys out there just trying to brute force our ssh ports. The following article provides information about the first steps to be performed when setting up a new webserver running Debian Etch.

For security reasons we recommend applying these how to’s before proceeding

  • Mandatory: How to secure your Debian server by updating the buggy openSSH Debian package (read tutorial here)
  • Optional: How to secure your Debian server by changing the SSH port number (read tutorial here)

The following howto will show you how to enable SSH login without a server based password (passwordless login) and how to disable password login in general on your server.

II. Generate SSH public- private-key pair

  • Generate keypair on your Linux client machine (works on Cygwin and Mac OS X as well!)
    client$ mkdir ~/.ssh
    client$ chmod 700 ~/.ssh
    client$ cd .ssh
    client$ ssh-keygen -q -f id_rsa -t rsa
  • You will be asked to provide a passphrase to encrypt your private key. Although you might leave this empty, we strongly recommend to provide it – for you own safety
  • In the folder called .ssh you will then find those two files:
    id_rsa > contains private-key (encrypted with your passphrase)
    id_rsa.pub > contains public-key (to be put on your Etch Webserver)

III. Upload public-key to server

  • In detail: the output of id_rsa.pub (which in fact is a textfile) is pushed via ssh on your root’s homefolder and being saved there as id_rsa.remote:
    client$ cat id_rsa.pub | ssh root@yourdomain.net cat “>“ id_rsa.remote

IV. Activate public- private-key authentication

  • log in to your server
    client$ ssh root@yourdomain.net (provide your password)
  • you may install nano (if you like vim, stay with vim), imho nano is faster for simpler tasks, but vim is much more powerful, so having both is no loss ;-)
    server$ apt-get install nano
  • Edit SSH configuration to allow public-key login
    server$ nano /etc/ssh/sshd_config
  • Allow AuthorizedKeysFile only (still in sshd_config)
    AuthorizedKeysFile %h/.ssh/authorized_keys
  • Disallow Password driven login (still in sshd_config)
    # Change to no to disable tunnelled clear text passwords
    PasswordAuthentication no
  • Save and exit (in nano: ctrl + x)
  • restart ssh deamon
    server$ /etc/init.d/ssh restart
  • Go back to your root’s home folder
    server$ cd
  • Makedir .ssh
    server$ mkdir .ssh
  • Copy uploaded id_rsa.remote to .ssh folder
    server$ cp id_rsa.remote .ssh/authorized_keys

V. Test your configuration

  • Don’t log out of your server, instead open a second terminal on your client machine to test your new configuration:
    client2$ ssh root@yourdomain.net
    (provide the passphrase for your private-key)
  • If everything works well, congratulations you’re done, consider clicking our sponsor (non offensive Google Adsense) to help maintaining this project free for all of you…

VI. Kindly Sponsored by


VII. Further steps

If you didn’t already do it. For further improving your server’s security you probably want to change ssh port address from 22 to anything else? Read here, how to do that…

[Linux] Change Standard SSH Ports

“and first for something complete different”: Muzaq… coding or administrating system can’t do without gooood muzaq. Check our latest tunes here :-)

Are you also tired of those weird guys, script kiddies and wanna-be-hackers, who are trying to ssh your server on port 22? All those connection attempts cost your server time and in the end your money.

I. Abstract:

By just changing the standard ssh port of your server you can reduce the amount of unwanted login attempts quite effectivly. Simply because it would take too much time for these ugly guys to find out about your specific configuration. Although this is just a basic proactive measure, it is statistically proven that a significant amount of these kiddies do decide to move on to try to hack another server.

II. Requirements

The following lines are being applied to a Debian Etch based box. Other distros should work similar, but I am not experienced with them. Moreover there is no specific knowledge required.

III. Edit sshd_config

  • get your favourite editor by hand (no matter if this is vi, vim, nano, joe or any other thing), here nano is sufficient. Btw: nano comes preinstalled on Mac OS boxes. In case it is absent I am quite familiar with vim aswell, but imho nano is much faster for simpler tasks like the one we’re going to solve and vim is much more powerful for complex operations.
  • nano /etc/ssh/sshd_config
  • see the line, where that code is written:
    # What ports, IPs and protocols we listen for
    Port 22
  • change this port to whatever port you like. May I suggest 8722 ?

IV. Recommendations for testing

  • If you are using a firewall (you should!!) don’t forget to open that port! Otherwise you won’t be able to login on that port ;-)
  • For testing purposes (like when you don’t have physical access to that server) I would really recommend to not edit the sshd_config by just changing that line:
  • # What ports, IPs and protocols we listen for
    Port 22

    I’d rather recommend to add a second port, like that:
    # What ports, IPs and protocols we listen for
    Port 22
    Port 8722
  • Your server will then listen on two ssh ports!
  • The advantage is: if anything (like) firewall doesn’t work you are not locked out of your box and won’t have to much hazzle with running a recovery console and so on.

V. Restart ssh deamon to apply changes

  • Ok let’s get our new (added or changed) ssh port running:
    /etc/init.d/ssh restart

VI. Login again

  • then open a new terminal and try to connect with the switch “-p” (port)
    ssh myuser@mydomain.com -p 8722
  • if the login attempt works on port 8722, you can remove “Port 22” from your sshd_config (restart ssh deamon then again)
  • otherwise login on port 22 as usual and fix your firewall settings

Don’t hesitate to leave a comment. In case that explanations where helpful do us the favor and visit our sponsor (Google). Thanks…

Sponsor:

[Linux] Workaround for SSH buffer error

I. Abstract
Some of you may already have experienced the same phenomenon. We wanted to secure one of our servers and disallow any password login. We configured the passwordless login to use ssh and use public-, private-key mode (see here) instead. But after having saved the sshd_config file, we eventually couldn’t reconnect to our Debian server from our Cygwin console. Instead we received a buffer error. The following lines show what we did and a somewhat not 100% clean workaround.

II. What did we do?

  • we set up a Debian Etch server to use Public and Private Key authentication only (see here how to do it)
  • we edited the sshd_config
    server$ nano /etc/ssh/sshd_config
  • we set
    PasswordAuthentication No
  • we saved sshd_config and quit vim
  • we restarted out beloved ssh deamon
    server$ /etc/init.d/ssh restart
  • we then logged out and found that we cannot login by entering
    client$ ssh -o PreferredAuthentications=publickey root@somedomain.com
  • arghhhhh…

III. Workaround

  • we examined the errors:
    buffer_get_ret: trying to get more bytes 4 than in buffer 0
    buffer_get_int: buffer error
  • After fumbling here and there we just removed the known_hosts file on the local client
    client$ rm ~/.ssh/known_hosts
  • we reauthorized the domain and guess what?
  • The error vanished
  • obviously the known_hosts was modified to have a line break somewhere in the middle of the public-key. I suspect openSSHp to have caused this incident

If the above solved your problem aswell, please help us maintaining this site by visiting our sponsors:

IV. Sponsored by