Category Archives: MacOS

[iPhone] Issues with iPhone DFU mode in MacOS 10.5.6

According to forum reports the iPhone DFU mode, which is required to install custom firmware with PwnageTool, does not get detected properly after updating Mac OS X to 10.5.6.

That means you cannot Jailbreak or Unlock the iPhone currently. The iPhone Dev Team has investigated in to this issue and comes to the conclusion that this is not a countermeasure by Apple, but a bug in the new kernel.

The Phone Dev Team names possible fixes for 10.5.6. As always: you do this at your own risk!

1. Replace the following plugin kexts from within IOUSBFamily.kext with the ones from 10.5.5 and then rebuild kextcache (if you don’t understand this, then you shouldn’t attempt it!)

/System/Library/Extensions/IOUSBFamily.kext/Contents/PlugIns/AppleUSBHub.kext

/System/Library/Extensions/IOUSBFamily.kext/Contents/PlugIns/IOUSBCompositeDriver.kext

2. Use a USB hub in-between the DFU device and the Mac and insert/reinsert the iPhone’s USB cable.

3. Use a PwnageTool created .ipsw on Windows! Oh the irony!

If you did not update yet to 10.5.6 better don’t do it and wait for a fix or for 10.5.7 to be released.

[MacOS] Switcher’s Hints 1001: Moving Cursor in Terminal

Mac OS has the wonderful feature that it’s got a BSD compatible Unix enviroment called Darwin as the basis. You can get to it by simply starting the terminal. Once getting used to it you even install Cygwin to your Microsoft Windows installation because it simply is a powerful way of controlling your computer.

Anyway typos and forgotten parameters is pita once you entered some longer commands. Going back to the beginning of the line is real pain, using the right/left cursor arrows takes forever. But there are workarounds…

The following list shows some of the most common commands that help to use the terminal more effectively – derived from the old unix days btw.

Key
Function
Ctrl-A jump to beginning of the line
Ctrl-E jump to end of the line
Esc-F jump forward word by word (requires to hit Esc every time again!)
Esc-B jump backword word by word (requires to hit Esc every time again!)
Tab completes the names of folders and files

BTW: Did you consider our sponsors yet, they really got the coolest offers. Thanks for helping us maintaining this page free.

[MacOS] Switcher’s Hints 1001: Most Helpful Shortcuts

Mac OS is much more depending on mouse commands than Microsoft Windows. Anyway there are some shortcuts that make your switcher’s lives easier.

Key
Meaning
Cmd-Tab change between programs (not between windows)
Fn-F9 thumbnail overview of all windows
Alt-Cmd-Esc kill programs instantly
Shift-Cmd-3 screenshot of whole screen (saves on desktop)
Shift-Cmd-4 select part of the screen for screenshot (saves on desktop)
Shift-Cmd-4 + Space select active window for screenshot (saves on desktop)
Esc (in textfields) auto complete
Cmd-PageDown execute program/open subfolder (like return-key in MS-Windows)
Alt-Eject instantly eject CD/DVD
Alt-Cmd-Eject instantly go to sleep mode

Cmd-Key = Apple-Key

[MacOS] Switcher’s Hints 1001: Change the Dock to 2D

You don’t like the Dock in 3D? You like it in 2D but sadly this is available only if you put the Dock to the left or the right side of the screen? There is a simply command that can help you :-)

Changing the Dock to 2D

Just open a terminal and do the following:

  • myUser$ defaults write com.apple.dock no-glass -boolean YES
  • myUser$ killall Dock

Et voilà, it looks like this:

Changing the Dock back to 3D

In case you want to change it back to 3D for whatever reason, do this:

  • myUser$ defaults write com.apple.dock no-glass -boolean NO
  • myUser$ killall Dock

And it looks again like default:

If this article helped, consider our sponsors, they may help you aswell – at least they help us maintaining these pages, that help you. Got it? Thanks :-)

[MacOS] Save your Data after EFI-X Crash

I. Abstract

Imagine the following situation. You are very keen on this EFI-X device that’s now on sale. So you order a testing device. Some days later the device arrives from Taiwan. Your EFI-X compliant system already kept waiting with a blank SATA 250GB on a Gigabyte EP35-DS3.

After having plugged the EFI-X module to your system, you install MacOS on your PC. It’s really worth the bunch of money since EFI-X lets MacOS boot like a charm. Easy and nice to handle for everyone who is not more willing to hack device drivers into their Hackintoshs. But as a tinkerer who wants to see how it works in real life and so you decide to apply the newest update for your EFI-X module. Since you’re a Mac user you decide to use the MacOS tool provided by the EFI-X team.

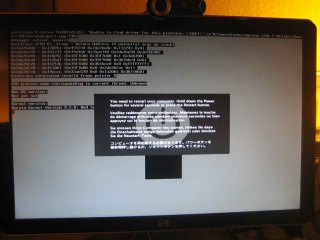
All works well during update, until you do the reboot. All of a sudden the intro boot screen of EFI-X looks quite garbled (like the screen below). You wonder what might have happened and do a reboot. As it doesn’t help you plug your EFI-X to another computer hoping you may be able to flash it again using Windows XP. But after all the installation argy-bargy with EFI-X’ virtual device driver under Windows XP – the update tool tells you, you are running the current version.


To make a long story short. EFI-X has customer service and they will exchange their defective units. You may also have a look at the EFi-X Bug Hunt forums for further assistence (please don’t link our article from EFI-X Bug Hunt forums, they will remove it and may ban you – don’t say we didn’t warn ya ;-) Anyway if you need to have access to your data until the RMA unit arrives, we prepped the following article. We’re going to show you how to make your system bootable after the EFI-X device broke for whatever reason.

A short remark before we start: this article is partly based on a HowTo by a guy going by the nick Menoob. We shamelessly stole the method of installing retail Leopards on PCs and adapted it a tiny bit for this EFI-X specific case. Anyway: all the shouts fly out to him.

II. What you need

  • 30 minutes of your precious life time – you may use this time to think about why you didn’t buy a real Mac
  • a Boot-132 disk – it contains your MacOS compatible bootloader (find a list of Boot-132.iso’s for different mainboards and chipsets here – in case you don’t know you should always give the generic.iso a try) – Kudos to Sonotone/Hackint0sh forums!
  • burn the Boot-132 onto a blank CD-R or CD-RW

III. Prepping your hardware

  1. remove the defective EFI-X device and if you feel you don’t need it, send it to the CCC for further examination
  2. let only the MacOS drive and the CD/DVD drive plugged, unplug all other drives from your motherboard
  3. start your computer and hit DEL key to go into your BIOS
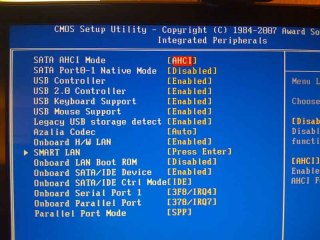
  4. inside of your BIOS: set the MacOS harddrive as first boot device and enable AHCI mode for SATA drives – your drives will appear orange/yellow in MacOS, don’t worry about that
  5. save the BIOS changes and reboot

IV. Booting your system

  1. turn on your computer
  2. insert the just burnt Boot-132 CD-R into CD/DVD drive
  3. during BIOS startup hit the F12 key to manually choose your boot device (applies to Gigabyte boards only!!!)
  4. Choose to boot your CD/DVD drive
  5. Your screen will show that ISOLINUX 3.6x is prepping to boot the Multiboot loader
  6. since this ISOLINUX bootloader is not too user-friendly ;-) you will find yourself with a screen similar to this.
  7. Hit the F8 Key. You’re gonna see this:
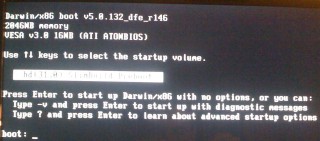
  8. Hit the ESC Key. and You’re gonna be welcomed with this screen.
  9. Now enter 80 and hit return, if the name of your MacOS harddrive shows up, 80 was the right number, if it does not show up, give 81 a try and so on.
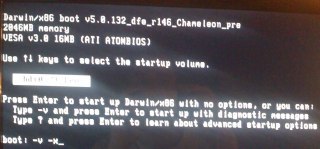
  10. Once you’ve found your MacOS harddrive, the bootloader will require again some parameters. Simply enter -v -x as parameters and hit return (you may find more infos about these Darwin boot parameters here)
  11. if you experience the “still waiting for root device” issue, just reset your system and play with the AHCI mode for SATA inside of your BIOS
  12. Anyway: booting will take a long while – in our case about 5 minutes until the login screen appears
  13. login into your system

V. Saving your data

  1. Examine which data you require from your formerly known as almost native system
  2. plug your external harddrive (if you plan to migrate data to Windows, better have the external drive FAT32 formatted)
  3. Copy the files

VI. Final Words

Ooop duh. You got some more options here that we cannot cover at this time:

  1. You may revive this system with the hackint0sh ingredients (dsmos.kext and kexts for audio and video cards) – this will be a longer journey
  2. You may also get a real Mac. In this case Apple will suddenly love you…
  3. We recommend to give also Microsoft’s Vista a try. We feel like Vista Aero Glass effects are currently superior to Leopard’s effects. In this case Microsoft will love you (and us for suggesting this)…
  4. You could also go up the hill to the end and find Debian and ask yourself why it took so long to understand that unix is beautiful – in this case nobody will really love you but during installation you’ll find plenty of new friends in the Ubuntu community explaining you Debian…
  5. :-)

Anyway we hope that article helped you a tiny bit. If so you may also consider our sponsors, they also help you (and us of course)…

[MacOS] Using CrossOver to run UltraEdit

I. Abstract

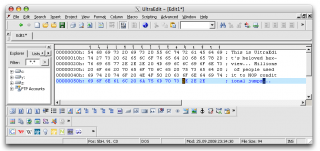
Many of us are nowadays using different operating systems almost at the same time. At work most of us use Windows machines, at home we use a Mac, coexisting with a Windows Laptop. Although we really like the Mac eco system, from time to time we find out we’re missing something from the Windows world very desperately. Many of us coders who recently switched to a Mac soon find out, we miss one thing for sure: UltraEdit. UltraEdit is one (if not even the) editor for the Windows environment. And once you get used to a workflow you will not want to miss it, no matter if you switched completely or not. This is were the emulators or the virtual machines come into play. As long term users of UltraEdit we’re gonna show you in the following article how to get UltraEdit (almost natively) installed on MacOS using the WINE based CrossOver by CodeWeavers. Enjoy…

II. What you need

  • Intel Mac (or a Hackintosh with EFI-X) running MacOS X 10.5 Leopard
  • CrossOver Mac 7.0.1 installed. Get a CrossOver trial version here (we recommend to get the “Professional Version” as it also includes CrossOver Games, but for running UltraEdit only, CrossOver Standard Version will be sufficient.)
  • UltraEdit 14.10 installer. Get an UltraEdit trial version here. In case the downloaded file is .zipped, please unpack before proceeding.

III. Prepping CrossOver

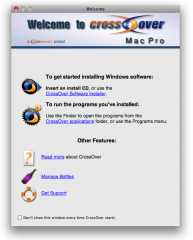
  1. Start CrossOver. The welcome screen will ask you what to do. Click the “CrossOver Software Installer” link:
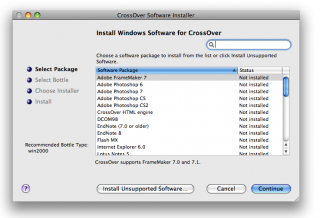
  2. An Installer window will pop up. Choose “Install Unsupported Software“:
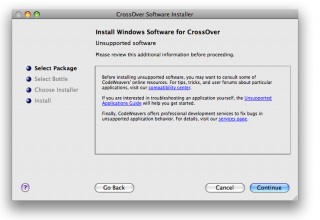
  3. Click “Continue” after having read this reminder:
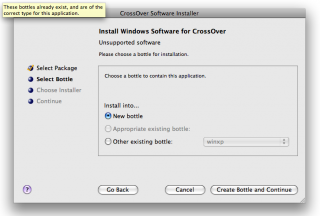
  4. Choose to “Install into... New bottle” and click “Create Bottle and Continue“:
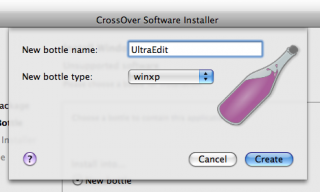
  5. Enter the “New bottle name:” (like UltraEdit, for example) and choose “New bottle type” as “winxp” (yes, means Windows XP compatibility mode). And hit the “Create” button:

    The bottle is being created then. This process may take some minutes on older machines.

IV. Installing UltraEdit

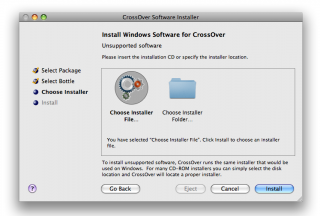
  1. After bottle creation, CrossOver like to install. So “Choose Installer File...” and click “Install“…
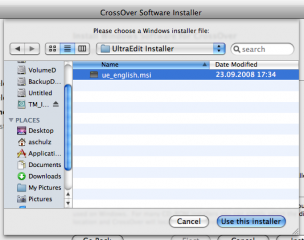
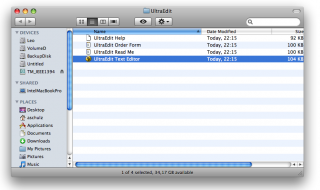
  2. Locate the installer file. It will be called something like “ue_english.msi“. Click “Use this installer“:
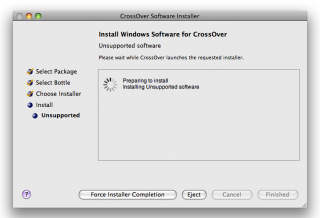
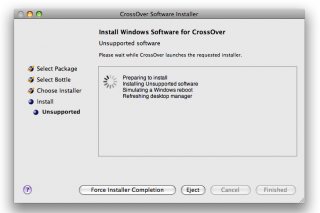
  3. CrossOver will prepare to install (no interaction of yours required here!)
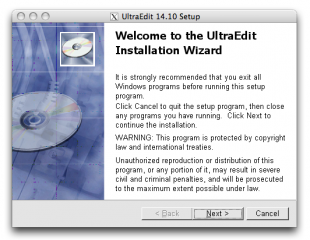
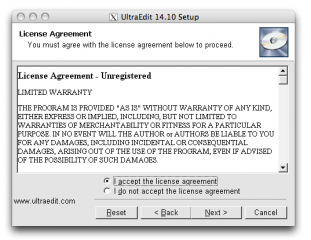
  4. Et voilà, the well known Windows installer will be loaded. Click “Next
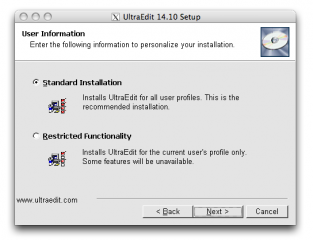
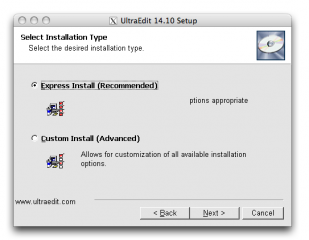
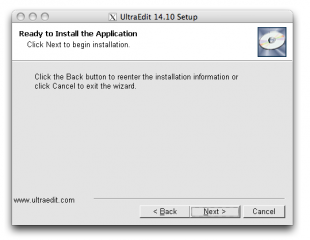
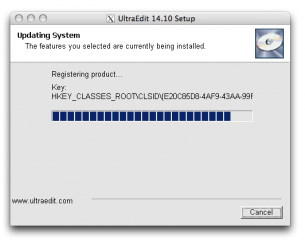
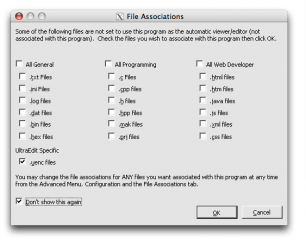
  5. We expect, you know how to install Windows software, so we’re not gonna comment the following screenies:


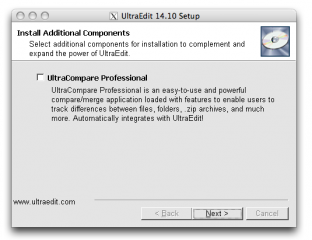
  6. We did not install UltraCompare, but you may give it a try…
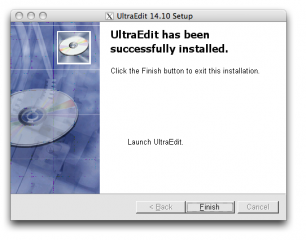
  7. Uncheck the “Lauch UltraEdit” box and click “Finish“.

V. Final preparations

  1. After installation, Crossover will do a virtual reboot of its Windows XP bottle, where you installed UltraEdit into (no interaction of yours required here!)
  2. After virtual reboot, it will create the program links. You may now double click the “UltraEdit” program link to start it.
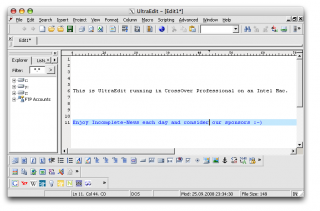
  3. Feeling home already?
  4. Don’t hesitate to type some lines

  5. Yes, you’re done…

VI. Final words

We hope you had some fun, following this tiny HowTo to get UltraEdit back to our new environment. Although the FTP feature did not work for us, as it crashs UltraEdit, by being able to run UltraEdit we can use our trained workflow for coding and editing. Anyway there are native editing solutions on a Mac, which we will have a closer view on within next time.

[MacOS] HowTo Update to MacOS X 10.5.4

Abstract

Just four weeks ago Apple released update 10.5.3. It seems it didn’t hold too long, since 10.5.4 has been released two days ago. Features of 10.5.4 include Apple’s recent security updates, RAW image support for many cameras, Airport bugfixes, iCal bugfixes, Safari bugfixes, Spaces and Exposé bugfixes (read all details here). To sum things up: Apple recommends to apply this update as soon as possible.

So the most unanswered question for us white-box OS X users: how to update my Hackintosh? There are two different ways, depending which revision you’re running currently. If you are on 10.5.3 update is fairly easy. If you are on a revision below 10.5.3 you need to apply some more steps when using the combo update. Follow our short instructions and your are finished virtually before you even started ;-)

Update from 10.5.3

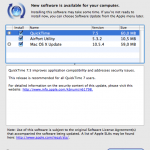
You can simply use the auto-updater from within MacOS X’ Software Update (see picture).

Apple Software Update


Update from 10.5.2, 10.5.1 or even earlier

Get yourself the comboupdate from here: Download,
then apply the instructions we already described here. Because the instructions for updating to 10.5.2, 10.5.3 or using the 10.5.4 combo update are the same.

Enjoy and tell us about your experiences.

[MacOS] Root Exploit in Apple Remote Desktop (ARD)

Update 26.06.2008: read latest news about this exploit here

Abstract

Intego reports (read details here) a “bug” in Apple’s Remote Desktop (ARD) application. In short: the ARD Agent runs AppleScripts always with root privileges. Now, when you put shell-commands into that AppleScript they are executed as “root”. ARD doesn’t require any admin/root password to do so.

An Example

Heise.de (read here – german only) has prepped a simply example to show us where we are… open a console and simply enter:

  • mymacbox$ osascript -e 'tell app ARDAgent to do shell script whoami';

The answer will be:

  • root

We won’t delve into this too deeply, but in the meantime there have already been posted several ways to use this exploit. One shows how to open a root-shell on TCP port 9999, which is really scary simple. At first it was expected people need physical access to the machine, but it is confirmed that is also works if being applied on a OS X server where a user got an account with limited rights.

How to fix this

Two ways have been reported to circumvent this issue. One way might be enabling “Remote Management”:

  • Open System Preferences
  • Open Sharing
  • Enable Remote Management

The other way – which we recommend – is to manually repair permissions of ARDAgent.app via

  • mymacbox$ chmod u-s /System/Library/CoreServices/RemoteManagement/ARDAgent.app/Contents/MacOS/ARDAgent

Conclusion

Get yourself a Mac virusscanner (consider our premium sponsors). Viruses for MacOS X are chomping at the bit…

[MacOS] HowTo Update to MacOS X 10.5.3

Update 02.07.2008: MacOS X 10.5.4 is out now. See our notes here.

I. Abstract

Three days ago (May, 28th) Leopard update 10.5.3 has been released. It solves several security issues and application issues (read details here). So sumed up: you should update. Being on a Hackint0sh we need to take some things into consideration because we cannot use the built-in auto update.

The following article shows how to upgrade your Intel based Hackintosh to version 10.5.3. The approach is pretty much the same like updating to 10.5.2 and can be applied to both updates.

One limitation: the whole update process is currently only applicable to close-to-original-mac-hardware and is being done manually. Note: we did not test this on AMD based Hackintoshs.

Note to first timers: after having installed the update. The updater asks you to reboot. Do not hit the restart button eventually, instead read on. Some more steps need to be applied before you are allowed to reboot. Don’t say, we didn’t warn you!

II. Enable root user

In case you did not enable root user access to your system yet, this is a good time to do that. This has been described a thousand times elsewhere, so we won’t delve into this too deep:

  • Open Directory Utility.app
  • click the Lock to allow changes (!)
  • then Edit > Enable root user > supply password of your choice

III. Obtain update package

For manual update we need to get the updater.

IV. Back up important data and custom kexts

Backup important data like

  • documents
  • emails
  • muzaq
  • videos
  • downloads etc.

Don’t say we didn’t warn you in case anything goes wrong for whatever reason. After having done the backup of your personal data, do the backup for your system specific kexts.

Most simple way is using a terminal. Do the following:

  • hackint0sh$ su
    (provide root password)
  • hackint0sh$ cp -r /System/Library/Extension/KEXT-I-WANNA-BACKUP /TARGET/FOLDER/KEXT-I-WANNA-BACKUP

That kexts might be:

  • Audio
  • LAN
  • WLAN
  • Graphics Adapter etc.

This highly depends on your hardware. I am running an ASUS P5LD2 VM DH with a Sapphire HD 2600 XT. In my case I only need to backup my Natit.kext device driver and dsmos.kext, because history taught me a strange lesson once.

V. Use monitoring script

Since AppleIntelCPUPowerManagement.kext would simply kill our systems we need to make sure it does not become loaded into the kernel. So netkas supplied a little command line, which monitors the install of that file and if found removes it. You need to be logged in as root:

  • hackint0sh$ while sleep 1 ; do rm -rf /System/Library/Extensions/AppleIntelCPUPowerManagement.kext ; done

This command line must run until the end of the update.

VI. Process the update

Just mount your downloaded MacOSXUpdCombo10.5.3.dmg and begin your update. When the update process is complete

! ! ! ! _ d o n ‘ t _ i n s t a n t l y _ c l i c k _ r e s t a r t _ ! ! ! !

Instead of restarting, stop the while command line from step V. Stop it by hitting CTRL and C and read on, but don’t restart your system, until we say it.

VII. Modify startup script

Sadly, we are not running OS X on original hardware. The consequence is we are missing a chip for the fan control that holds a specific key (Alexander Graf told about the details here – german only). This key is necessary to run the graphical interface Aqua of Mac OS X (in fact: this key decodes the binaries – details about the binary protection are provided by Amit Singh here).

To make a long story short: we don’t want the operating system to look for that specific chip and key, we can supply it easier (via emulator). Netkas provided the emulator called dsmos.kext (kernel extension) for that problem as well.

Simply do the following (I assume you know how to use nano, you can also use vi or whatever you prefer).

  • hackint0sh$ nano /System/InstallAtStartup/scripts/1

In that 1 file there must be a line of code like this (old)

  • /System/Library/Extensions/Dont Steal Mac OS X.kext

This needs to be changed to this (new):

  • /System/Library/Extensions/dsmos.kext

Then save and exit. Using nano simply click CTRL and X, you will be asked if you wanna save before exiting.

VIII. Restoring kexts

We highly recommend you are logged in as root on a command line. In step IV. you saved your specific kexts. Now is the time to recover them to this folder:

  • /System/Library/Extensions

We will not explain how to use the copy command: this is the learning curve for today 8-))

IX. Reboot your machine

After having restored your system specific kexts. You reboot your machine. On first reboot, screen will not show the GUI but will show a black screen for about 3 minutes. It will then reboot again and it will take about 3 minutes again to show you the GUI (in our case the login window).

Shouts fly out to Netkas who’d better call himself +netkas and to Davil Elliott ;-) Live long and prosper, dudes!

And finally a word by our sponsor, who reduces our costs for this project at least a bit. Take them advertisments into consideration, would you? Thanks in advance!


[MacOS] Integrate Mac Address Book into Thunderbird

I. Abstract

Mozilla Thunderbird 3 alpha has been released on May 13th. It’s got a wonderful (terrible) working title: “Shredder Alpha 1”. Anyway, there are two features that we Mac users definitly appreciate to read:

  • Thunderbird’s address book is now compatible with OS X’s system Address Book.
  • Thunderbird now is a native Cocoa application…

Well to be serious, we don’t really care if it is a native Cocoa app or whatever app it is, if it is running stable in the end. But we do care about the address book integration. For all iPhone users this is really good news. We never had the chance to use Thunderbird and have the email addresses synchronized with our beloved iPhone.

But there are disadvantages at this very moment. First being the integration. Integration of the address book is a one way street only. Currently we can only synchronize our iPhone with our Mac and have the addresses, phone numbers and mail addresses available in Thunderbird. But you still won’t be able to add new contacts, phone numbers or email addresses to your OS X Address Book using Thunderbird. Thunderbird 3 alpha has read access only. To change entries you need to use the OS X Address Book application. Second disadvantage is, the address book integration has been disabled by default, simply because this compatibility module is under heavy development. In this article we’re gonna show you how to enable it in simple steps.

As note: although we didn’t experience any problems while testing during the last week, we have to point out that this is an alpha release that is not intended for productivity use.

II. Requirements

  • Intel Mac or Intel Hackintosh (Power PC has not been tested, sorry)
  • Download and install Thunderbird 3 alpha (Shredder alpha 1) here.

III. Thunderbird’s Config Editor

We assume you already have Thunderbird 3 alpha installed. Follow these steps:

  • start Thunderbird
  • open Preferences menu
  • click the Advanced menu
  • in tab General you will find the Config Editor... button – click it

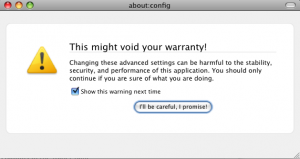
You will see a picture similar like that:

Since you know what you are doing, otherwise you would not be here reading this article, just click the “I'll be careful, I promise” button.

IV. How to add new values

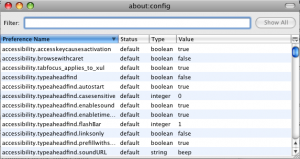
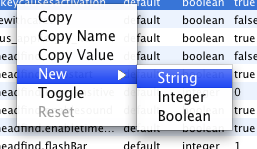
After having promised that you won’t destroy your own system, you will see a new window, which is titled “about: config“. The window will look similar like this:

Some more instructions here: with a click on the right mouse button (or ctrl+left mouse button!) you open the context menu in the Config Editor.

V. Add the description tag

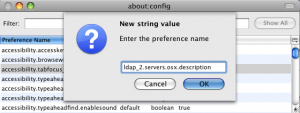
As shown add a New > String value. You will be asked to Enter the preference name, then. Enter this:

  • ldap_2.servers.osx.description
  • click on OK

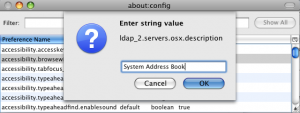
After clicking OK a new box will ask you to Enter the string value. Enter this:

  • System Address Book
  • click on OK

VI. Add the dirtype tag

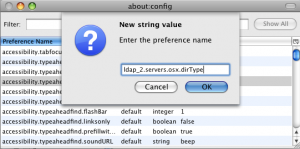
As shown add a New > String value. You will be asked to Enter the preference name, then. Enter this:

  • ldap_2.servers.osx.dirtype
  • click on OK

After clicking OK a new box will ask you to Enter the string value. Enter this:

  • 3
  • click on OK


VII. Add the uri tag

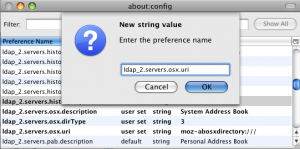
And again friends: as shown add a New > String value. You will be asked to Enter the preference name, then. Enter this:

  • ldap_2.servers.osx.uri
  • click on OK

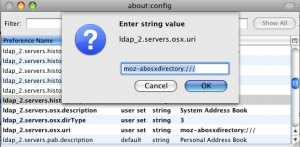
After clicking OK a new box will ask you to Enter the string value. Enter this:

  • moz-abosxdirectory:///
  • click on OK

You’re almost done.

Just restart your Thunderbird and you will have entries of your OS X’s Address Book available in Thunderbird.

VIII. Conclusions

We found no problems with our system configuration during testing. But as said: Thunderbird 3 is alpha status. Problems and issues may occur on your system and alpha status also means there will be changes to the final version.

If you find this article helpful, please consider visiting our non-offensive sponsor (Google-Adsense). Thanks for paying attention.