Category Archives: iOS

[iPhone] HowTo Jailbreak and Unlock using RedSn0w

I. Abstract

The following article will show you how to install firmware 3.0 on your iPhone 2G by also allowing to jailbreak, activate and eventually to unlock (JAU process). At the moment of writing this article is for Mac OS X users with iPhone 2G’s only.

II. Who needs this article?

We suppose 50% of all 2G users around the globe. As iPhone 2G’s were sold almost everywhere with Sim-Lock enabled (besides some T-Mobile Germany or Orange France unlocked 2G’s).

III. Warning

You’d better read all of this in detail before you do anything practically! If you feel there is something you don’t understand or something you will not be able to handle, then go and ask someone who is in the know.

!!!!!!!! Otherwise your devices may be terribly screwed up! !!!!!!!

IV. Required Downloads

Download these tiny things first:

» RedSn0w for Mac OS X
» iPhone OS 3.0 for iPhone 2G
» if you are using an iPhone 2G: get Bootloader 3.9 and 4.6

RedSn0w is almost the same as QuickPwn was in the ancient days of iPhone firmware 2.x

V. Preparing for Take off

  1. you need to have iPhone OS 3.0 already installed / updated /restored via iTunes
  2. install RedSn0w
  3. start RedSn0w
  4. Browse to the downloaded restore firmware (iPhone1,1_3.0_7A341_Restore.ipsw)
  5. Wait for the firmware to be checked

  6. Click Next
  7. Wait for the firmware to be modified
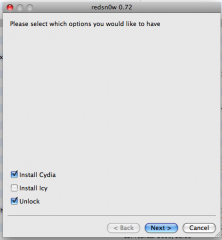
  8. Select Install Cydia (and Unlock if you are using an iPhone 2G. If you are using an iPhone 3G, don’t select to unlock, since it will not work this way)
  9. Click Next
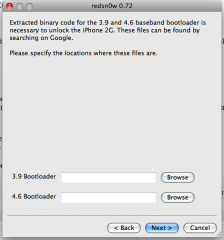
  10. Browse for the Bootloaders you downloaded
  11. Click Next
  12. Turn your iPhone off
  13. Turn iTunes off

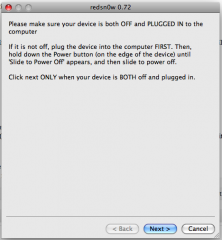
VI. Fasten your seat belts // Get into DFU mode

  1. Click Next
  2. bring out beloved jesus phone into DFU mode
  3. RedSn0w guides you thru the required steps (anyway this may take several repetitions as this is not as easy as some people write on the net!)

VII. Ignition sequence start

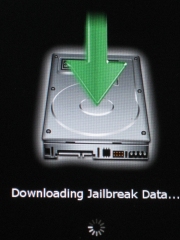
  1. the uploaded modified ramdisk will do all the required stuff
  2. to indicate what is going on your iPhone will show some nice pictures like this:
  3. don’t disturb the process
  4. instead: relax and get yourself a good drink or a cigarette
  5. as this may take some minutes

VIII. Possible issues

Although we haven’t been reported any yet, this doesn’t mean there can’t go something wrong. If you run into problems, try:

  • restoring original unmodified 3.0 firmware from within iTunes 8.2
  • make sure you installed firmware 3.0 with iTunes 8.2
  • generate a custom pre-hacked ipsw using PwnageTool (find article here)

IX. Kudos

Fly out to the iPhone Dev Team. You guys should get paid by Apple…

[iPhone] HowTo Jailbreak and Unlock using PwnageTool

I. Abstract

The following article will show you how to install firmware 3.0 on your iPhone 2G by also allowing to jailbreak, activate, and eventually to unlock (JAU process). At the moment of writing this article is for Mac OS X users with iPhone 2G’s only.

II. Who needs this article?

We suppose 50% of all 2G users around the globe. As iPhone 2G’s were sold almost everywhere with Sim-Lock enabled (besides some T-Mobile Germany or Orange France unlocked 2G’s).

III. Warning

You’d better read all of this in detail before you do anything practically! If you feel there is something you don’t understand or something you will not be able to handle, then go and ask someone who is in the know.

!!!!!!!! Otherwise your devices may be terribly screwed up! !!!!!!!

IV. Required Downloads

Download these tiny things first:

» Pwnage 3.0 for Mac OS X
» iPhone OS 3.0 for iPhone 2G
» if you are using an iPhone 2G: get Bootloader 3.9 and 4.6

V. Preparing for Take off // Prepping your custom iPhone OS 3.0

  1. make sure you synced your iPhone with iTunes before to have all your current calendar and address book entries in a safe place
  2. Install PwnageTool
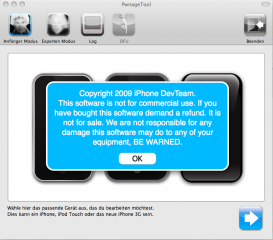
  3. start PwnageTool
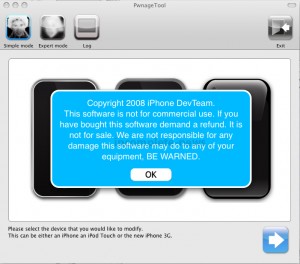
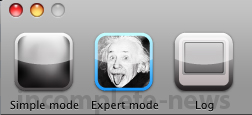
  4. Choose Expert Mode
  5. Select iPhone
  6. Click the Next button (down right of PwnageTool window)
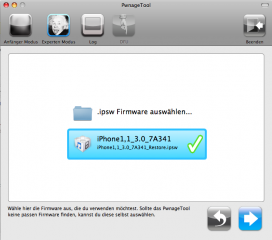
  7. Select (or browse for) the iPhone1,1_3.0_7A341.ipsw firmware
  8. Click the Next button
  9. You now may choose some more Cydia Packages (like SSH), but you can also safely install this later via Cydia on the iPhone. This is a matter of taste
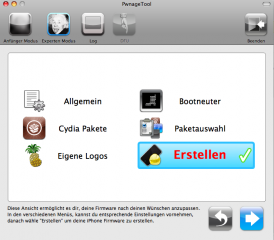
  10. Click Create (here in german “Erstellen”)
  11. Click the Next button
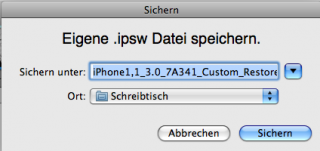
  12. Select a location to save the custom firmware 3.0
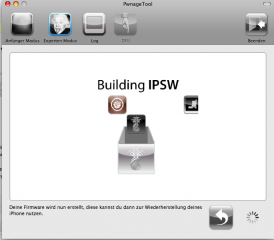
  13. wait some minutes for the creation of your custom firmware 3.0
  14. you may provide your adminstrator password during creation phase, this is normal !

VI. Fasten your seat belts // Get into DFU mode

  1. in case you never pwned your iPhone before: bring it into DFU mode first.
  2. PwnageTool guides you thru the required steps (anyway this may take several repetitions as this is not as easy as some people write on the net!)

VII. Ignition sequence start // Restore

  1. start iTunes (make sure you’re using iTunes 8.2)
  2. Select your iPhone (found on the left column under devices)
  3. and hold the Alt Key and Click the Restore button (this allows browsing for your custom firmware)
  4. The iPhone software will be extracted and prepared for restoring
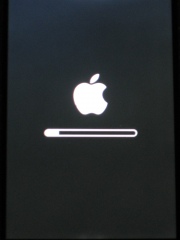
  5. in the meantime your iPhone will show a status bar like this:
  6. The whole process will take some minutes, don’t wonder about that

VIII. Possible issues

You may receive an “unknown error 1600”, “unknown error 2001”, “unknown error 10”, or “unknown error 20” . If this is the case you may try this:

  • restore the original unmodified iPhone firmware 3.0 first and the re-restore your custom firmware and
  • try aswell in DFU mode as in normal mode
  • if all that does not work: restore with original unmodified iPhone firmware and jailbreak with redsn0w (article here)

IX. Kudos

Fly out to the iPhone Dev Team…

[iPhone] Issues with iPhone DFU mode in MacOS 10.5.6

According to forum reports the iPhone DFU mode, which is required to install custom firmware with PwnageTool, does not get detected properly after updating Mac OS X to 10.5.6.

That means you cannot Jailbreak or Unlock the iPhone currently. The iPhone Dev Team has investigated in to this issue and comes to the conclusion that this is not a countermeasure by Apple, but a bug in the new kernel.

The Phone Dev Team names possible fixes for 10.5.6. As always: you do this at your own risk!

1. Replace the following plugin kexts from within IOUSBFamily.kext with the ones from 10.5.5 and then rebuild kextcache (if you don’t understand this, then you shouldn’t attempt it!)

/System/Library/Extensions/IOUSBFamily.kext/Contents/PlugIns/AppleUSBHub.kext

/System/Library/Extensions/IOUSBFamily.kext/Contents/PlugIns/IOUSBCompositeDriver.kext

2. Use a USB hub in-between the DFU device and the Mac and insert/reinsert the iPhone’s USB cable.

3. Use a PwnageTool created .ipsw on Windows! Oh the irony!

If you did not update yet to 10.5.6 better don’t do it and wait for a fix or for 10.5.7 to be released.

[iPhone] HowTo Activate and Unlock using QuickPwn 2.1

I. Abstract

This is a short HowTo since all of you by now know how to use QuickPwn, don’t you? in short: QuickPwn is an Après-Tool. Means: you let iTunes 8 do the update process and use QuickPwn afterwards to “open” your device. Note:

  • 2G iPhones can be jailbroken and unlocked
  • 3G iPhones can be jailbroken, but not unlocked
  • iPod Touch 1st generation can be jailbroken
  • iPod Touch 2nd generation can not be jailbroken

Our article will not cover the iPod Touch, but the iPhone.

II. Requirements

III. Warning

Jailbreaking and unlocking is illegal to be performed with iPhone devices that are part of a current agreement (mostly 12 or 24 months). You would violate your contract by jailbreaking and unlocking! Don’t do it.

  • If you’re updating: all your Cydia and Installer.app based applications will be lost and need to be installed again!
  • Make sure you make a backup of your data!

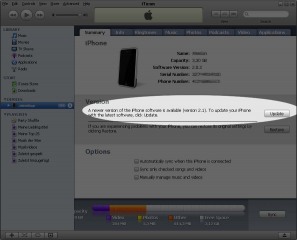
IV. Update iPhone firmware

  • connect your iPhone with your PC
  • start iTunes 8
  • choose your iPhone (under devices)
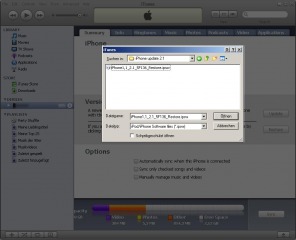
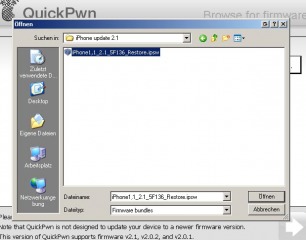
  • hold the shift-key (on your keyboard) and do a mouse-click on the Update Button – a file-open window will pop up like this:
  • locate the downloaded firmware 2.1 (named: iPhone1,1_2.1_5F136_Restore.ipsw) and open it
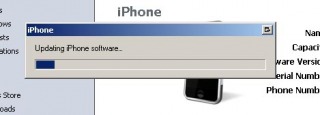
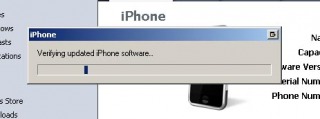
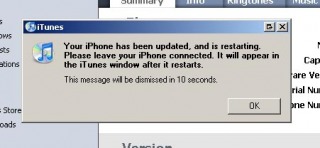
  • iTunes will begin to update your iPhone automatically


  • After having updated the iPhone will reboot. If you are using an already Pwned iPhone it will remain activated and unlocked, you only need to jailbreak.

IV. QuickPwning it :-)

  • Let your iPhone plugged to your computer
  • Close iTunes
  • Start QuickPwn 2.1-1
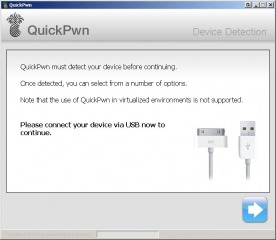
  • You will be greeted with the Device Detection screen, click the right-arrow to proceed:
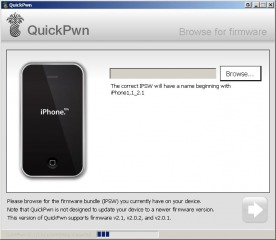
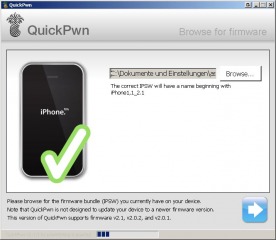
  • on the next window, click the Browse button to locate your iPhone1,1_2.1_5F136_Restore.ipsw firmware:

  • QuickPwn will check if the firmware matches the version currently running on your iPhone and will allow you to proceed (click the right-arrow):
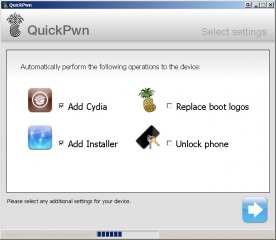
  • the next windows allows you to select, what you want to install. We recommend to install both Cydia and Installer.app. If your iPhone has not been unlocked until now, here you can also choose to simunlock it. As we are quite conservative: we never change the boot logos, but this seems to be a matter of taste. After having selected, click the right-arrow button to proceed.
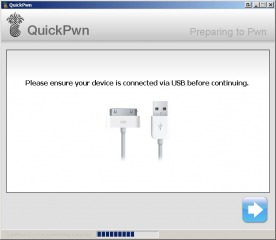
  • For safety reasons, QuickPwn will remind you to leave your iPhone plugged to your computer, click the right-arrow button to proceed
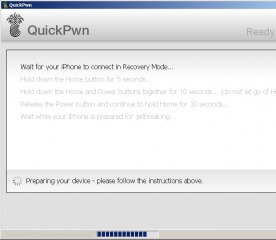
  • Read and follow the instruction on this window very carefully! QuickPwn will help you counting!
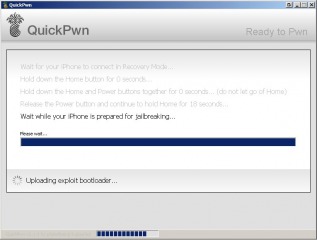
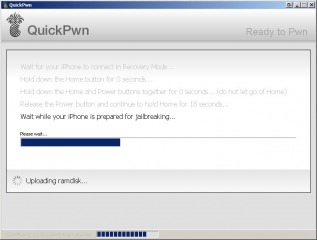
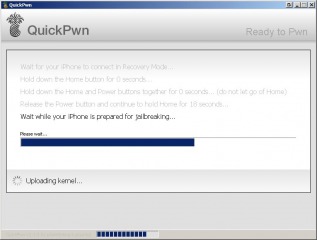
  • After that, QuickPwn will take control and perform the following actions automatically:


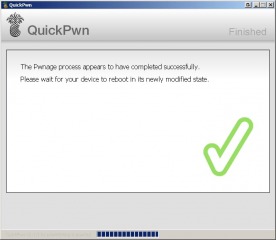
  • When all the tasks have been completed, QuickPwn has finished.
  • Your iPhone will perform some more actions for the next few minutes. It will show it is changing the NOR and so on and will reboot then.

After having rebooted your iPhone will be perfectly jailbroken and unlocked

V. Final words

Guys, we hope we could clarify some more things here than others did. We appreciate your comments on this. Kudos to all of you and remember to consider our sponsors, they really got the coolest offers ;-) Kudos fly out to the iPhone Dev Team! Live long and prosper, guys.

[iPhone] Workarounds for Issues with PwnageTool/QuickPwn for Firmware 2.1

We read all over the net and found some solutions to the most common issues that occurred. If you are kinda conservative user, we’d recommend not to update to firmware 2.1 and wait until a PwnageTool and QuickPwn update has been released. Since the iPhone Dev Team is reacting very fast, this should take only some days.

Known Workarounds:

Error 1600 and Error 6: restore with stock firmware 2.1, then QuickPwn (you may then put into restore mode and install custom IPSW, but it’s not necessary- credits to “HomeGrown”).

Error 1600: when Pwnage asks, if already pwned your device, answer NO, no matter if you pwned if before or not (credits to “Maurofoto”)

Error 1600: let iTunes download firmware 2.1 again (you may delete it from the local folder if you already downloaded it via iTunes. Folder on a Mac: ~/Library/iTunes/iPhone Software Update/), then exit iTunes, prep a custom IPSW using Pwnage, delete the iTunes downloaded firmware from the above mentioned folder again and copy your custom IPSW to that folder, but name it exactly as the original firmware was named (credits to “Markat”)

[ID1082] Was the information provided above helpful?

View Results

Loading ... Loading ...

[iPhone] iTunes 8 crashs Windows Vista

Windows Vista users complain about complete operating system crashs resulting in blue screens. iTunes 8 for Windows seems to have the following issues, when using under Vista:

  • after connection an iPod Touch or an iPhone to the USB port: complete system hang up
  • CD/DVD drives disappear from Windows Explorer

But Apple already reacted and distributes now a fixed version. This implies you need to uninstall your current iTunes 8, then download the fixed iTunes 8 and install ii.

[iPhone] iTunes 8 detects Pwned iPhone Firmware

Warning

Firmware 2.1 will be released today. As of now, it cannot be pwned – no matter if you are running QuickPwn or PwnageTool. We recommend not to update until further notice.

Current Status

The iPhone Dev Team reports iTunes tries to countermeasure the exploits the well known Pwnage Tool is using. After having compiled a custom firmware with Pwnage Tool or WinPwn, you need to install it using iTunes. Now, iTunes in version 8.0 refuses to install custom firmware, thus combatting Pwnage’s way into the iPhone or the iPod Touch. The iPhone Dev Team released the photo below indicating the error message from iTunes 8, when trying to install a custom firmware to a (not yet) pwned iPod Touch. As of now, it is unknown if iTunes can also detect an already installed custom firmware. Thus allowing original unmodded updates to install. This would also allow the use QuickPwn. iTunes seems not to be able to detect already pwned iPhones. Forum reports say, iTunes 8 still can install custom firmware to an already pwned iPhone. For those guys of you who are running a device fresh from the factory (means not pwned), use QuickPwn as a workaround for now.

Interim solution to pwn a new device:

  1. Use QuickPwn to jailbreak and then Pwn/unlock your device
  2. if you like you can then use Pwnage Tool to create a recovery custom firmware (imho: you don’t need it, after having QuickPwned your devices

Next Steps

Anyway the Dev Team reports, they are working on a way to trick iTunes, thus forcing iTunes to install custom firmwares even on not pwned devices. The iPhone Dev Team is currently prepping a whole lot of patches for iTunes 8, no matter if you are on Windows or on Mac. Patches will be released during the next week.

» Read the iPhone Dev Team’s article here

[iPhone] Experienced Issues with Firmware 2.0

After some days of using a pwned iPhone 2G with firmware 2.0, we found some issues. As of now, we don’t know where they come from. But we definitly know: we don’t like them.

  • WiFi doesn’t stay connected, it falls “asleep” and takes time to reconnect
  • the more apps have been used, the longer it takes to see reactions
    means: if you click on contacts and have used Safari, SMS and Youtube before, opening of contacts takes a lot longer than after an fresh reboot!
  • loading the contacts take 5-10 seconds
  • scrolling through contacts is jerky and freezes the view from time to time
  • scrolling through photos is jerky and freezes the view from time to time
  • launching the camera takes up to 10 seconds
  • the unlock slider may not react in time and you may miss a call
  • keyboard reacts slower than on 1.1.4
  • reaction time is heavily delayed (or seems not to react at all for more than 17 seconds – see video below)

We won’t blame anyone for this, because on the one hand this could be an effect of Pwning the iPhone and on the other hand these issues might be “features” of the original unmodified firmware 2.0 aswell. See update below, this is a firmware 2.0 issue.

Anyway we feel there are heavy problems with the memory management in firmware 2.0, that need to be addressed soon. Workflow was a lot faster with firmware 1.1.4.

As of now we just reboot the iPhone once a day, but this really is no working solution for such a device. We feel this reminiscent to Windows 95 times is not necessary.

Update: it has been reported this may come from Cydia. As we’re investigating this issue, we get back to you once we found a solution.

Update: Pumpkin of the iPhone Dev Team reports this most likely is an issue of the original firmware 2.0. Native iPhone users have also experienced this behaviour (see reports here in Apple’s forums). The internet is full of reports. Do a Google search you will find plenty of people reporting these issues.

[iPhone] HowTo Activate and Unlock your iPhone using Pwnage 2.0

Article is outdated. Find newest Jailbreak and Unlock HowTo for iPhone Firmware 3.0 here.

Note

We need to stress: respect the laws of the country you live in. For instance as german citizen with a T-Mobile Germany plan and iPhone you are not allowed to jailbreak or unlock your iPhone. T-Mobile is not kidding in this topic, as we’ve all seen with the sipgate sue (we reported here). This tutorial is in no way meant as an invitation to do things that are in violation of your contracts. We cannot be held responsible for bricking your devices. You do everything at your own risk and responsibility. Thanks.

I. Abstract

Pwnage Tool 2.0 is the newest tool to unlock and jailbreak “old” iPhones (iPhone 2G) and jailbreak “new” iPhones (iPhone 3G). It is developed, maintained and provided for free by the iPhone Dev Team. The Dev Team already provided Pwnage Tool 1.0 (see recent tutorial here).

This tutorial is for Mac users only who previously activated and unlocked their iPhones using Pwnage Tool 1.0. The release of Pwnage Tool 2.0 has been delayed in the last few days because of several bugfixes and issues that occurred during latest test. As we’ve used Pwnage Tool 2.0 in the last hours on some old iPhones, we can say: in contrast to Pwnage Tool 1.0, we encountered some problems with Pwnage Tool 2.0. Keeping that in mind it is your own risk to prolly brick your iPhone. We cannot be held responsible for your actions.

II. Preparations

A Microsoft Windows version of Pwnage 2.0 has not yet been released. Get yourself a Mac, it really is time to switch :-)

You need to download and install a couple of programs

  • download and install Pwnage Tool 2.0.1 (here or here) / Updated links to new Pwnage 2.0.1
  • download bootloaders.rar (for legal reasons, we can’t provide a direct download link as we are in Germany. Do a simple Google search for bootloaders.rar)
  • update to iTunes 7.7 (using Apple Software Update)
  • download iPhone Restore Firmware 2.0 (here)

III. Fasten your seatbelts

Before taking off, we highly recommend to do the following preparations on your iPhone:

  • backup/synchronize current calendar and address book using iTunes
  • backup current SMS using Syphone (download here)

In case you didnot, we highly recommend you read our tutorial about activating and unlocking iPhones with firmware 1.1.4 (see here).

IV. Take off

…into the wide open world of unlocked and jailbroken iPhones.

  1. Start Pwnage Tool 2.0, and click OK.

  2. Choose Expert Mode

  3. Select iPhone 2G, and click the blue arrow
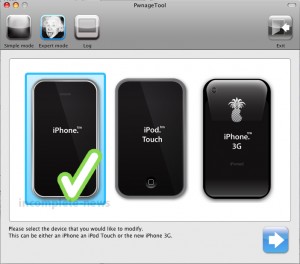
  4. After clicking the blue arrow you will see a window like this:
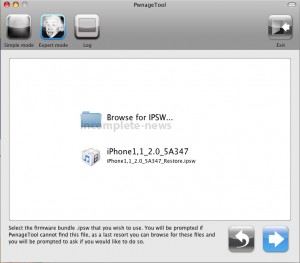
    Note: we encountered errors when browsing for the IPSW firmware that we manually downloaded several times:
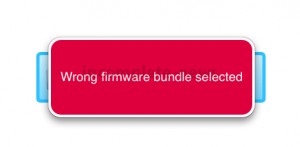
    We circumvented this error by letting iTunes download the firmware. But be careful let iTunes only download the firmware. Don’t choose download and install!!!

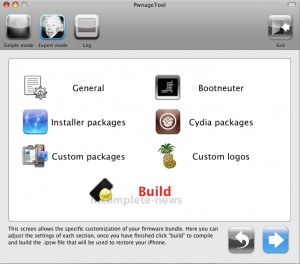
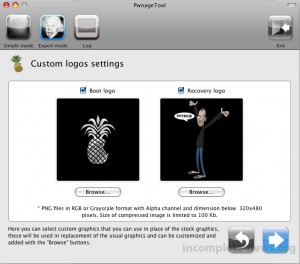
  5. When Pwnage feels like the Firmware is the right one, it will show this picture, where we can manually change some settings. We highly recommend to change nothing but the Cydia packages. We even leave the pictures the same.
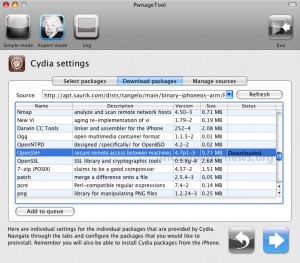
  6. Inside the Cydia packages menu we recommend to choose these files for download:
    OpenSSH, Cydia Installer, and Cydia's Source Set. These files will automatically become downloaded in the background.
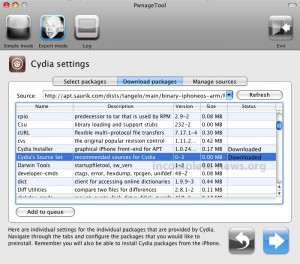

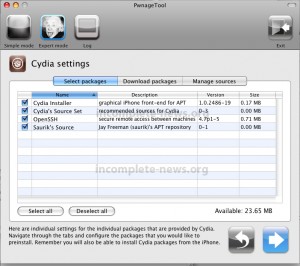
  7. Make sure you select the above downloaded Cydia packages. Under Select packages you can check them, in case the packages are not pre-chosen for including into your custom IPSW. Then click the blue arrow again.
  8. After having clicked the blue arrow again, we may choose new logos. We recommend to leave these as they are and click the blue arrow again.
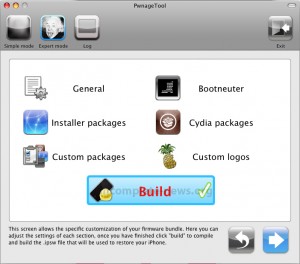
  9. Pwnage Tool 2.0 feels we are ready and shows “Build” with a checkmark. We click the blue arrow again and can already smell the pwrn.
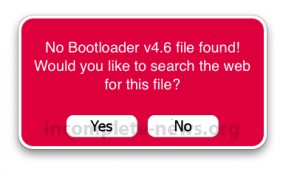
  10. You may provide the bootloaders now, by clicking No to search the web for them (we only show the 4.6 bootloader question, in fact there will be same question for the 3.9 bootloader).
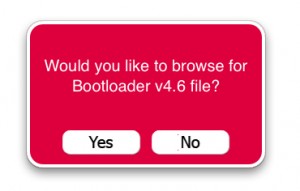
  11. After having chosen the bootloader Pwnage needs to know where to save the custom IPSW file. It will show a picture similar to this:
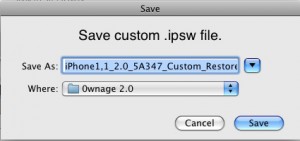
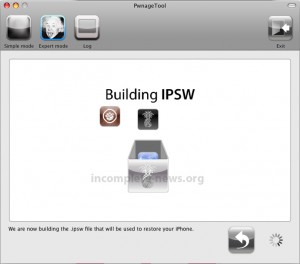
    After having chosen the target filename and folder, Pwnage will submissively begin its work.
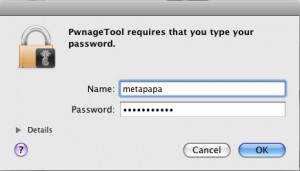
    At a specific point of work, Pwnage will require your admin password. This is due to a limitation of access to the filesystem.
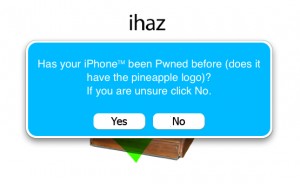
  12. After working some minutes you will be shown this menu. Since we are all obedient Pwnage users (aren’t we?) we already had used Pwnage 1.0 before. And therefore we choose Yes.
  13. Pwrnage Tool will wish us the best for our recovery and wants to be quitted:

V. Approach for Landing

  1. As our odysee thru iPhonitis is not over, we need to start iTunes (we have our iPhones connected!). And we choose the iPhone menu in iTunes (looks like this picture:)
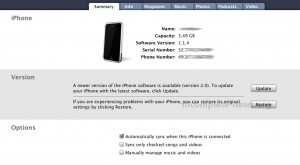
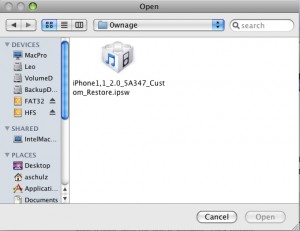
  2. We need to restore our 0wn firmware, therefore we need to hold the ALT key and press Restore Button. We will get a dialog, where we can choose our custom firmware:
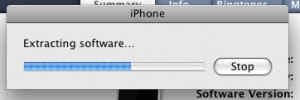
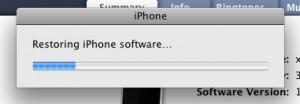
  3. iTunes will begin its work of extracting and restoring our custom firmware. This process will take some minutes. Don’t disconnect during this period. You would have an expensive brick then.
  4. After restoring successfully the custom firmware to your iPhone your iPhone will reboot and eventually show a screen that indicates that the baseband is currently in process of getting unlocked:
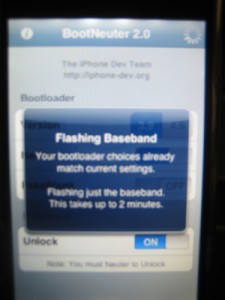
  5. After the baseband flashing has been finished, your iPhone will reboot again and will show up with firmware 2.0. We hope you enjoyed your flight with incomplete-news airways. We wish you a good stay on Eff-Doubleyou-Two-Dot-Oh. We recommend to pick up your baggage in the claim area.

VI. Baggage Claim Area

  1. You may now decide to set up your system clean and configure everything anew or simply choose to restore your old settings (like eMail-accounts, calendar, photos, muzaq, and videos):
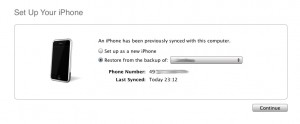
  2. After having clicked Continue you will see this picture. It depends on how many things you had saved on your iPhone and how much space it’s got. Our 4GB testmodel only took about 5 minutes to get all settings restored:
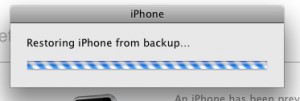
  3. After restoring the settings your iPhone will reboot…
  4. To get back your EDGE settings, simply follow our tutorial here (see part II.)_T_H_E__Z_E_N__W_A_Y_ . In firmware 2.0 the EDGE menu is now called “Cellular Data Network”).

VII. Final words

Congratulations. You’re finished now. In case any of you got questions, don’t hesitate to ask below in our comments section. We hope you enjoyed this tutorial. Thanks for your attention. Big shouts fly out to the iPhone Dev Team. You guys simply rock our hearts…

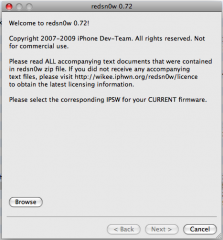
[iPhone] iPhone 3G allegedly unlocked using SIM Adapter

[Update] Aug/25th/2008: read here, everything you gotta know about Proxy SIM solutions.

The Brazilian based company DesbloqueioBr.com.br claims to have unlocked the 3G iPhone. The whole procedure is like a deja-vu. It is said it works almost the same like with TurboSIM for the “old” iPhone. The difference is they say they make use of a faked IMSI test card, while Bladox’ TurboSIM solution emulated an AT&T card.

The Theory behind

The guys at DesbloqueioBr claim that the iPhone 3G only checks on first card detection (means after hot-swapping or after reboot) for the type of SIM. It is said it checks the IMSI code. During card-detection, the IMSI test card emulation now returns that it is a test card. The next requests to the card will then be answered by the normal SIM card. Same working like with the TurboSIM, except that the TurboSIM was coded to emulate an AT&T card during card detection stage.

Empiricism

Since this has not been confirmed on forums and the video provided (see below) doesn’t show the unlock procedure, this is likely to be a rip-off. Anyway for proving the theory the iPhone Dev Team already provided a sample application for the TurboSIM, that does exactly what the theory requires: emulating a test IMSI at card detection stage. As of now there is no feedback. For legal reasons we cannot link the application, as we are located in Germany. During the next 24 hours google will index the page that contains the link, search for lamesaft-0.1.zip then.

Limitations

The video provided does not clarify how the unlock is performed. It simply shows a call being made from one iPhone to the other. It does not show the SIM adapter to be taken out. Moreover you still need to have the iPhone 3G activated. Currently there is no application available to do this. People on forums report that the DesbloqueioBr guys seem not to be willing to answer concrete questions.

Since there is no prove: we currently classify the DesbloqueioBr SIM adapter as SCAM. Update: at 00:29 the video shows the model as MB046LL, which could be identified as a U.S. american AT&T locked iPhone 3G (see model list here). This model obviously works with a different carrier (not AT&T, but TIM) in a different country (not the US, but Brazil).

Here’s the video that shows calls being made from one iPhone to another. The guy is talking portuguese, a translation is not available.

empty line for distance to the text.