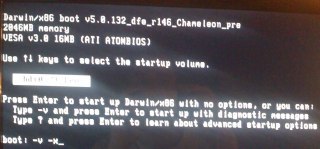
Tag Archives: EFI-X

[MacOS] Chameleon On USB: Mounting USB Stick Correctly

Inserting USB sticks to your Mac OS X based system makes Mac OS X mount the stick without assigning certain permissions like owners, or groups.

I. How things get mounted on Mac OS

The mount command on the terminal returns most likely some lines, like that:

  • testuser$ mount
  • /dev/disk0s2 on / (hfs, local, journaled)
    devfs on /dev (devfs, local, nobrowse)
    map -hosts on /net (autofs, nosuid, automounted, nobrowse)
    map auto_home on /home (autofs, automounted, nobrowse)
    /dev/disk3s1 on /Volumes/CHAMBOOT (hfs, local, nodev, nosuid, journaled, noowners)
    /dev/disk1s4 on /Volumes/Mac OS X Install DVD (hfs, local, nodev, nosuid, noowners)

You can see quite a lot of slices (i.e. ~partitions) are mounted to that system I am running here. For instance disk1s4 is the forth slice of disk1 and it countains an image of a Mac OS X Install DVD. And you can see a CHAMBOOT named drive mounted with several options.

II. Mount Options/Permissions

Our beloved USB stick named CHAMBOOT (contains Chameleon and) is disk3s1 and is mounted to /Volumes/CHAMBOOT. Mac OS handles USB mounting for most of our every day life operations fairly reliable. But this comes at a cost, as this simplicity is achieved here by applying options like nosuid and noowners during the mount process.

For people willing to run Chameleon from a USB stick permissions are inevitable, as for instance an Extensions.mkext kextcache can only be generated with proper file permissions being set.

II. Mounting USB with permissions

This just requires some simple mount operations being performed manually on the terminal. Do the following:

  • testuser$ sudo -s
    Become ultimate root now.
  • testuser$ cd
    Get back to the home folder whereever you’ve been before.
  • testuser$ sync
    Force completion of pending disk writes.
  • testuser$ umount -f /Volumes/CHAMBOOT
    This unmounts the USB stick called CHAMBOOT
  • testuser$ mkdir chamboottemp
    Create a temporary folder for our mounting session
  • testuser$ mount_hfs /dev/disk3s1 chamboottemp/
    Mount the USB stick to the temporary folder
  • testuser$ mount
    See how the drives are mounted now
  • /dev/disk0s2 on / (hfs, local, journaled)
    devfs on /dev (devfs, local, nobrowse)
    map -hosts on /net (autofs, nosuid, automounted, nobrowse)
    map auto_home on /home (autofs, automounted, nobrowse)
    /dev/disk3s1 on /Users/admin/chamboottemp (hfs, local, journaled)
    /dev/disk1s4 on /Volumes/Mac OS X Install DVD (hfs, local, nodev, nosuid, noowners)
    You can see the USB stick is now mounted without “extra” options.

Now you can apply changes to the USB stick’s files in the proper manner (like copying files, repairing permissions and creating a kextcache). After having performed all the changes, you can correctly unmount. Read here:

III. Manually Unmounting

  • testuser$ cd
    Get back to the home folder whereever you’ve been before.
  • testuser$ umount -f chamboottemp
    Force to unmount the device mounted to the chamboottemp folder now.
  • testuser$ rmdir chamboottemp
    It is safe to delete the chamboottemp folder now.

IV. Links

» Mac OS X Reference Library: Man Page for “sync”
» Mac OS X Reference Library: Man Page for “mount”
» AsereBln.BlogSpot.com: Some terminal work

[MacOS] Update 10.6.2 to Break Intel Atom CPU Support

According to Stellarolla’s blog the upcoming Snow Leopard update 10.6.2 and the Leopard update 10.5.9 will most likely break Intel Atom support. Thus rendering hackintosh installations on netbooks inoperable.

Although Apple does not provide products shipping with Intel Atom CPUs, the Mac OS kernel did support those. Now with the growing amount of hackintoshs it seems Apple tries to stop the use of their operating system on cheap an tiny netbooks.

Probably this is another indicator that Apple is going to bring the long rumored tiny tablet Mac. Anyway for people willing to maintain MacOS on their netbooks the easiest way is to not update to 10.6.2 or 10.5.9 at the moment.

» Stellarolla: “10.6.2 kills Atom and other news”…

[MacOS] Is EFI-X illegally using 3rd Party Program Code?

About a year ago a company called ASEM released a device called EFI-X. This device has been claimed to be capable of booting several Microsoft Windows versions and Mac OS X Leopard.

Legal concerns

From the beginning there were question regarding the legal status of the device. But ASEM claimed the device is legal, although it circumvents Apple’s binary protection using Apple’s copyrighted secret operating system keys (OSK1 and OSK2).

Technical issues

Anyway EFI-X devices had some issues. Many forums reported about problems with Bonjour and sharing in general. In the meantime articles from the official EFI-X support forums have been suddenly disappeared. Customers reporting issues or solutions and workaround to severe bugs have been banned from EFI-X support forums – our own help article to recover almost lost data was removed aswell and one of our members has been officially banned from their forums (the reason was this article in october 2008).

Examining EFI-X in deep

Now some frustrated customers who are on the other hand technologically very familiar have examined the EFI-X device in deep. One of the main points AsereBln found: in contrast to what EFI-X is stating: “Our approach is entirely different, (..) all our code and development is our own only” – they seem to be using program code that has been developed by the OSX86 community though. They seem to be using “Disabler.kext“. Moreover another user (RezRov) found out the EFI-X Windows update software seems to be violating the LGPL as it incorporates a modified USB device library (libusb-win32).

Use of possibly unlicensed 3rd party program code, possibly illegal use of Apple security keys, and customer support below grade for a 170€ (250US$) commercial product that seems to be the summary about a year after product launch.

Lessons learnt

We suppose end users should be aware of this possible hassle. Only an original Apple Mac is really hassle free and 100% compatible to a Mac. But if you are technologically interested and have the time and motivation search the OSX86 communities for setups. The OSX86 forums are full of knowledge and willing to help. But remember a PC won’t ever be 100% compatible to a real Mac.

[MacOS] EPOS I. – EFI Post Install for White-Box PCs

We were working quite some time on this. Now here is EPOS I. – the “EFI Post Install” Script for white-box PCs that are almost hardware compatible with Apple’s devices

“EPOS I.” is an “EFI Post Install” Script

What does it do?

EPOS helps installing retail DVD’s of Apple’s Mac OS X 10.5 Leopard on white-box PC’s. EPOS is SlimBuild-Preboot compliant. And as such it makes installation very easy. Grab a copy of a SlimBuilt-Preboot CD image that matches your hardware (motherboard and graphics), then install Leopard and after installation run EPOS.

Technically EPOS I. automates the necessary steps of preparing MacOS’ native EFI partition and the installation of (legacy-) kexts to this EFI partition. The whole shebang was first discovered and described by Munky (all shouts fly out to him!). You may find his article here on the InsanelyMac forums.

Installation and Usage:

  • unplug ethernet cable from your white-box PC
  • copy EPOS I.zip to USB drive for instance
  • install Leopard from retail DVD using a SlimBuild-Preboot standard compatible CD (find links to tested disks below
  • boot installed Leopard using the SlimBuild-Preboot CD again
  • on first boot provide all the registration information required from Apple
  • see desktop for the first time
  • unpack EPOS I. and run it as ROOT from a terminal (have your SlimBuild-Preboot CD mounted)
  • EPOS takes about a minute to install everything
  • remove SlimBuild-Preboot CD from drive, reboot and let Apple’s autoinstaller grab the newest updates
  • enjoy a white-box Mek

Habit:

  • EPOS must be executed from the disk that will hold the EFI bootloaders.
  • If you are unsure what this means: better make sure you only have your DVD drive and your OS X harddrive connected.
  • I recommend using this script on a clean and fresh installed system, no other operating systems on the same disk!
  • prefers mounted SlimBuild-Preboot CD’s for getting kexts and the com.apple.Boot.plist
    (looks for /Volumes/SlimBuild-Preboot/initrd.img and /Volumes/SlimBuild-Preboot/com.apple.Boot.plist)
    if no SlimBuild-Preboot CD is found, EPOS tries to find Extensions in EPOS’ own Extensions folder

Supports:

  • autoextraction kexts from SlimBuild-Preboot CD
  • kexts in own Extensions folder
  • autoextraction com.apple.Boot.plist from SlimBuild-Preboot CD
  • com.apple.Boot.plist in own Plist folder
  • internally pretested with Leopard retail DVD’s 10.5.0, 10.5.1, 10.5.4 and 10.5.5

Notes:

  • Munky’s EFI Boot 6.1 included (found here)
  • compatible to Galaxy’s SlimBuild-Preboot creator 2.0 (Kudos!) found here
  • Tested with ximekon’s (Kudos, aswell) Gigabyte GA-EP35-DS3 SlimBuild-Preboot CDs found here

Error handling:

  • integrated for a bunch of common errors, anyway it remains an ugly script

Todo:

  • code cleanup / rewrite ;-)
  • autoinstallation of custom kernels
  • GUI is in the works, but don’t ask for timelines, we all got jobs to feed our families

License & restrictions:

  • This script is freeware but may NOT be used for commercial purposes!
  • It may NOT be included in SlimBuild-Preboot Disks that contain original / modded Apple kexts.
  • that means until not everything is self enabled via homebrew or legacy kexts you may only include it in your private SlimBuilds but don’t distribute them, please.
EPOS 0.95 running on a sample system :


Feedback

You are welcome to leave a note here in the comment’s section or on the insanelymac forums.

Download EPOS

Please download from the version history overview below. Did you know our sponsors yet? No we neither. Because it’s just Google adds. Anyway these premium sponsors really got the coolest offers and moreover by considering them you help us in return maintaining this site free… :-)

Version history:

  • 0.5 semi automatic really much too ugly one day rapid prototype (not released)
  • 0.6 rewrote using functions (not released)
  • 0.7 autodetermining of EFI partition (not released)
  • 0.8 improved error handling for common errors we experienced (not released)
  • 0.9 included autoextraction for SlimBuild-Preboot images (not released)
  • 0.95 included com.apple.Boot.plist extraction (released) –
    » Download EPOS 0.95 here…
  • 0.95.1 (cosmetic) bugfixes (not released)
  • 0.97 com.apple.Boot.plist bugfix (released) –
    » Download EPOS 0.97 here…
  • 10.0 “the got rich as bill from writing even uglier code” version (will definitly be released) ;-)

[MacOS] Save your Data after EFI-X Crash

I. Abstract

Imagine the following situation. You are very keen on this EFI-X device that’s now on sale. So you order a testing device. Some days later the device arrives from Taiwan. Your EFI-X compliant system already kept waiting with a blank SATA 250GB on a Gigabyte EP35-DS3.

After having plugged the EFI-X module to your system, you install MacOS on your PC. It’s really worth the bunch of money since EFI-X lets MacOS boot like a charm. Easy and nice to handle for everyone who is not more willing to hack device drivers into their Hackintoshs. But as a tinkerer who wants to see how it works in real life and so you decide to apply the newest update for your EFI-X module. Since you’re a Mac user you decide to use the MacOS tool provided by the EFI-X team.

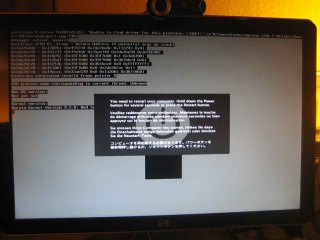
All works well during update, until you do the reboot. All of a sudden the intro boot screen of EFI-X looks quite garbled (like the screen below). You wonder what might have happened and do a reboot. As it doesn’t help you plug your EFI-X to another computer hoping you may be able to flash it again using Windows XP. But after all the installation argy-bargy with EFI-X’ virtual device driver under Windows XP – the update tool tells you, you are running the current version.


To make a long story short. EFI-X has customer service and they will exchange their defective units. You may also have a look at the EFi-X Bug Hunt forums for further assistence (please don’t link our article from EFI-X Bug Hunt forums, they will remove it and may ban you – don’t say we didn’t warn ya ;-) Anyway if you need to have access to your data until the RMA unit arrives, we prepped the following article. We’re going to show you how to make your system bootable after the EFI-X device broke for whatever reason.

A short remark before we start: this article is partly based on a HowTo by a guy going by the nick Menoob. We shamelessly stole the method of installing retail Leopards on PCs and adapted it a tiny bit for this EFI-X specific case. Anyway: all the shouts fly out to him.

II. What you need

  • 30 minutes of your precious life time – you may use this time to think about why you didn’t buy a real Mac
  • a Boot-132 disk – it contains your MacOS compatible bootloader (find a list of Boot-132.iso’s for different mainboards and chipsets here – in case you don’t know you should always give the generic.iso a try) – Kudos to Sonotone/Hackint0sh forums!
  • burn the Boot-132 onto a blank CD-R or CD-RW

III. Prepping your hardware

  1. remove the defective EFI-X device and if you feel you don’t need it, send it to the CCC for further examination
  2. let only the MacOS drive and the CD/DVD drive plugged, unplug all other drives from your motherboard
  3. start your computer and hit DEL key to go into your BIOS
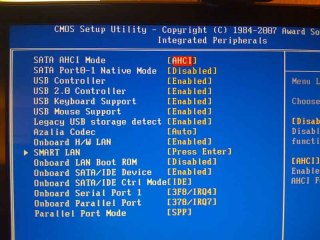
  4. inside of your BIOS: set the MacOS harddrive as first boot device and enable AHCI mode for SATA drives – your drives will appear orange/yellow in MacOS, don’t worry about that
  5. save the BIOS changes and reboot

IV. Booting your system

  1. turn on your computer
  2. insert the just burnt Boot-132 CD-R into CD/DVD drive
  3. during BIOS startup hit the F12 key to manually choose your boot device (applies to Gigabyte boards only!!!)
  4. Choose to boot your CD/DVD drive
  5. Your screen will show that ISOLINUX 3.6x is prepping to boot the Multiboot loader
  6. since this ISOLINUX bootloader is not too user-friendly ;-) you will find yourself with a screen similar to this.
  7. Hit the F8 Key. You’re gonna see this:
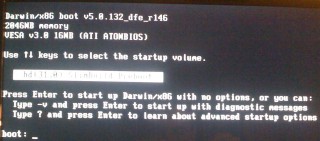
  8. Hit the ESC Key. and You’re gonna be welcomed with this screen.
  9. Now enter 80 and hit return, if the name of your MacOS harddrive shows up, 80 was the right number, if it does not show up, give 81 a try and so on.
  10. Once you’ve found your MacOS harddrive, the bootloader will require again some parameters. Simply enter -v -x as parameters and hit return (you may find more infos about these Darwin boot parameters here)
  11. if you experience the “still waiting for root device” issue, just reset your system and play with the AHCI mode for SATA inside of your BIOS
  12. Anyway: booting will take a long while – in our case about 5 minutes until the login screen appears
  13. login into your system

V. Saving your data

  1. Examine which data you require from your formerly known as almost native system
  2. plug your external harddrive (if you plan to migrate data to Windows, better have the external drive FAT32 formatted)
  3. Copy the files

VI. Final Words

Ooop duh. You got some more options here that we cannot cover at this time:

  1. You may revive this system with the hackint0sh ingredients (dsmos.kext and kexts for audio and video cards) – this will be a longer journey
  2. You may also get a real Mac. In this case Apple will suddenly love you…
  3. We recommend to give also Microsoft’s Vista a try. We feel like Vista Aero Glass effects are currently superior to Leopard’s effects. In this case Microsoft will love you (and us for suggesting this)…
  4. You could also go up the hill to the end and find Debian and ask yourself why it took so long to understand that unix is beautiful – in this case nobody will really love you but during installation you’ll find plenty of new friends in the Ubuntu community explaining you Debian…
  5. :-)

Anyway we hope that article helped you a tiny bit. If so you may also consider our sponsors, they also help you (and us of course)…

[MacOS] EFI-X USB Devices on Sale

Update May 5,  2009: EPOS I. does pretty much the same like EFI-X, but is free of charge for endusers. Find EPOS I. here.

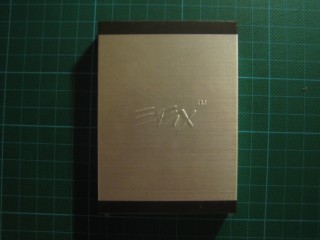
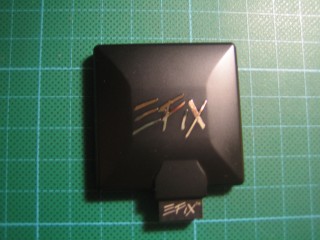
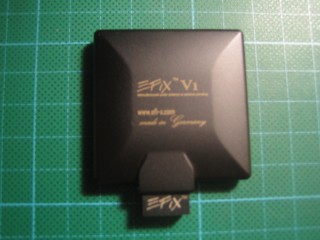
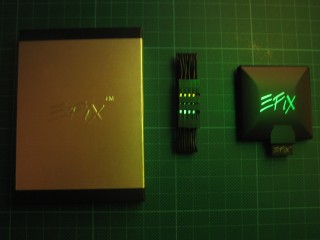
We today finally received an EFI-X V1 device for review purposes. As our device arrived from Taiwan, there is obviously a swiss dealer who really got some devices for sale, yet. We get back to you a little later, when we setup our testing lab devices. In the meantime, enjoy some photos…

» List of EFI-X Retail Dealers

[MacOS] Rumors about EFI-X Prices and Shipping date

The EFI-X thing turns into quite a never ending story (see our recent reports here and here). So although june, 23rd – originally announced EFI-X release date – has passed by without any astonishing news on the EFI-X website, there have been some rumors in forums.

Forums tell EFI-X will be priced at 80€ (~125USD). EFI-X will not sell to consumers. See a privisional list of countries selling EFI-X here – though yet no retail stores have been named either. They want to start shipping in about 4 weeks (end of july).

Moreover it seems like only Gigabyte motherboards are fully supported by that device. We hope to receive an NFR copy of EFI-X soon to keep you updated with details.

[MacOS] EFI-X.com releases compatibility list

Update jan 01, 2009: EFI software solution called EPOS available for free…
Update june 26, 2008: read latest news about EFI-X here

We yet reported the rumors about an EFI emulator being put into a USB boot device (read here). The project is called EFI-X.com and the guys behind announced to open their shop tomorrow. Anyway they updated their website already and released some more details about “their” products. Though there are no information about pricing yet.

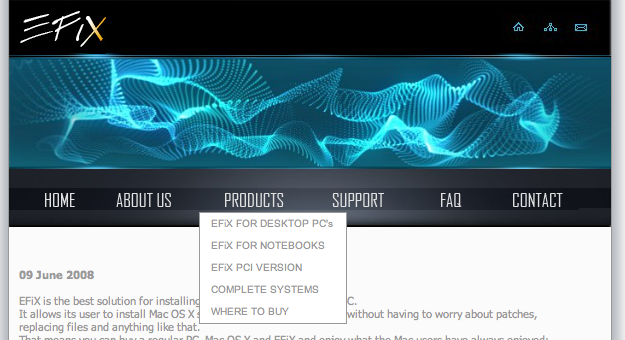
EFiX seem to start with two products (see here)

EFiX USB V1

  • EFiX interactive system boot selector
  • allows to install MacOS X from retail DVD (and online updates)
  • installed into internal USB (this is quite vague still)

EFiX USB Deluxe / Sound

  • EFiX interactive system boot selector
  • allows to install MacOS X from retail DVD (and online updates)
  • includes USB Soundcard
  • USB Hub
  • installed into internal USB (this is quite vague still)

Supported Hardware (see here)

EFI-X supports the following CPUs:

  • Intel Core 2 Extreme
  • Intel Core 2 Quad
  • Intel Core 2 Duo
  • Intel Pentium dual-core (E2xx0)
  • Intel Celeron dual-core (E1200)
  • Intel Celeron (420, 430, 440)
  • Intel Multi Core CPU

and graphic adapters using these chipsets:

  • nVidia Geforce 7300 GS / GT
  • nVidia Geforce 7600 GT
  • nVidia Geforce 7800 GT / GTX
  • nVidia Geforce 7900 GS / GT
  • nVidia Geforce 7950 GT
  • nVidia Geforce 8600 GTS / GT
  • nVidia Geforce 8800 GS / GT / GTS / GTX / Ultra
  • nVidia Quattro FX 5600
  • ATI Radeon 2600 XT
  • ATI Radeon HD 3870

and these motherboards:

  • Gigabyte GA-P35-DS3P (rev. 2.0)
  • Gigabyte GA-EP35-DS3P (rev. 2.1)
  • Gigabyte GA P35-DS3R
  • Gigabyte GA P35-DS3L

What (we) the people think

Many endusers will welcome this product. Endusers won’t need to download illegal distributions of adjusted and custom hacked/packed install DVDs (like Kalyway or iAtkos). People who where following the Brazil-Mac’s way will also like it. It simply seems to make the installation of MacOS X on whitebox PCs hassle-free, because we all will be able to use original retail DVDs. People will tend to buy those DVDs rather than just downloading from dark torrent sites. This is a strong position to like this product. Apple might like it aswell since it may help their propable guerilla strategy to silently undercut the PC market.

Anyway in the meantime several things have been mentioned that might detain people from buying it. First being the question of the legal status of EFiX. There has been a strong dispute about if EFI-X is legal or if it might contain parts of code that have been released under Apple’s open source license (like Dave Elliot’s Darwin Bootloader or the EFI emulaton Chameleon), which would require to release the source code of EFi-X as open source aswell. Second being something we’re gonna tell when we got enuff information…

[MacOS] Boot native MacOS X with EFI-X USB Dongle

Update 26.06.2008: Read latest news about EFI-X here
Update 22.06.2008: Read latest news about EFI-X here

The newest on the market is announced to be released on 23. June. It is called EFI-X and seems to be quite a revolution. Technically it is a small USB dongle that contains a bootloader. That bootloader allows booting of native MacOS X installer DVDs or yet installed MacOS X installations…

Are you yet shackling your heads? Well, we are. It is said it will support any PC hardware to run OS X. At that point we are skeptical, since even Apple themselves are not able to support any hardware… We expect this to allow seamless installation on close-to-original-mac hardware. Which means: Intel Core2Duo on MoBo’s with Intel chipset and typical ATI or NVidia graphic adapters. But anyway: the installation will become simple and easy. No more BrazilMac workarounds or illegal downloading thru torrents from darkest places on the net. More features – as far as known yet – to be found in the updates section below the video.

We are quite curious about more details but currently the project’s website doesn’t contain anything more than we just told you. Netkas provides a video that shows the bootscreen. Sadly it is of poor quality and light, but see here:

Update (14.08.08):
Rumors on forums are telling about the specifications of your PC required to allow EFiX to run MacOS X

  • Intel Core 2 Duo (not likely to support AMD)
  • Intel chipsets on MoBo’s req
  • ALC889A or ALC885 audio chipset on MoBo to work out of the box
  • USB stick needs to plugged all the time (well who cares?)

Update II (15.06.08):
Althought not finished, the website of EFI-X.com has been updated during the last few hours. It seems, the following product versions of EFi-X will be sold:

  • EFiX for desktop computers
  • EFiX for notebooks
  • EFiX PCI version
  • EFiX complete systems

That looks promising. More to come at latest on 23rd…
Update III (16.06.08)
An FAQ has been published by the EFi-X Team. It clearly states, AMD CPUs are not supported, yet – as expected…