Tag Archives: Jailbreak

[iPhone] Vodafone Germany to Offer Plan for Unlocked iPhones

Vodafone yesterday announced to offer a data-plan for customers who actually bought an unlocked iPhone in a foreign country. The data-plan requires a normal fon-plan by vodafone, means: the iPhone plan is an upgrade. The interesting point is the price.

This flatrate costs 9,95€/month surcharge to a current fon-plan. It gets slowed down from HDSPA to EDGE/GPRS speeds after having transmitted 500MBytes.

In contrast to original T-Mobile Germany iPhone plans Vodafone does not permit using Voice-Over-IP (VoIP), Instant Messaging (IM) or VPN – means they tolerate that you even jailbreak your iPhone in order to install third party apps, that are not provided through the official Apple AppStore.

The struggle for the cheapest iPhone plan has begun.

[iPhone] Experienced Issues with Firmware 2.0

After some days of using a pwned iPhone 2G with firmware 2.0, we found some issues. As of now, we don’t know where they come from. But we definitly know: we don’t like them.

  • WiFi doesn’t stay connected, it falls “asleep” and takes time to reconnect
  • the more apps have been used, the longer it takes to see reactions
    means: if you click on contacts and have used Safari, SMS and Youtube before, opening of contacts takes a lot longer than after an fresh reboot!
  • loading the contacts take 5-10 seconds
  • scrolling through contacts is jerky and freezes the view from time to time
  • scrolling through photos is jerky and freezes the view from time to time
  • launching the camera takes up to 10 seconds
  • the unlock slider may not react in time and you may miss a call
  • keyboard reacts slower than on 1.1.4
  • reaction time is heavily delayed (or seems not to react at all for more than 17 seconds – see video below)

We won’t blame anyone for this, because on the one hand this could be an effect of Pwning the iPhone and on the other hand these issues might be “features” of the original unmodified firmware 2.0 aswell. See update below, this is a firmware 2.0 issue.

Anyway we feel there are heavy problems with the memory management in firmware 2.0, that need to be addressed soon. Workflow was a lot faster with firmware 1.1.4.

As of now we just reboot the iPhone once a day, but this really is no working solution for such a device. We feel this reminiscent to Windows 95 times is not necessary.

Update: it has been reported this may come from Cydia. As we’re investigating this issue, we get back to you once we found a solution.

Update: Pumpkin of the iPhone Dev Team reports this most likely is an issue of the original firmware 2.0. Native iPhone users have also experienced this behaviour (see reports here in Apple’s forums). The internet is full of reports. Do a Google search you will find plenty of people reporting these issues.

[iPhone] Pwnage for Windows 2.0 (WinPwn) waits in its wings

CMW – the developer of the Microsoft Windows version of Pwnage tool announced that WinPwn is about to be released. On http://www.winpwn.com he writes: “Expect a release within the next few days!”.

That sounds like a release on the weekend. Windows users help is on its way. In the meantime scroll the Apple pages and consider buying a Mac :-)

[iPhone] HowTo Activate and Unlock your iPhone using Pwnage 2.0

Article is outdated. Find newest Jailbreak and Unlock HowTo for iPhone Firmware 3.0 here.

Note

We need to stress: respect the laws of the country you live in. For instance as german citizen with a T-Mobile Germany plan and iPhone you are not allowed to jailbreak or unlock your iPhone. T-Mobile is not kidding in this topic, as we’ve all seen with the sipgate sue (we reported here). This tutorial is in no way meant as an invitation to do things that are in violation of your contracts. We cannot be held responsible for bricking your devices. You do everything at your own risk and responsibility. Thanks.

I. Abstract

Pwnage Tool 2.0 is the newest tool to unlock and jailbreak “old” iPhones (iPhone 2G) and jailbreak “new” iPhones (iPhone 3G). It is developed, maintained and provided for free by the iPhone Dev Team. The Dev Team already provided Pwnage Tool 1.0 (see recent tutorial here).

This tutorial is for Mac users only who previously activated and unlocked their iPhones using Pwnage Tool 1.0. The release of Pwnage Tool 2.0 has been delayed in the last few days because of several bugfixes and issues that occurred during latest test. As we’ve used Pwnage Tool 2.0 in the last hours on some old iPhones, we can say: in contrast to Pwnage Tool 1.0, we encountered some problems with Pwnage Tool 2.0. Keeping that in mind it is your own risk to prolly brick your iPhone. We cannot be held responsible for your actions.

II. Preparations

A Microsoft Windows version of Pwnage 2.0 has not yet been released. Get yourself a Mac, it really is time to switch :-)

You need to download and install a couple of programs

  • download and install Pwnage Tool 2.0.1 (here or here) / Updated links to new Pwnage 2.0.1
  • download bootloaders.rar (for legal reasons, we can’t provide a direct download link as we are in Germany. Do a simple Google search for bootloaders.rar)
  • update to iTunes 7.7 (using Apple Software Update)
  • download iPhone Restore Firmware 2.0 (here)

III. Fasten your seatbelts

Before taking off, we highly recommend to do the following preparations on your iPhone:

  • backup/synchronize current calendar and address book using iTunes
  • backup current SMS using Syphone (download here)

In case you didnot, we highly recommend you read our tutorial about activating and unlocking iPhones with firmware 1.1.4 (see here).

IV. Take off

…into the wide open world of unlocked and jailbroken iPhones.

  1. Start Pwnage Tool 2.0, and click OK.

  2. Choose Expert Mode

  3. Select iPhone 2G, and click the blue arrow
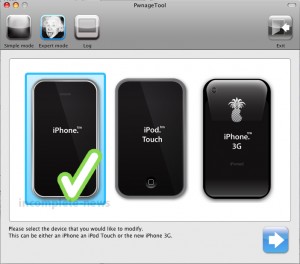
  4. After clicking the blue arrow you will see a window like this:
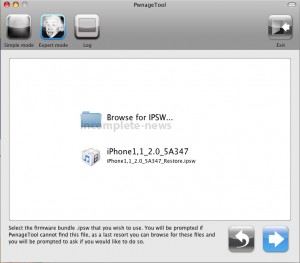
    Note: we encountered errors when browsing for the IPSW firmware that we manually downloaded several times:
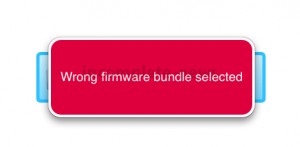
    We circumvented this error by letting iTunes download the firmware. But be careful let iTunes only download the firmware. Don’t choose download and install!!!

  5. When Pwnage feels like the Firmware is the right one, it will show this picture, where we can manually change some settings. We highly recommend to change nothing but the Cydia packages. We even leave the pictures the same.
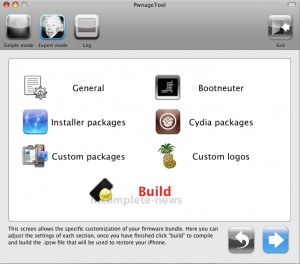
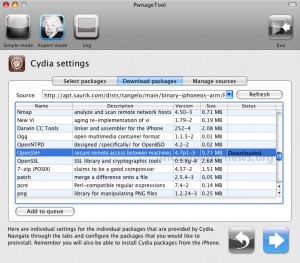
  6. Inside the Cydia packages menu we recommend to choose these files for download:
    OpenSSH, Cydia Installer, and Cydia's Source Set. These files will automatically become downloaded in the background.
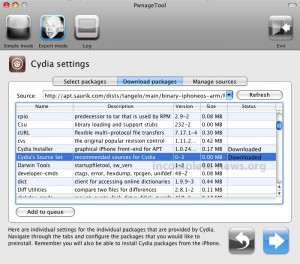

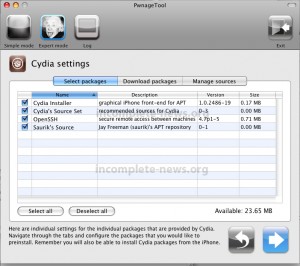
  7. Make sure you select the above downloaded Cydia packages. Under Select packages you can check them, in case the packages are not pre-chosen for including into your custom IPSW. Then click the blue arrow again.
  8. After having clicked the blue arrow again, we may choose new logos. We recommend to leave these as they are and click the blue arrow again.
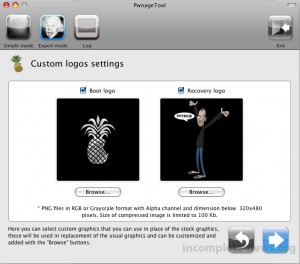
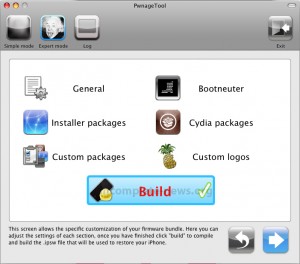
  9. Pwnage Tool 2.0 feels we are ready and shows “Build” with a checkmark. We click the blue arrow again and can already smell the pwrn.
  10. You may provide the bootloaders now, by clicking No to search the web for them (we only show the 4.6 bootloader question, in fact there will be same question for the 3.9 bootloader).
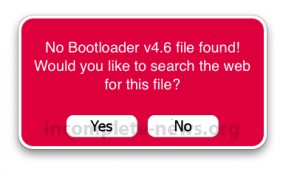
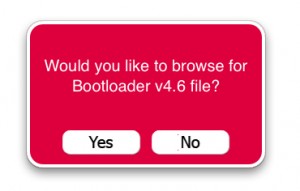
  11. After having chosen the bootloader Pwnage needs to know where to save the custom IPSW file. It will show a picture similar to this:
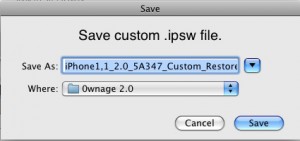
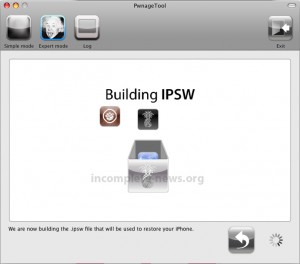
    After having chosen the target filename and folder, Pwnage will submissively begin its work.
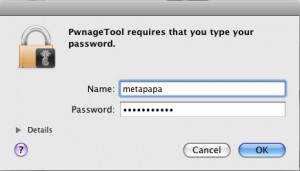
    At a specific point of work, Pwnage will require your admin password. This is due to a limitation of access to the filesystem.
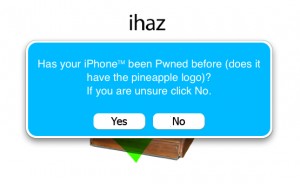
  12. After working some minutes you will be shown this menu. Since we are all obedient Pwnage users (aren’t we?) we already had used Pwnage 1.0 before. And therefore we choose Yes.
  13. Pwrnage Tool will wish us the best for our recovery and wants to be quitted:

V. Approach for Landing

  1. As our odysee thru iPhonitis is not over, we need to start iTunes (we have our iPhones connected!). And we choose the iPhone menu in iTunes (looks like this picture:)
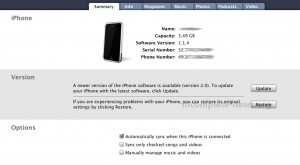
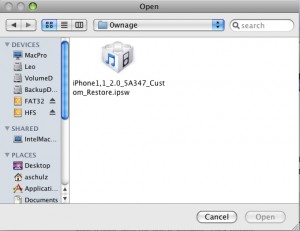
  2. We need to restore our 0wn firmware, therefore we need to hold the ALT key and press Restore Button. We will get a dialog, where we can choose our custom firmware:
  3. iTunes will begin its work of extracting and restoring our custom firmware. This process will take some minutes. Don’t disconnect during this period. You would have an expensive brick then.
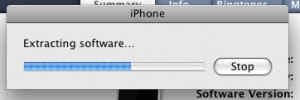
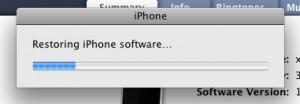
  4. After restoring successfully the custom firmware to your iPhone your iPhone will reboot and eventually show a screen that indicates that the baseband is currently in process of getting unlocked:
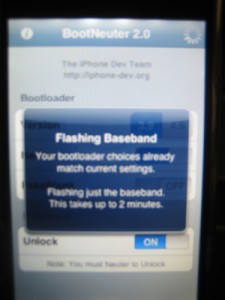
  5. After the baseband flashing has been finished, your iPhone will reboot again and will show up with firmware 2.0. We hope you enjoyed your flight with incomplete-news airways. We wish you a good stay on Eff-Doubleyou-Two-Dot-Oh. We recommend to pick up your baggage in the claim area.

VI. Baggage Claim Area

  1. You may now decide to set up your system clean and configure everything anew or simply choose to restore your old settings (like eMail-accounts, calendar, photos, muzaq, and videos):
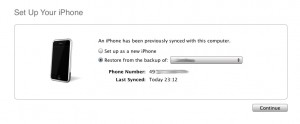
  2. After having clicked Continue you will see this picture. It depends on how many things you had saved on your iPhone and how much space it’s got. Our 4GB testmodel only took about 5 minutes to get all settings restored:
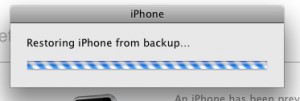
  3. After restoring the settings your iPhone will reboot…
  4. To get back your EDGE settings, simply follow our tutorial here (see part II.)_T_H_E__Z_E_N__W_A_Y_ . In firmware 2.0 the EDGE menu is now called “Cellular Data Network”).

VII. Final words

Congratulations. You’re finished now. In case any of you got questions, don’t hesitate to ask below in our comments section. We hope you enjoyed this tutorial. Thanks for your attention. Big shouts fly out to the iPhone Dev Team. You guys simply rock our hearts…

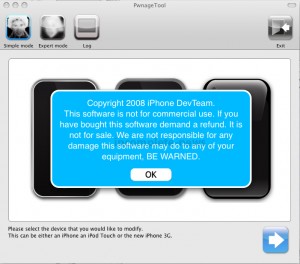
[iPhone] Geohot confirms 3G uses new Bootloader

Although we didn’t get our hands on a new iPhone 3G yet, things are as expected: the iPhone 3G uses a new bootloader for its baseband modem as confirmed by Geohot.

Bootloader versions from the “old” iPhones

As far as we are aware the there are those 3 different bootloader versions known on old iPhones:

  • 3.8 (very rare)
  • 3.9 (iPhones before november 2007) and
  • 4.6 (iPhones after november 2007).

It is widely known, that exploits for these old bootloaders have been found, that allow to SIM unlock any of these old iPhones. No matter which software revision is running.

No Unlock for iPhone 3G, but for old iPhones

For the new iPhone 3G bootloader, there is no (public) exploit known yet. Although the iPhone Dev Team states they can unlock firmware 2.0 – the unlock is most likely meant to work on “old” iPhones only. The only exploit yet known (in both old and new iPhones) is an iBoot bug. The iPhone Dev Team provided a video showing Pwnage Tool neutering the baseband for firmware 2.0:

Video: Pwnage Tool Bootneuter on firmware 2.0 (on an old iPhone)

Bootneuter 2.0 from iphonedev on Vimeo.

A new jailbreak for iPhone 3G and old iPhones

The Pwnage Tool 2.0 (and Geohot’s yiPhone) will most likely feature an iBoot bug to jailbreak old and new iPhones. iBoot is needed by iTunes to talk to when restoring firmware. About a year ago, Geohot found out that iBoot provides a full interactive shell. The only problem was, iBoot only allowed signed code to run. The iPhone Dev Team now managed to break the chain of trust from the earliest boot stage. Thus allowing to run unsigned code and in the end jailbreaking old and new iPhones (see video):

Video: Talking to iBoot unsigned

Talking to iBoot? from iphonedev on Vimeo.

Both videos are provided by iPhone Dev Team. Kudos to you guys.

[iPhone] Update, Activate, Jailbreak, and Unlock Firmware 1.1.4

english

iClarified just released a manual for jailbreaking, activating and unlocking firmware 1.1.4. Bootloader 3.9 seems to be required. They use a modified version of ZiPhone. I expect Zibri not to be happy with this. However this is not updating but recovering to 1.1.4 therefore I strongly recommend to do like iTunes recommends: to save the configuration of your iPhone automatically (means: contacts, calendar entries, text-messages, network configuration, weather etc.). I reinstalled those save configuration settings afterZiPhone activated the phone and before the unlock.

However I can confirm the howto (Mac version) works flawlessly. There is also a howto for Windows users – not tested though…

unlock114

german

Die Jungens von iClarified haben eine nette klar verständliche Anleitung verfasst, wie man Firmware 1.1.4 bearbeiten muss. Diese Anleitung benötigt Bootloader 3.9. Zum Einsatz kommt eine modifizierte Version von Zibris ZiPhone. Genau genommen ist der Prozess kein Updaten, sondern ein Recovern auf die Firmware 1.1.4. iTunes bietet deshalb vor dem Recovery-Prozess auch an, die Einstellungen zu sichern. Wenn Ihr das nicht macht, sind die Kontakte, Kalender Einträge, SMS Einträge, WLan Einstellungen, Wetter Einstellungen nach dem Recovern natürlich im Eimer. Meine Empfehlung daher, nach dem ZiPhone das Telefon aktiviert hat, könnt Ihr die gesicherten Einstellungen noch vor dem Unlock wieder in das Telefon zurückspielen…

Ihr findet das englischsprachige HowTo für Mac hier – es funktioniert einwandfrei. Eine Windows Variante gibt es ebenfalls, die ich jedoch nicht getestet habe…