Tag Archives: Mac

[MacOS] Using CrossOver to run UltraEdit

I. Abstract

Many of us are nowadays using different operating systems almost at the same time. At work most of us use Windows machines, at home we use a Mac, coexisting with a Windows Laptop. Although we really like the Mac eco system, from time to time we find out we’re missing something from the Windows world very desperately. Many of us coders who recently switched to a Mac soon find out, we miss one thing for sure: UltraEdit. UltraEdit is one (if not even the) editor for the Windows environment. And once you get used to a workflow you will not want to miss it, no matter if you switched completely or not. This is were the emulators or the virtual machines come into play. As long term users of UltraEdit we’re gonna show you in the following article how to get UltraEdit (almost natively) installed on MacOS using the WINE based CrossOver by CodeWeavers. Enjoy…

II. What you need

  • Intel Mac (or a Hackintosh with EFI-X) running MacOS X 10.5 Leopard
  • CrossOver Mac 7.0.1 installed. Get a CrossOver trial version here (we recommend to get the “Professional Version” as it also includes CrossOver Games, but for running UltraEdit only, CrossOver Standard Version will be sufficient.)
  • UltraEdit 14.10 installer. Get an UltraEdit trial version here. In case the downloaded file is .zipped, please unpack before proceeding.

III. Prepping CrossOver

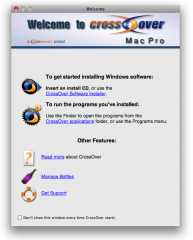
  1. Start CrossOver. The welcome screen will ask you what to do. Click the “CrossOver Software Installer” link:
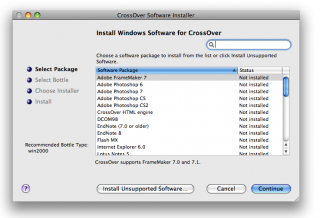
  2. An Installer window will pop up. Choose “Install Unsupported Software“:
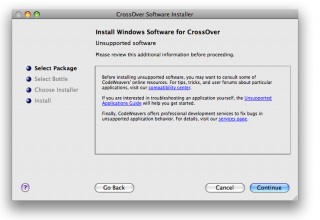
  3. Click “Continue” after having read this reminder:
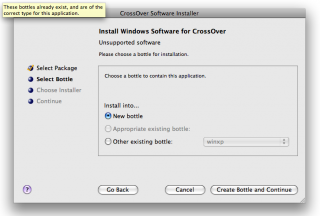
  4. Choose to “Install into... New bottle” and click “Create Bottle and Continue“:
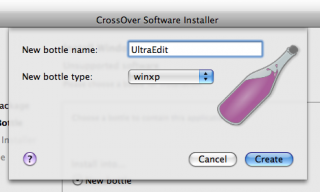
  5. Enter the “New bottle name:” (like UltraEdit, for example) and choose “New bottle type” as “winxp” (yes, means Windows XP compatibility mode). And hit the “Create” button:

    The bottle is being created then. This process may take some minutes on older machines.

IV. Installing UltraEdit

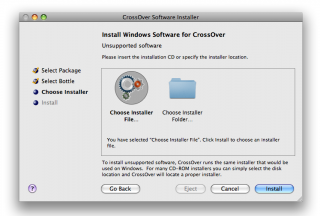
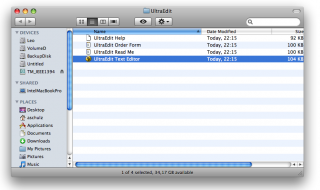
  1. After bottle creation, CrossOver like to install. So “Choose Installer File...” and click “Install“…
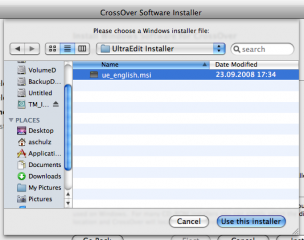
  2. Locate the installer file. It will be called something like “ue_english.msi“. Click “Use this installer“:
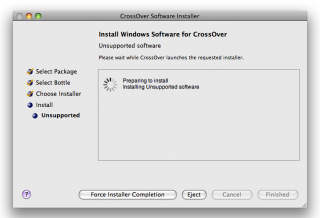
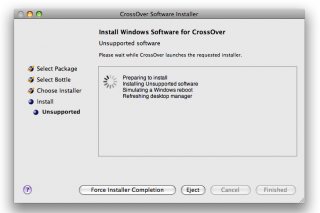
  3. CrossOver will prepare to install (no interaction of yours required here!)
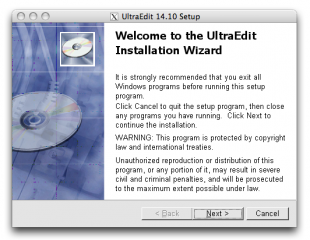
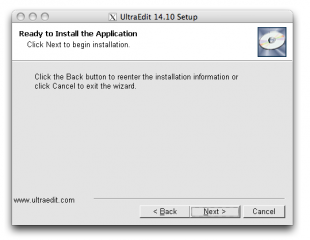
  4. Et voilà, the well known Windows installer will be loaded. Click “Next
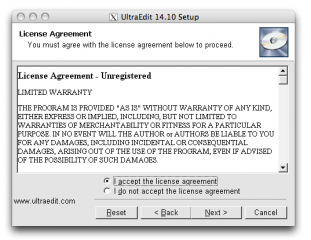
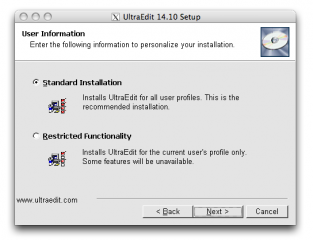
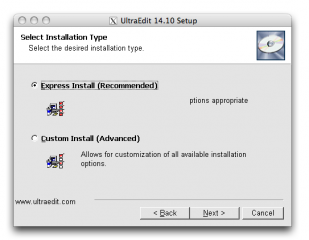
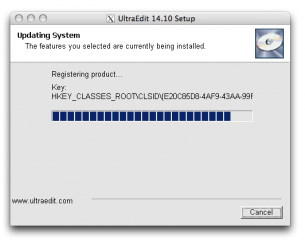
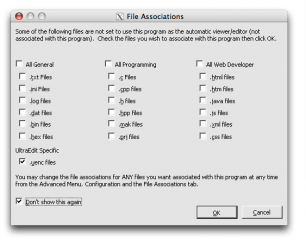
  5. We expect, you know how to install Windows software, so we’re not gonna comment the following screenies:


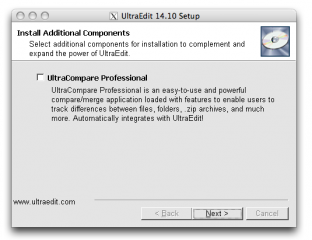
  6. We did not install UltraCompare, but you may give it a try…
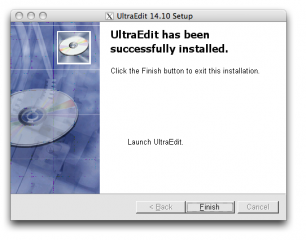
  7. Uncheck the “Lauch UltraEdit” box and click “Finish“.

V. Final preparations

  1. After installation, Crossover will do a virtual reboot of its Windows XP bottle, where you installed UltraEdit into (no interaction of yours required here!)
  2. After virtual reboot, it will create the program links. You may now double click the “UltraEdit” program link to start it.
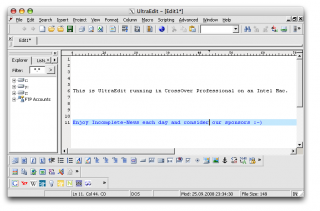
  3. Feeling home already?
  4. Don’t hesitate to type some lines

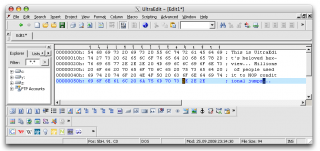
  5. Yes, you’re done…

VI. Final words

We hope you had some fun, following this tiny HowTo to get UltraEdit back to our new environment. Although the FTP feature did not work for us, as it crashs UltraEdit, by being able to run UltraEdit we can use our trained workflow for coding and editing. Anyway there are native editing solutions on a Mac, which we will have a closer view on within next time.

[iPhone] QuickPwn 1.0 for MacOS X released

Our fellow iPhone Dev Team yesterday finally released QuickPwn for MacOS X. Sadly the Dev Team in the first place only provided a .torrent link (get torrent here) for distribution. We will come up with further details soon. For now: there are no reports about bugs about this version for Mac ,yet. Use “Archive Utility” to unpack, otherwise permission may be screwed up. Thumbs up for the Dev Team.

SHA1 sum: QuickPwn_1.0.0.tbz (via torrent) = 22ee0d6814a6bac9b1b9a8c7715dd714bd6bb449

[Update] Download QuickPwn 1.0 for Mac from these mirror locations now: RapidShare and iPhone-Hacks.com.

[MacOS] Install Leopard from .dmg Image to your System

“and first for something complete different”: Muzaq… coding or administrating system can’t do without gooood muzaq. Check our latest tunes here :-)

This time we’re gonna install Leopard from a .dmg image instead from DVD. The purpose is having a repair and recovery system by the hand in case you need it. My story is this: after having had a clean install of Leopard finished and having had applied all the updates, my MBP simply crashed again and again (two mouse pointers error – I found a solution in the meantime: that bug belongs to the Leopard Graphics Update – read it here howto fix it), since at that point I could not fix it, I then decided to reinstall. Something seemed fishy and would hopefully be gone after another fresh install. But as you expect: the same problem occurred again. I then decided to restore my previous tiger install and installed the Leopard DVD to a second partition. This way nothing can stop me, whereever I am, whatever does not work…

Ok what to do now?

I assume

  • You don’t have a bootcamp partition installed
  • means your harddrive is single partitioned
  • You got Tiger installed
  • You know the size of your harddrive (you can also find out in “Disk Utility”)

Now, let the game begin…

    1. Insert Leopard installation DVD into your drive
    2. Start “Disk Utility” to make a .dmg image of your installation DVD (see picture)
    3. click the Mac OS X Install DVD (highlight it) and choose New Image


beforedmg

  1. Choose Read as type of image and name it Mac OS X Install DVD(see picture)

    makedmg

  2. Wait forever (15-20minutes)
  3. Close Diskutility and
  4. Open terminal and enter:
    sudo diskutil resizeVolume disk0s2 139G "HFS+" "LeoInst" 10G
    (in this example the total harddrive size is 149GB = “139G + 10G”)
  5. This command resizes the first partition to 139GB and generates a second partition formated in “HFS+” with size of 10GB. The name of the second partition will be LeoInst (disk0s1 is in this case the EFI partition – see here, what makes the EFI partition so interesting, system partition starts at disk0s2 – that’s the partition we’re gonna resize and split into disk0s2 and disk0s3)
  6. After having executed this command successfully you need to reboot
  7. After reboot open “Disk Utility” again
  8. You should now see two partitition on your harddrive (see picture)

    LeoInst

  9. Click on the second partition named “LeoInst”
  10. Click “Restore”
  11. As Source choose your Mac OS X Install DVD.dmg image (should be located on the desktop!)
  12. As destination drag and drop the second partition called “LeoInst”
  13. click “Restore”
  14. Wait about forever to have the DVD copied to your drive (again 15-20mins)

    diskutil01

  15. Close Disk Utility
  16. Go to “System Preferences” and choose “Startup Disk”
  17. Choose your Mac OS X Install DVD (which is in fact now a partition) as start volume
  18. reboot system and install Leopard

Additional notes

These instructions are intended to be applied to genuine Apple systems rather than HackMacs. In my case I used my MacBook Pro. Because of the different .kexts to be applied to HackMacs this guide will not work for those systems! Be warned!