In our Linux Debian section the following articles have been published during the last weeks:
- How to secure your Debian server by changing the SSH port number (read tutorial here)
- How to secure your Debian server by setting up SSH for passwordless login via public- and private-key cryptography (read tutorial here)
- How to secure your Debian server by updating the buggy openSSH Debian package (read tutorial here)
- How to secure your Debian server by configuring a GUI based Firewall named Firestarter (read tutorial here)
- How to simplify Debian administration by setting up a graphical interface (GNOME) to be used via VNC connection thru an SSH tunnel (read tutorial here)
I. Abstract
This time we’re gonna set up a LAMP (Linux – Apache – MySQL – PHP) webserver. Furthermore we will consider the basic security implications for such a server. Follow us into the amazing world of Debian server configurations. This article will take you about 60 minutes to follow straightforward (and well it took us a lot more than those 60 minutesto prepare, but nevermind, just click our sponsor to help us, when you found the tutorial helpful).
II. Requirements
Hic at nunc, we need to have an SSH connection (better is a running VNC connection (read tutorial here) to our Debian server, because dumbed down: to eventually access the webserver from all over the web, we will configure our firewall using the Firestarter GUI – read tutorial here)
III. Install and test Apache 2 and PHP 5
III. Part I. Installing Apache 2 and PHP 5
We assume you logged into your server as root. Enter that command:
server$ apt-get install apache2 php5 libapache2-mod-php5
(yes we can use the apt-get install command to install more than just one package, in this case we use it to install three packages consecutively)
III. Part II. Creating a PHP test file
Standard path of your www web folder will be /var/www . For checking if everything went well, we simply create a phpinfo script. Take your favourite editor like vi, vim, joe or nano. We use nano…
server$ nano /var/www/test.php
Fill that command into your editor:
And save and exit (in nano: ctrl+x).
III. Part III: Checking via VNC
When you followed all our other articles about configuring a server, you will have the Firestarter running as a frontend to the iptables firewall. At this point we highly recommend to still block and disallow any incoming connections on port 80, since we will install phpmyadmin and it would be available from all over the net. For Firestarter this means: the only port that has been opened by you explicitly still is the SSH port.
For testing our php environment it is much safer to perform an SSH tunneled VNC connection and start a browser on that server. Which points to http://127.0.0.1/test.php
When everything went well, you will see your server specific PHP configuration.
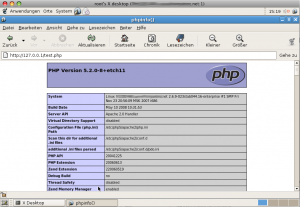
As this file simply tells to much server internals and since we really don’t need it anymore, we strongly recommend removing it now.
server$ rm /var/www/test.php
A file like that is easily forgotten and could become a serious security danger…
IV. Install MySQL, PHP5 connector and phpMyAdmin
IV. Part I. Installing MySQL
We still assume, you’re logged into your server as root. Enter the following command:
server$ apt-get install mysql-server mysql-client php5-mysql
(this time we again install three packages, we could have installed php and mysql even in one step, means we would have supplied an apt-get install with six commands)
IV. Part II. Configuring MySQL
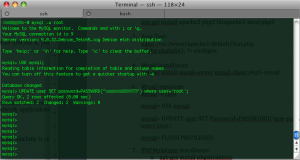
All of us know about the bad guys being outside. We can make their lives a little more difficult by applying a default root password for MySQL. Do the following as root:
server$ mysql -u root
(login as user root)mysql> USE mysql;mysql> UPDATE user SET Password=PASSWORD('yournewpasswordgoeshere') WHERE user='root';mysql> FLUSH PRIVILEGES;mysql> quit;
V. Installing phpMyAdmin
You are logged into your server as root, aren’t you? Enter those commands:
server$ apt-get install phpmyadmin
V. Part I. Security precautions for phpMyAdmin I
During the installation of phpMyAdmin a symbolic link will be created to make phpMyAdmin available under that address: http://yourserver.net/phpmyadmin.
We feel this is not a good idea and not a very secure way here. Even if you already set the MySQL root password, it is no good idea to leave standard settings at that, since all the bad guys know this, aswell. So we have two options. First we just put an .htaccess file into that folder. That would work, but has the little disadvantage, that it would show the bad guys that the address http://yourserver.net/phpmyadmin really exists. Therefore we prefer option 2: we make phpMyAdmin available from localhost (means from within the server) only and move it to a new place and make it accessible on a specific port only (we use a non privileged port for that). We still can access our beloved phpMyAdmin simply via SHH tunneled http or SSH tunneled VNC directly on the server.
server$ unlink /var/www/phpmyadmin
(we remove the symbolic link, means pointing to http://yourserver.net/phpmyadmin won’t return any results anymore)
V. Part II. Security precautions for phpMyAdmin II
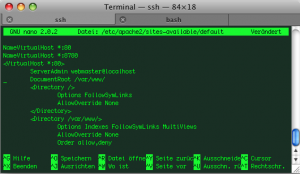
Since even we still cannot access phpMyAdmin, we need to change the Apache configuration a little bit. Take your favourite editor (we again use nano here) and do that:
server$ nano /etc/apache2/sites-available/default
Right in the beginning of that file change (old):
to (new):
NameVirtualHost *:80
NameVirtualHost *:8780
Then change (old):
to (new):
and after the closing </VirtualHost> tag, we insert this:
<VirtualHost *:8780> Alias /my-pma-is-not-accessible/ "/usr/share/phpmyadmin/"
<Directory "/usr/share/phpmyadmin/">
Options Indexes Multiviews FollowSymLinks
AllowOverride None
Order deny,allow
Deny from all
Allow from 127.0.0.0/255.0.0.0 ::1/128
</Directory>
</VirtualHost>
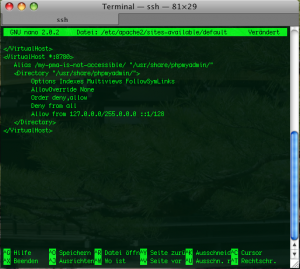
As we can see, we specify 127.0.0.1 (localhost) as the only Allow from address and bind access to port 8780. So our phpMyAdmin will now be accessible from http://localhost:8780/my-pma-is-not-accessible (== port 8780) only. Since port 8780 is behind our firewall and is not accessible from outside, we are quite safe for the beginning.
V. Part III. Security precautions for phpMyAdmin III
As mentioned before we got two ways for accessing our beloved phpMyAdmin now. The first is simply using our VNC connection and start a browser on our server machine and let it point to http://localhost:8780/my-pma-is-not-accessible . The second way is simply forwarding the port 8780 to our local client browser via SSH tunnel.
Having bound the phpmyadmin access to the new port 8780 solves here another issue: forwarding of privileged ports would require root privileges on a client machine. Our somewhat unpurified trick to make Apache listening on a second non privileged port allows us forwarding to a client machine without a hitch.
Let’s edit /ect/apache2/ports.conf
server$ nano /ect/apache2/ports.conf
Let’s make it listen to that second port mentioned. Inside the ports.conf add this parameter
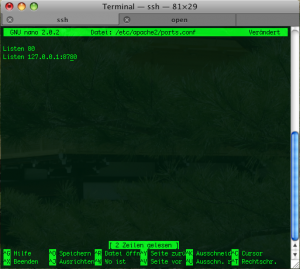
By now you might guess what this configuration targets at. It creates a listen port for apache on our beloved port 8780 but only for network cards that have the IP address 127.0.0.1. Means in case our firewall would go down and port scanning would give results, there wouldn’t be any results from port 8780…
After that we simply restart our Apache via:
server$ /ect/init.d/apache2 restart
VI. Setting up SSH tunnel for http connection
Ok now we almost made it. For security precautions and for server performance reasons it makes sense to not use VNC connections all the time, although it works. But as it is more comfy to edit phpMyAdmin on your local client machine, we simply set up an SSH tunnel thru our server’s firewall and let it forward http from within the server to our local machine.
This can simply be done by entering this on your client’s terminal:
client$ ssh -f -N -L 8780:localhost:8780 root@yourdomain.net -p 8722
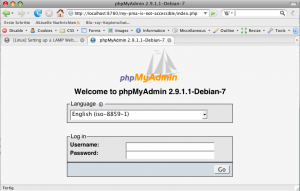
Congratulations, you’re almost done. You can now start a webbrowser of your choice and let it point to:
http://localhost:8780/my-pma-is-not-accessible
et voilà, you’re smack in your phpMyAdmin interface.
Killing your tunnel (and all other running SSH connections) can be done by simply entering on your client machine:
VII. Conclusions
We hope you had some fun by conquering this learning curve. There are several points that we only touched on. We might consider applying other security features like faked error reports. We will deal with those faked error reports (means returning a 404 instead of 403) and comprehensive security techniques in forthcoming articles, because this would have lead us here astray.
If you found this article helpful: why not considering our sponsor’s offers? Thanks for re-enacting and now for something completely different: our sponsor …


