Tag Archives: JAU

[iPhone] HowTo Jailbreak and Unlock using RedSn0w

I. Abstract

The following article will show you how to install firmware 3.0 on your iPhone 2G by also allowing to jailbreak, activate and eventually to unlock (JAU process). At the moment of writing this article is for Mac OS X users with iPhone 2G’s only.

II. Who needs this article?

We suppose 50% of all 2G users around the globe. As iPhone 2G’s were sold almost everywhere with Sim-Lock enabled (besides some T-Mobile Germany or Orange France unlocked 2G’s).

III. Warning

You’d better read all of this in detail before you do anything practically! If you feel there is something you don’t understand or something you will not be able to handle, then go and ask someone who is in the know.

!!!!!!!! Otherwise your devices may be terribly screwed up! !!!!!!!

IV. Required Downloads

Download these tiny things first:

» RedSn0w for Mac OS X
» iPhone OS 3.0 for iPhone 2G
» if you are using an iPhone 2G: get Bootloader 3.9 and 4.6

RedSn0w is almost the same as QuickPwn was in the ancient days of iPhone firmware 2.x

V. Preparing for Take off

  1. you need to have iPhone OS 3.0 already installed / updated /restored via iTunes
  2. install RedSn0w
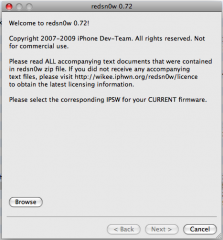
  3. start RedSn0w
  4. Browse to the downloaded restore firmware (iPhone1,1_3.0_7A341_Restore.ipsw)
  5. Wait for the firmware to be checked

  6. Click Next
  7. Wait for the firmware to be modified
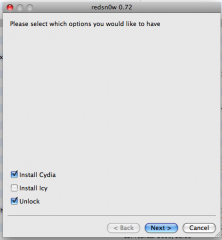
  8. Select Install Cydia (and Unlock if you are using an iPhone 2G. If you are using an iPhone 3G, don’t select to unlock, since it will not work this way)
  9. Click Next
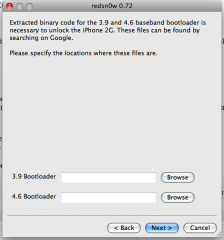
  10. Browse for the Bootloaders you downloaded
  11. Click Next
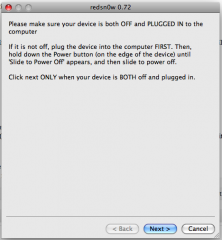
  12. Turn your iPhone off
  13. Turn iTunes off

VI. Fasten your seat belts // Get into DFU mode

  1. Click Next
  2. bring out beloved jesus phone into DFU mode
  3. RedSn0w guides you thru the required steps (anyway this may take several repetitions as this is not as easy as some people write on the net!)

VII. Ignition sequence start

  1. the uploaded modified ramdisk will do all the required stuff
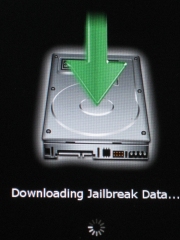
  2. to indicate what is going on your iPhone will show some nice pictures like this:
  3. don’t disturb the process
  4. instead: relax and get yourself a good drink or a cigarette
  5. as this may take some minutes

VIII. Possible issues

Although we haven’t been reported any yet, this doesn’t mean there can’t go something wrong. If you run into problems, try:

  • restoring original unmodified 3.0 firmware from within iTunes 8.2
  • make sure you installed firmware 3.0 with iTunes 8.2
  • generate a custom pre-hacked ipsw using PwnageTool (find article here)

IX. Kudos

Fly out to the iPhone Dev Team. You guys should get paid by Apple…

[iPhone] HowTo Jailbreak and Unlock using PwnageTool

I. Abstract

The following article will show you how to install firmware 3.0 on your iPhone 2G by also allowing to jailbreak, activate, and eventually to unlock (JAU process). At the moment of writing this article is for Mac OS X users with iPhone 2G’s only.

II. Who needs this article?

We suppose 50% of all 2G users around the globe. As iPhone 2G’s were sold almost everywhere with Sim-Lock enabled (besides some T-Mobile Germany or Orange France unlocked 2G’s).

III. Warning

You’d better read all of this in detail before you do anything practically! If you feel there is something you don’t understand or something you will not be able to handle, then go and ask someone who is in the know.

!!!!!!!! Otherwise your devices may be terribly screwed up! !!!!!!!

IV. Required Downloads

Download these tiny things first:

» Pwnage 3.0 for Mac OS X
» iPhone OS 3.0 for iPhone 2G
» if you are using an iPhone 2G: get Bootloader 3.9 and 4.6

V. Preparing for Take off // Prepping your custom iPhone OS 3.0

  1. make sure you synced your iPhone with iTunes before to have all your current calendar and address book entries in a safe place
  2. Install PwnageTool
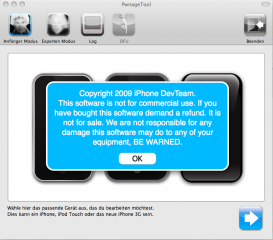
  3. start PwnageTool
  4. Choose Expert Mode
  5. Select iPhone
  6. Click the Next button (down right of PwnageTool window)
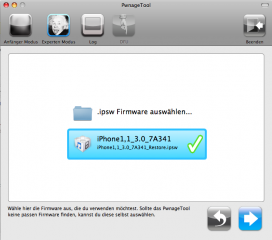
  7. Select (or browse for) the iPhone1,1_3.0_7A341.ipsw firmware
  8. Click the Next button
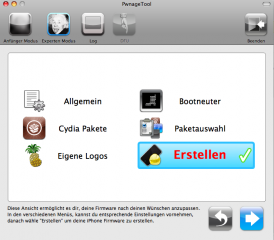
  9. You now may choose some more Cydia Packages (like SSH), but you can also safely install this later via Cydia on the iPhone. This is a matter of taste
  10. Click Create (here in german “Erstellen”)
  11. Click the Next button
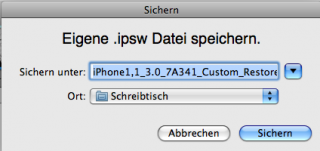
  12. Select a location to save the custom firmware 3.0
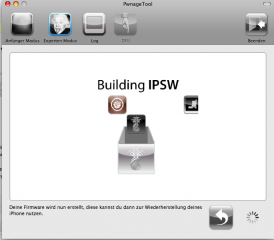
  13. wait some minutes for the creation of your custom firmware 3.0
  14. you may provide your adminstrator password during creation phase, this is normal !

VI. Fasten your seat belts // Get into DFU mode

  1. in case you never pwned your iPhone before: bring it into DFU mode first.
  2. PwnageTool guides you thru the required steps (anyway this may take several repetitions as this is not as easy as some people write on the net!)

VII. Ignition sequence start // Restore

  1. start iTunes (make sure you’re using iTunes 8.2)
  2. Select your iPhone (found on the left column under devices)
  3. and hold the Alt Key and Click the Restore button (this allows browsing for your custom firmware)
  4. The iPhone software will be extracted and prepared for restoring
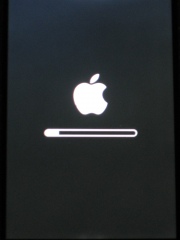
  5. in the meantime your iPhone will show a status bar like this:
  6. The whole process will take some minutes, don’t wonder about that

VIII. Possible issues

You may receive an “unknown error 1600”, “unknown error 2001”, “unknown error 10”, or “unknown error 20” . If this is the case you may try this:

  • restore the original unmodified iPhone firmware 3.0 first and the re-restore your custom firmware and
  • try aswell in DFU mode as in normal mode
  • if all that does not work: restore with original unmodified iPhone firmware and jailbreak with redsn0w (article here)

IX. Kudos

Fly out to the iPhone Dev Team…