I. Abstract
Mozilla Thunderbird 3 alpha has been released on May 13th. It’s got a wonderful (terrible) working title: “Shredder Alpha 1”. Anyway, there are two features that we Mac users definitly appreciate to read:
- Thunderbird’s address book is now compatible with OS X’s system Address Book.
- Thunderbird now is a native Cocoa application…
Well to be serious, we don’t really care if it is a native Cocoa app or whatever app it is, if it is running stable in the end. But we do care about the address book integration. For all iPhone users this is really good news. We never had the chance to use Thunderbird and have the email addresses synchronized with our beloved iPhone.
But there are disadvantages at this very moment. First being the integration. Integration of the address book is a one way street only. Currently we can only synchronize our iPhone with our Mac and have the addresses, phone numbers and mail addresses available in Thunderbird. But you still won’t be able to add new contacts, phone numbers or email addresses to your OS X Address Book using Thunderbird. Thunderbird 3 alpha has read access only. To change entries you need to use the OS X Address Book application. Second disadvantage is, the address book integration has been disabled by default, simply because this compatibility module is under heavy development. In this article we’re gonna show you how to enable it in simple steps.
As note: although we didn’t experience any problems while testing during the last week, we have to point out that this is an alpha release that is not intended for productivity use.
II. Requirements
- Intel Mac or Intel Hackintosh (Power PC has not been tested, sorry)
- Download and install Thunderbird 3 alpha (Shredder alpha 1) here.
III. Thunderbird’s Config Editor
We assume you already have Thunderbird 3 alpha installed. Follow these steps:
- start Thunderbird
- open
Preferencesmenu - click the
Advancedmenu - in tab
Generalyou will find theConfig Editor...button – click it
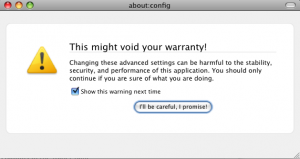
You will see a picture similar like that:
Since you know what you are doing, otherwise you would not be here reading this article, just click the “I'll be careful, I promise” button.
IV. How to add new values
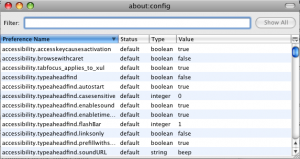
After having promised that you won’t destroy your own system, you will see a new window, which is titled “about: config“. The window will look similar like this:
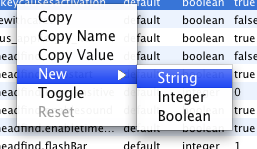
Some more instructions here: with a click on the right mouse button (or ctrl+left mouse button!) you open the context menu in the Config Editor.
V. Add the description tag
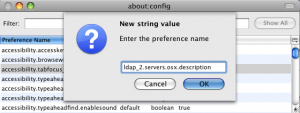
As shown add a New > String value. You will be asked to Enter the preference name, then. Enter this:
-
ldap_2.servers.osx.description - click on
OK
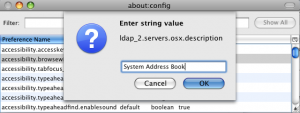
After clicking OK a new box will ask you to Enter the string value. Enter this:
-
System Address Book - click on
OK
VI. Add the dirtype tag
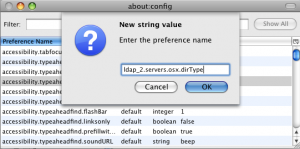
As shown add a New > String value. You will be asked to Enter the preference name, then. Enter this:
-
ldap_2.servers.osx.dirtype - click on
OK
After clicking OK a new box will ask you to Enter the string value. Enter this:
-
3 - click on
OK
VII. Add the uri tag
And again friends: as shown add a New > String value. You will be asked to Enter the preference name, then. Enter this:
-
ldap_2.servers.osx.uri - click on
OK
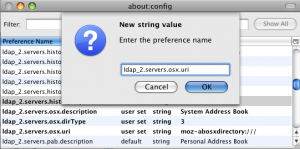
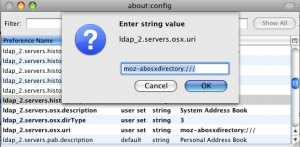
After clicking OK a new box will ask you to Enter the string value. Enter this:
-
moz-abosxdirectory:/// - click on
OK
You’re almost done.
Just restart your Thunderbird and you will have entries of your OS X’s Address Book available in Thunderbird.
VIII. Conclusions
We found no problems with our system configuration during testing. But as said: Thunderbird 3 is alpha status. Problems and issues may occur on your system and alpha status also means there will be changes to the final version.
If you find this article helpful, please consider visiting our non-offensive sponsor (Google-Adsense). Thanks for paying attention.

Great description! Followed it and it perfectly works. Finally I can maintain now only one address book.
Thanks,
~Karsten
note: the dirtype tage should be of type integer, not string.
Beta version fixed it http://www.mozillamessaging.com/en-US/thunderbird/early_releases/downloads/