I. Abstract
Imagine the following situation. You are very keen on this EFI-X device that’s now on sale. So you order a testing device. Some days later the device arrives from Taiwan. Your EFI-X compliant system already kept waiting with a blank SATA 250GB on a Gigabyte EP35-DS3.
After having plugged the EFI-X module to your system, you install MacOS on your PC. It’s really worth the bunch of money since EFI-X lets MacOS boot like a charm. Easy and nice to handle for everyone who is not more willing to hack device drivers into their Hackintoshs. But as a tinkerer who wants to see how it works in real life and so you decide to apply the newest update for your EFI-X module. Since you’re a Mac user you decide to use the MacOS tool provided by the EFI-X team.
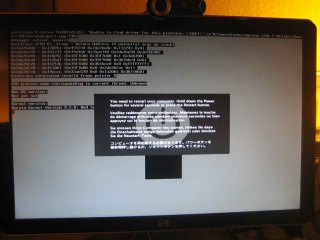
All works well during update, until you do the reboot. All of a sudden the intro boot screen of EFI-X looks quite garbled (like the screen below). You wonder what might have happened and do a reboot. As it doesn’t help you plug your EFI-X to another computer hoping you may be able to flash it again using Windows XP. But after all the installation argy-bargy with EFI-X’ virtual device driver under Windows XP – the update tool tells you, you are running the current version.
To make a long story short. EFI-X has customer service and they will exchange their defective units. You may also have a look at the EFi-X Bug Hunt forums for further assistence (please don’t link our article from EFI-X Bug Hunt forums, they will remove it and may ban you – don’t say we didn’t warn ya ;-) Anyway if you need to have access to your data until the RMA unit arrives, we prepped the following article. We’re going to show you how to make your system bootable after the EFI-X device broke for whatever reason.
A short remark before we start: this article is partly based on a HowTo by a guy going by the nick Menoob. We shamelessly stole the method of installing retail Leopards on PCs and adapted it a tiny bit for this EFI-X specific case. Anyway: all the shouts fly out to him.
II. What you need
- 30 minutes of your precious life time – you may use this time to think about why you didn’t buy a real Mac
- a Boot-132 disk – it contains your MacOS compatible bootloader (find a list of Boot-132.iso’s for different mainboards and chipsets here – in case you don’t know you should always give the generic.iso a try) – Kudos to Sonotone/Hackint0sh forums!
- burn the Boot-132 onto a blank CD-R or CD-RW
III. Prepping your hardware
- remove the defective EFI-X device and if you feel you don’t need it, send it to the CCC for further examination
- let only the MacOS drive and the CD/DVD drive plugged, unplug all other drives from your motherboard
- start your computer and hit DEL key to go into your BIOS
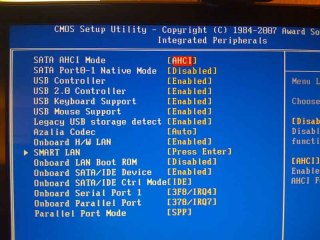
- inside of your BIOS: set the MacOS harddrive as first boot device and enable AHCI mode for SATA drives – your drives will appear orange/yellow in MacOS, don’t worry about that
- save the BIOS changes and reboot
IV. Booting your system
- turn on your computer
- insert the just burnt Boot-132 CD-R into CD/DVD drive
- during BIOS startup hit the
F12 keyto manually choose your boot device (applies to Gigabyte boards only!!!) - Choose to boot your CD/DVD drive
- Your screen will show that ISOLINUX 3.6x is prepping to boot the Multiboot loader
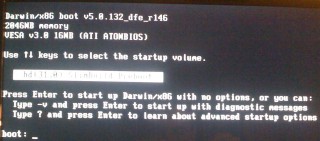
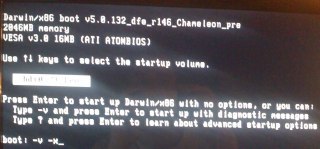
- since this ISOLINUX bootloader is not too user-friendly ;-) you will find yourself with a screen similar to this.
- Hit the
F8 Key. You’re gonna see this:
- Hit the
ESC Key. and You’re gonna be welcomed with this screen.
- Now enter
80and hit return, if the name of your MacOS harddrive shows up, 80 was the right number, if it does not show up, give81a try and so on. - Once you’ve found your MacOS harddrive, the bootloader will require again some parameters. Simply enter
-v -xas parameters and hit return (you may find more infos about these Darwin boot parameters here)
- if you experience the “still waiting for root device” issue, just reset your system and play with the AHCI mode for SATA inside of your BIOS
- Anyway: booting will take a long while – in our case about 5 minutes until the login screen appears
- login into your system
V. Saving your data
- Examine which data you require from your formerly known as almost native system
- plug your external harddrive (if you plan to migrate data to Windows, better have the external drive FAT32 formatted)
- Copy the files
VI. Final Words
Ooop duh. You got some more options here that we cannot cover at this time:
- You may revive this system with the hackint0sh ingredients (dsmos.kext and kexts for audio and video cards) – this will be a longer journey
- You may also get a real Mac. In this case Apple will suddenly love you…
- We recommend to give also Microsoft’s Vista a try. We feel like Vista Aero Glass effects are currently superior to Leopard’s effects. In this case Microsoft will love you (and us for suggesting this)…
- You could also go up the hill to the end and find Debian and ask yourself why it took so long to understand that unix is beautiful – in this case nobody will really love you but during installation you’ll find plenty of new friends in the Ubuntu community explaining you Debian…
- :-)
Anyway we hope that article helped you a tiny bit. If so you may also consider our sponsors, they also help you (and us of course)…

